Scratch is a free block-based programming platform designed primarily for kids. It's a visual programming interface where kids can code interactive stories, games and animations and share their creations through an online community.
Table of Contents
Opening Scratch Creating a project Deleting default sprite Choosing a backdrop Adding sun sprite Downloading planet sprites Uploading planet sprites Aligning sprites Coding sun sprite for sound Coding sun sprite to display name Coding planets to display names Run and save the project Why teach Scratch programming for kidsIntroduction
Developed as a project of the Lifelong Kindergarten Group at the MIT Media Lab, the platform helps young people to apply creativity, reasoning and logic while working on collaborative projects.
The core audience on the Scratch website is between the ages of 8 and 16 (with a peak at age 12), though there is a sizable group of adult participants as well.
The name “Scratch” itself highlights the idea of tinkering. The name comes from the scratching technique used by hip-hop disc jockeys, who tinker with music by spinning vinyl records back and forth with their hands, mixing music clips together in creative ways.

In Scratch Programming, the activity is similar: mixing together graphics, animations, photos, music, and sound. Overall, Scratch programming is easy for kids to use and understand.
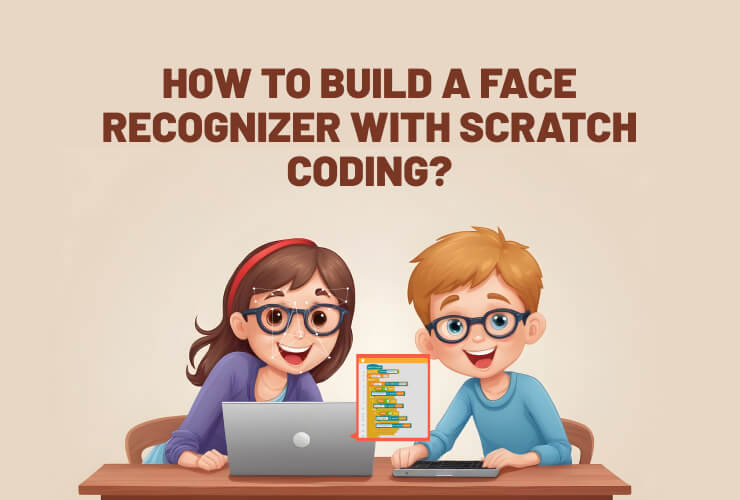
To help you better understand the Scratch platform, here is a step-by-step guide to creating a solar system using Scratch.
So let’s get started right away and have lots of fun along the way.
Step 1: Opening Scratch
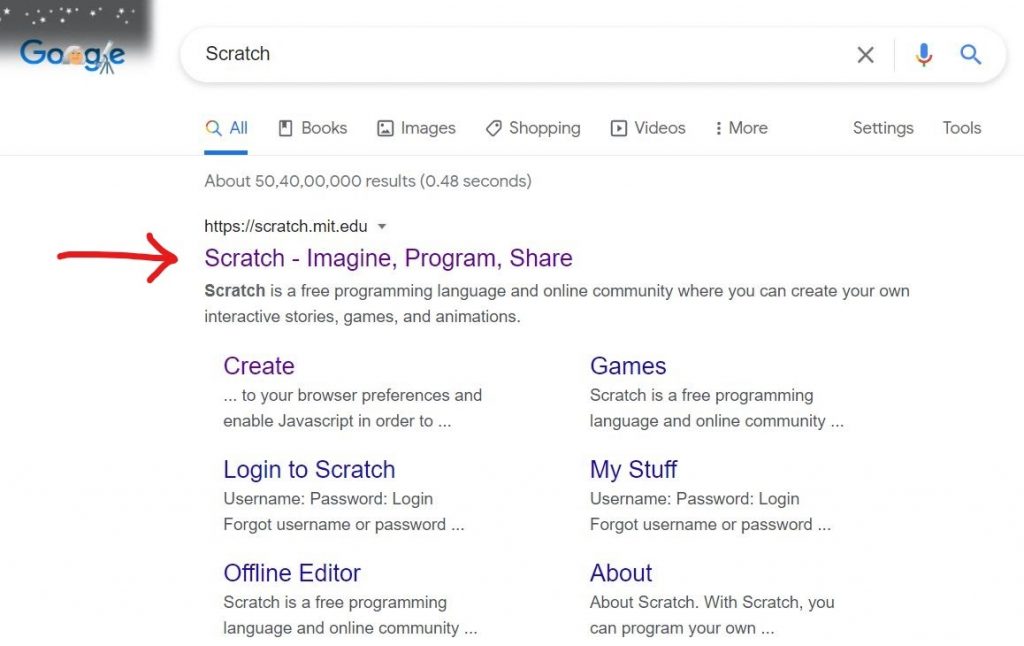
Go to Google search. Type ‘Scratch’ in the search bar. Click on the first option that appears as pointed by an arrow in the image below.
Step 2: Creating a project
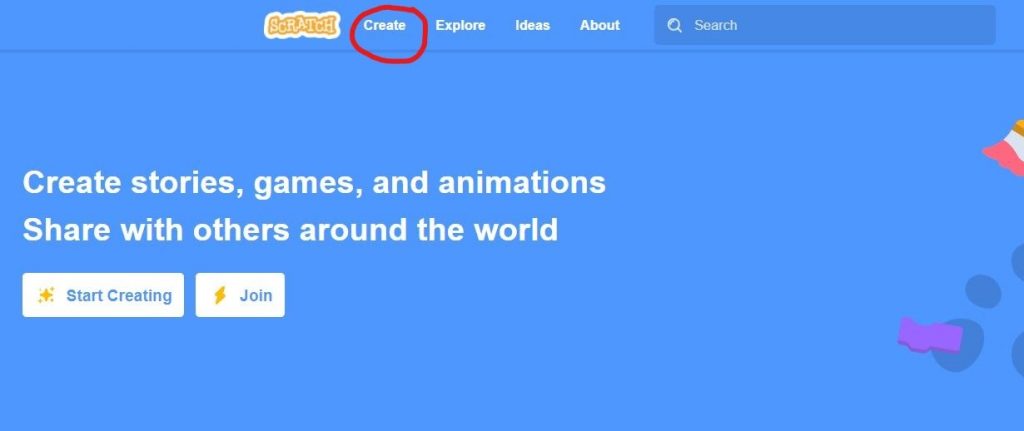
Click on the create option as circled in the image below.
Step 3: Deleting default sprite
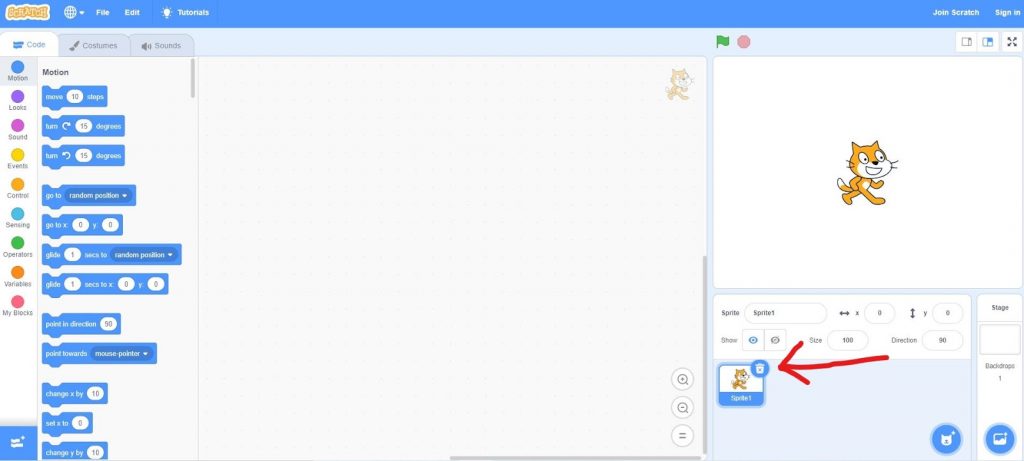
By default, we will have a cat sprite option (sprite refers to an image in scratch). We don’t need it as we are doing a solar system project. Delete it by clicking on the delete icon pointed by the red arrow.
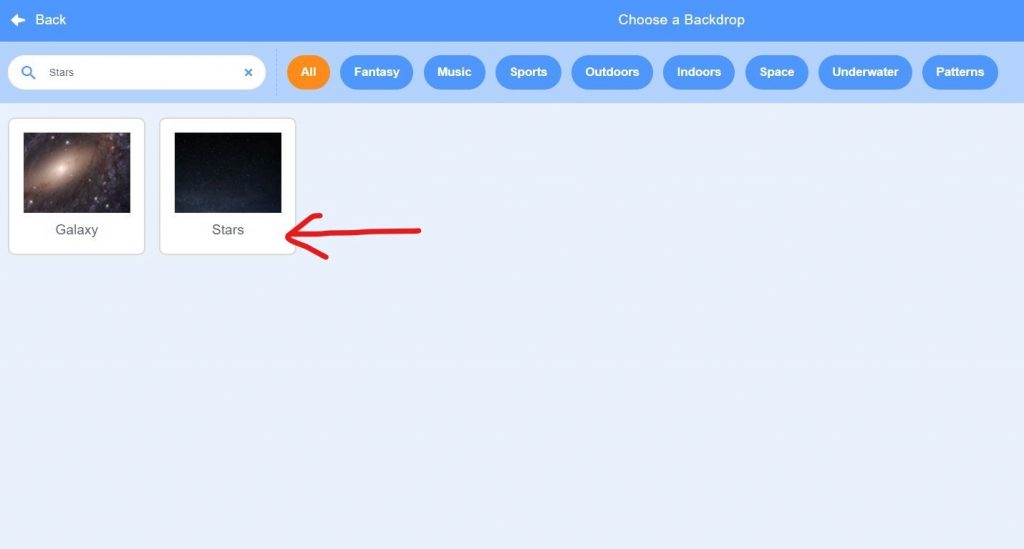
Step 4: Choosing a backdrop

Let’s choose a background for our solar system now. Click on the “Choose a Backdrop” option at the bottom right corner as pointed in red.
Type “Stars” in the search bar and select the Stars backdrop to suit our project and add it.
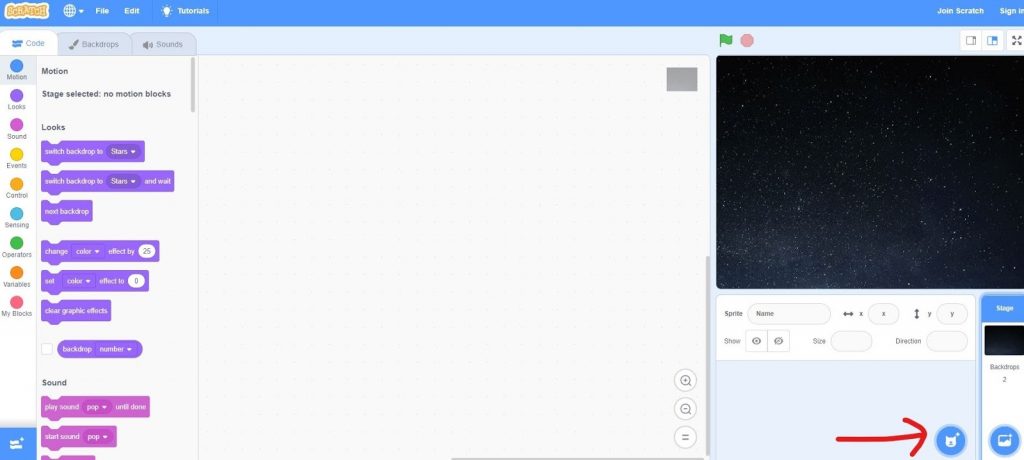
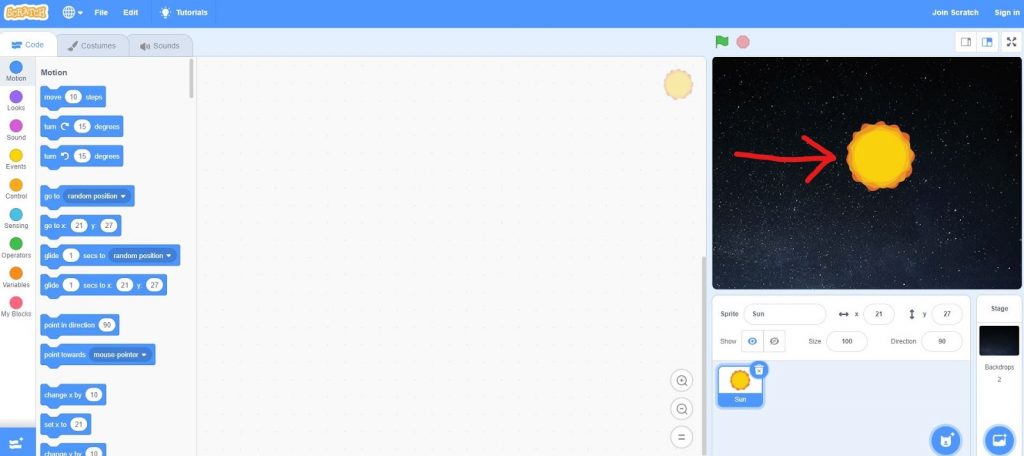
Step 5: Adding sun sprite
The Solar System consists of the Sun and the planets. Now, let’s add them to our project. Click on choose a sprite as pointed by the arrow.
Select Sun from the search bar and add it as below.

Step 6: Downloading planet sprites
Let’s add the other planets now. The other planet sprites are not available on Scratch by default. So, let’s download them all from Google.
To download a sprite, go to google search and type the names of individual planets. Click on their image and download it to your computer. Later, upload the sprite on Scratch.
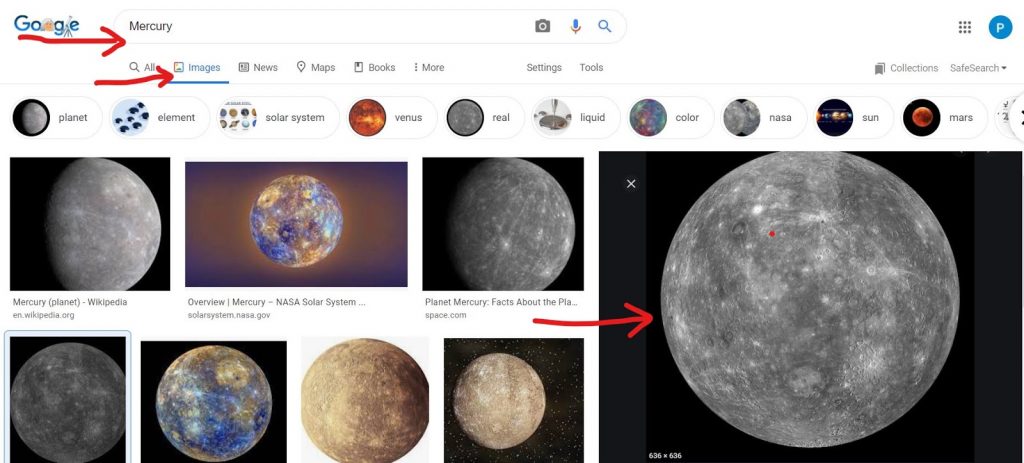
Let’s add Mercury as an example. Type Mercury in google search. Click on images option. Select an image. Right click, select save image as option, and save the image.
Step 7: Uploading planet sprites
Let’s upload all the downloaded images of planets to Scratch now.
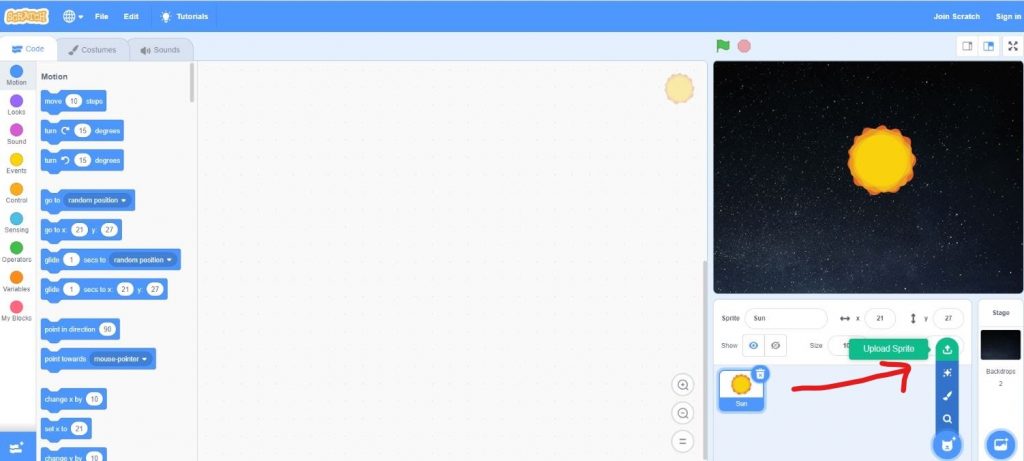
First, let’s take an example of Mercury. Go to Choose a Sprite option as we did while choosing the Sun sprite. Select upload a sprite option and select the mercury image from your computer.
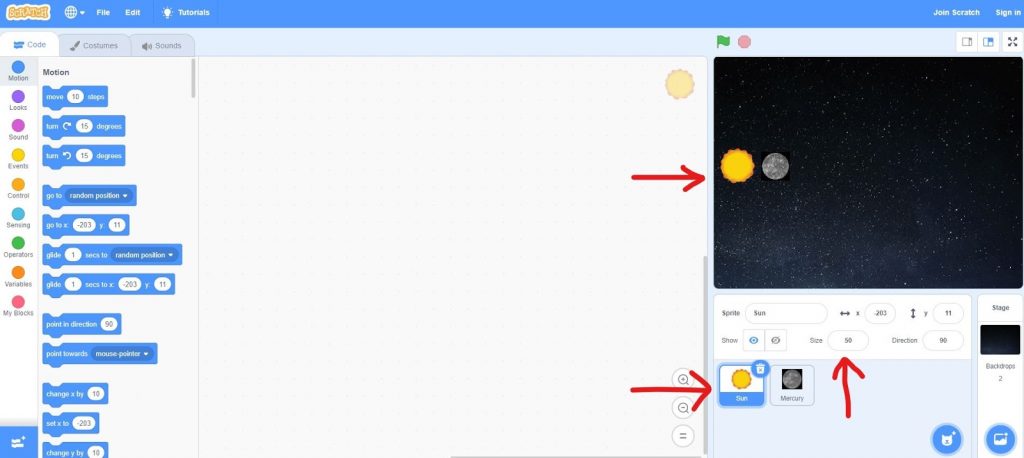
Select the Sun sprite and set size as 50. Similarly set size for Mercury as 30 or any size you like.
Step 8: Aligning sprites
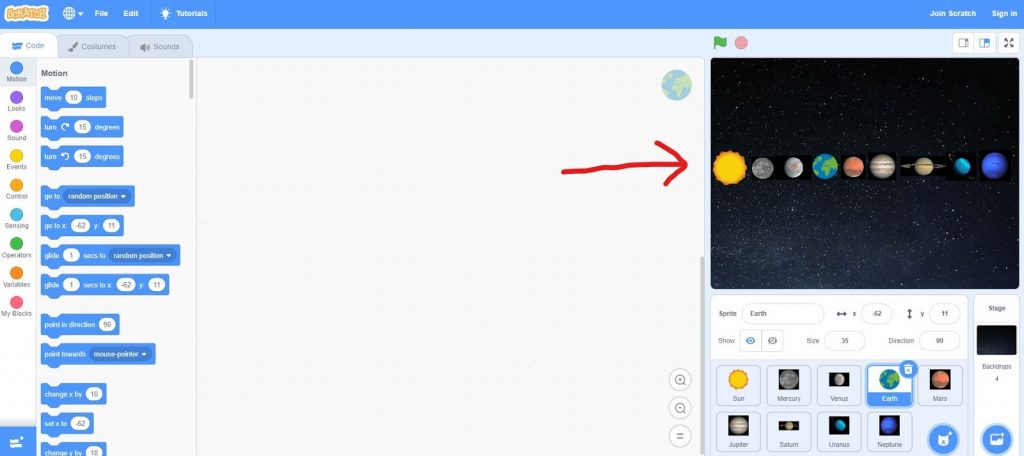
Let’s add all the planets now and after that your project would look like the image below.
9 sprites added from left to right: Sun, Mercury, Venus, Earth, Mars, Jupiter, Saturn, Uranus, and Neptune.
Align all the sprites in a straight line and resize them as necessary.
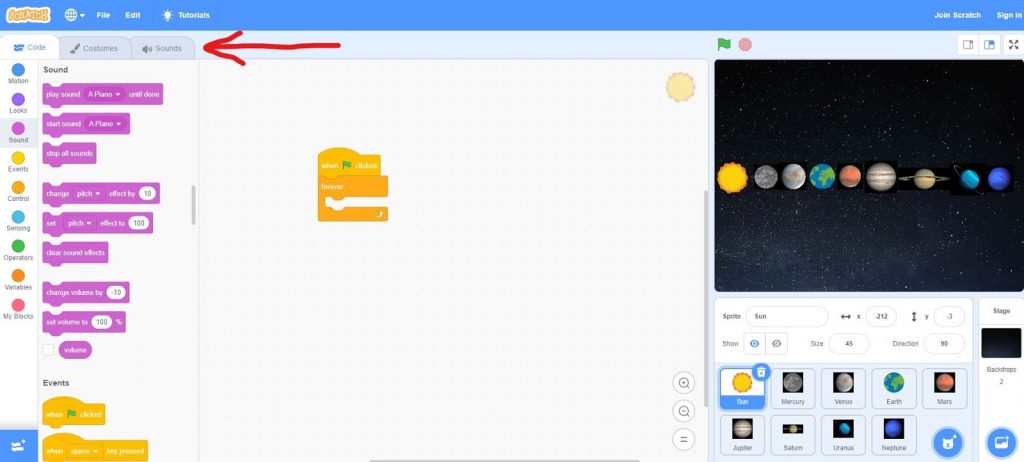
Step 9: Coding sun sprite for sound
Now, let’s start to code the Sun and the other planets one after another.
To code for the Sun, first select the Sun sprite among other sprites.
As pointed by the arrow in the image, add blocks as explained further.
Under the code section, select the events option and then drag and drop the block named “when clicked”. Similarly, select the control option and drag and drop the block named “forever”.
Next, click on the sounds option, select “choose a sound” and choose any sound you like. Now, go back to the code option and under the sounds section, drag and drop the block named “play sound until done”.
Step 10: Coding sun sprite to display name
Now, let’s code the sprites to display names when clicked.
Go to the events option under the code section, drag and drop the block named “when this sprite clicked”.
Let’s code the Sun sprite to display its name when clicked. To do that, go to the looks option, drag and drop the block named “say hello for 2 seconds”. Type “Hello, I am Sun” instead of “hello” in the above block.
Click on the Run option (green flag). Click again on the Sun sprite and you will see it display “Hello, I am Sun” as pointed by the arrow in the image below.
Step 11: Coding planets to display names
Further, let’s code for all other planets as well.
Click on the Mercury sprite. Under the code section go to events, drag and drop the block “when this sprite clicked”. Next, go to events and drag the drop the block named “say hello for 2 seconds”. Replace the word “hello” with “Hello, I am Mercury”.
Step 12: Run and save the project
Now, let’s code similarly for all other planets. The only change would be to add the names of the respective planets in “Hello, I am ____” block.
After coding for all planets, click on the “Run” option (green flag). Now, click on each planet to display its name along with the sound playing in the background.
To stop the project click on the “Red” button next to the “Run” button.
Save the project by clicking on the “Untitled” option at the top left and rename it as “Solar System”.
Kudos! You have successfully created the “Solar System” using Scratch!
Why teach Scratch programming for kids
Scratch is a great platform for kids to get started to learn to code. It’s a stepping stone for curious and enthusiastic kids to explore the possibilities with programming.
As children use Scratch to create and share interactive projects, they learn important mathematical and computational concepts, while also learning to think creatively, reason systematically, and work collaboratively—essential skills for the 21st century.
Scratch programming for kids not only prepares them for careers as professional programmers, but also nurtures the development of a new generation of creative, systematic thinkers who are comfortable using programming to express their ideas. Codingal offers the best online coding course for kids