Table of Contents
Introduction What is a Real-Time Messaging application? What is Firebase? Create a new Project on Thunkable Adding App Components Integrating Firebase with Messaging App Adding Code Blocks ConclusionIntroduction
Thunkable is a fantastic tool for kids and beginners who want to learn how to build mobile apps without any prior programming knowledge. We have discussed Thunkable and its features in great detail in this article. So, make you give this article a read before diving into the process of making a real-time messaging app on Thunkable.
What is a Real-Time Messaging application?
A real-time messaging app is a type of communication app that allows users to send and receive messages instantly and in real-time. This means that when a user sends a message, it is immediately delivered to the recipient without any delay.
Real-time messaging apps are designed to provide a seamless and uninterrupted communication experience. They are used for both personal and business purposes and are often preferred over traditional messaging apps because they offer faster and more reliable communication.
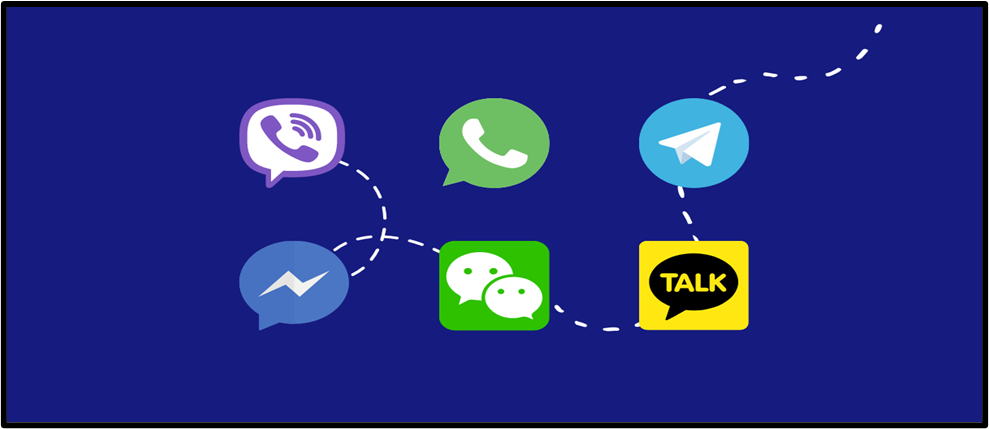
Some popular examples of real-time messaging apps include WhatsApp, Facebook Messenger, Slack, and Microsoft Teams. In this article, we will be teaching you how to make your messaging app using Thunkable and Firebase. If you are wondering what Firebase is, don’t worry. We have got you covered.
What is Firebase?
Firebase is a mobile and web application development platform that provides a range of services and tools for building, developing, and managing applications. It was acquired by Google in 2014 and has since become a popular platform for developers due to its ease of use and range of features.

One of the main features of Firebase is its real-time database service, which allows developers to store and synchronise data in real time across multiple clients. This enables developers to build real-time applications such as chat apps and collaborative tools.
In addition, Firebase provides cloud storage and hosting services, allowing developers to store and serve content such as images, videos, and other files. It also offers a range of tools for measuring and analysing application usage and performance, including crash reporting and analytics.
Create a new Project on Thunkable
Firstly, visit the Thunkable website and click the “Log in” button in the top right corner. Enter your credentials and log into your existing account. If you do not have an account, read this article on getting started with Thunkable.
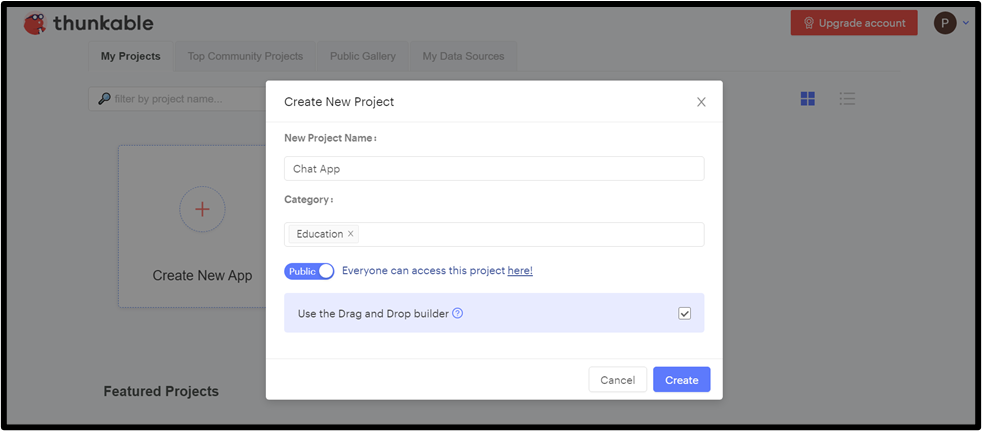
After creating the account, create a new project and name it whatever you want. I have named it “Chat App.” Uncheck the “Use the Drag and Drop Builder” option.
After this the “Start Building console” will pop up, so now we will begin our app development by adding components.
Adding App Components
Creating User Page
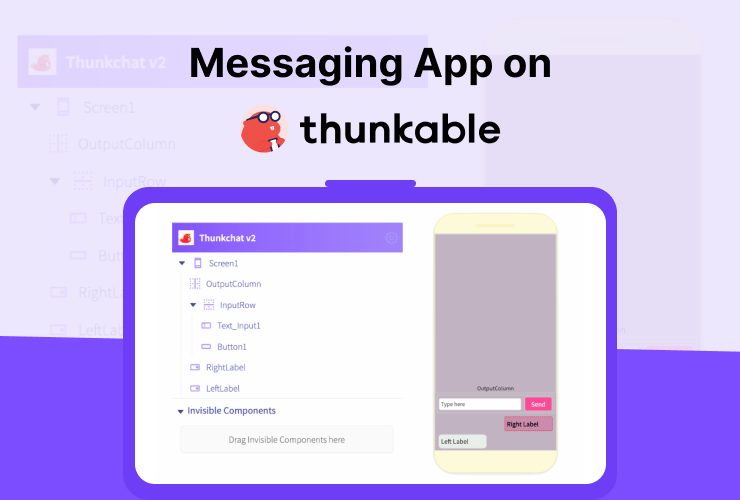
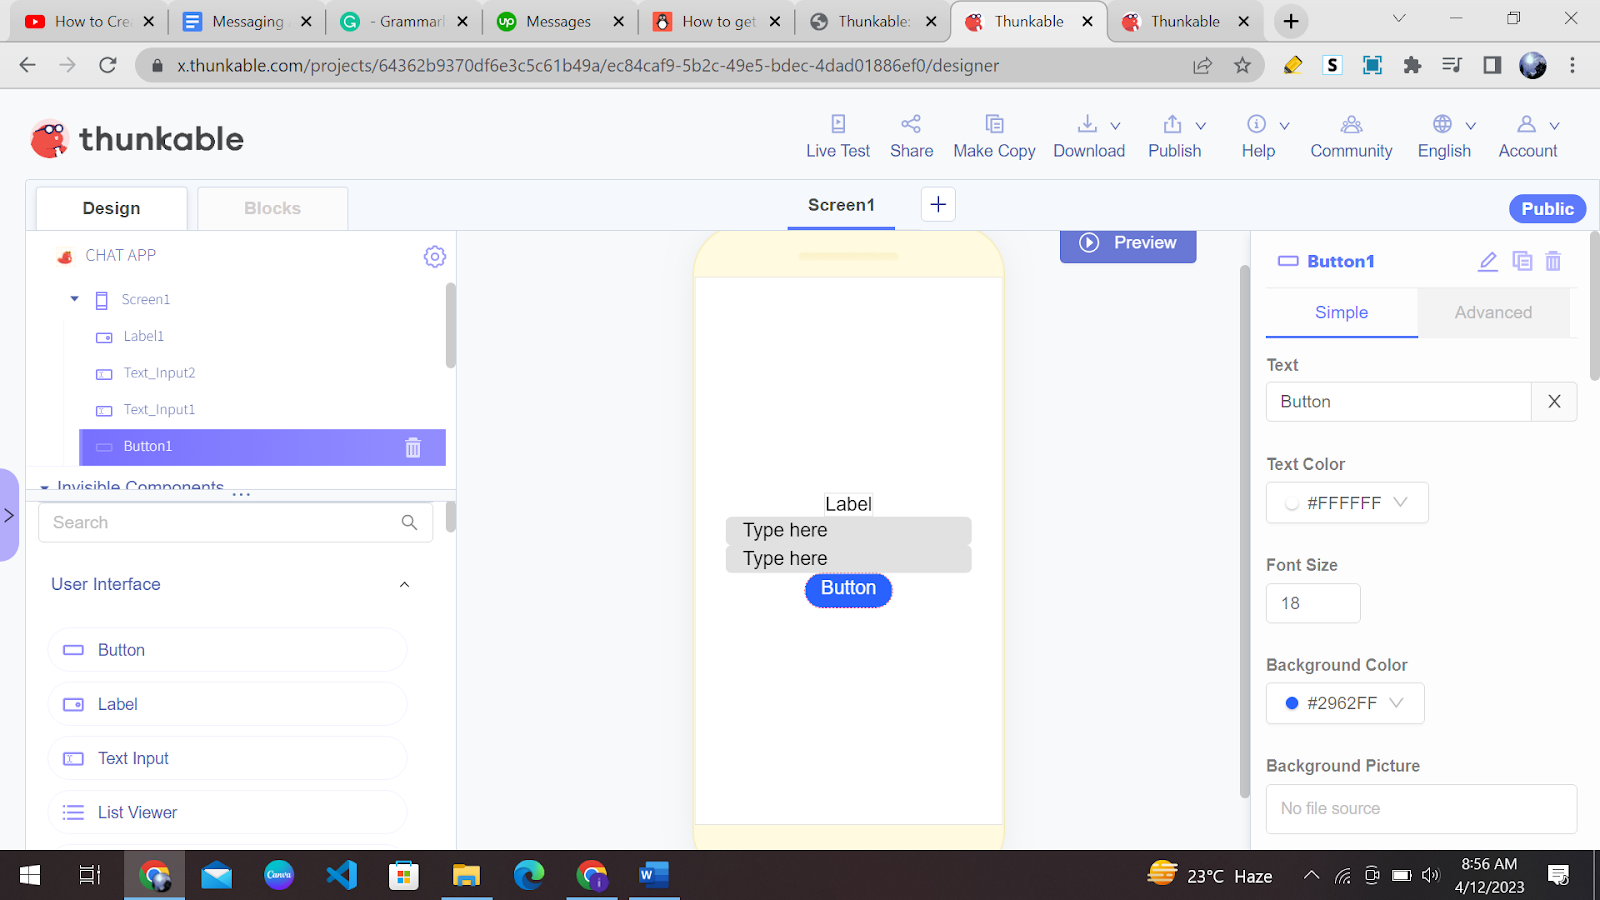
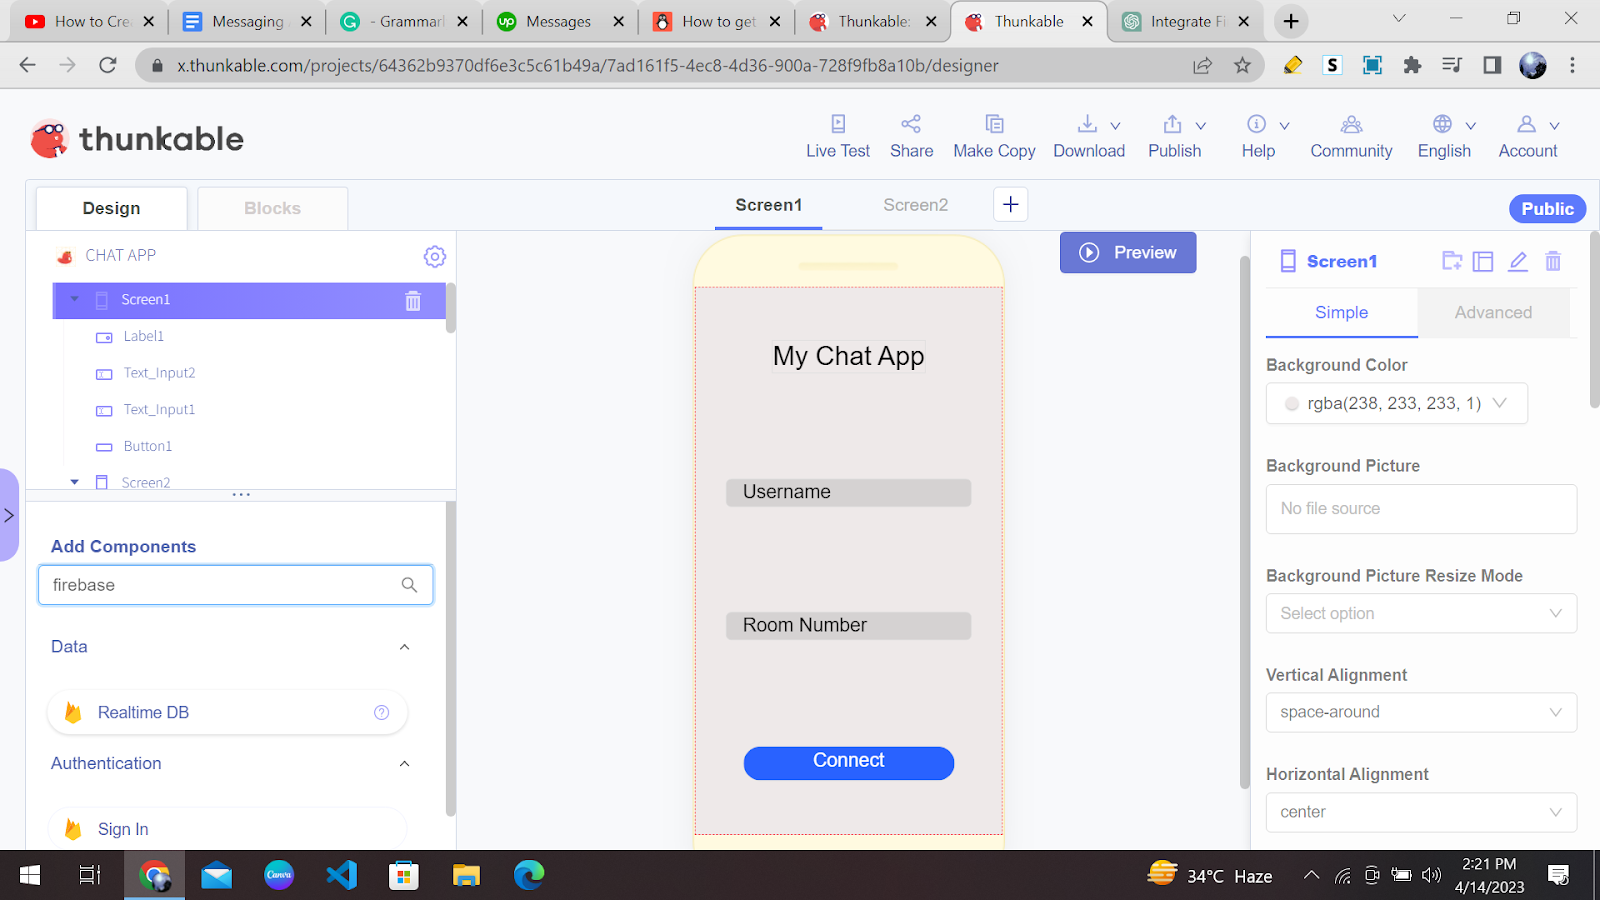
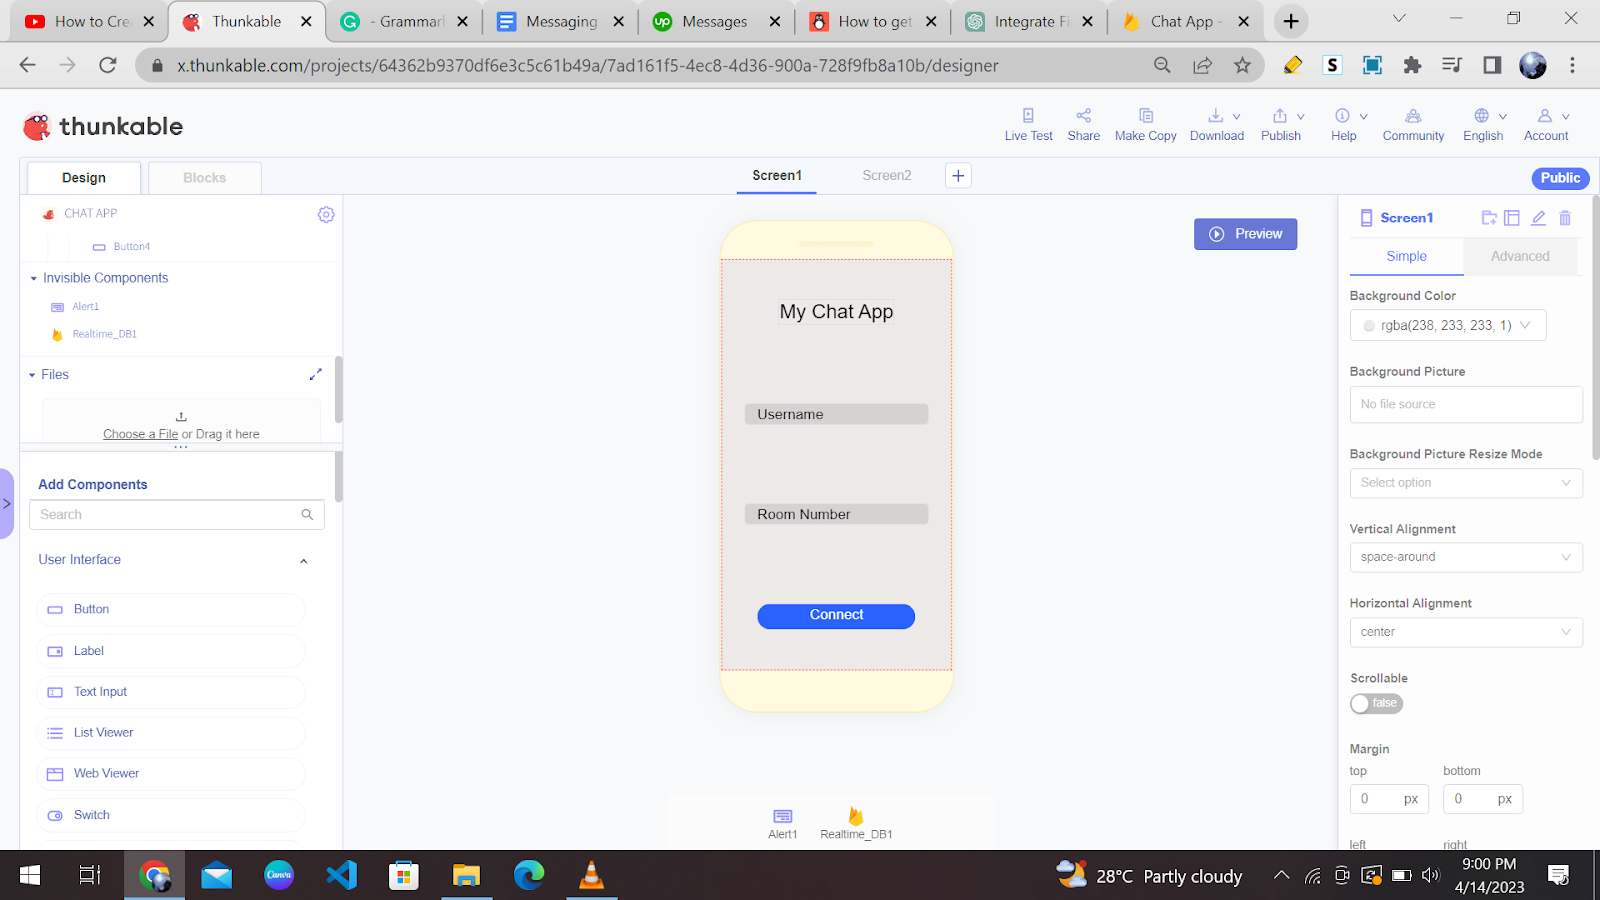
First, we need to create a general user page for our app. To do this, drag and drop 1 label, 2 text inputs, and 1 button on your screen. This is what your console should look like:
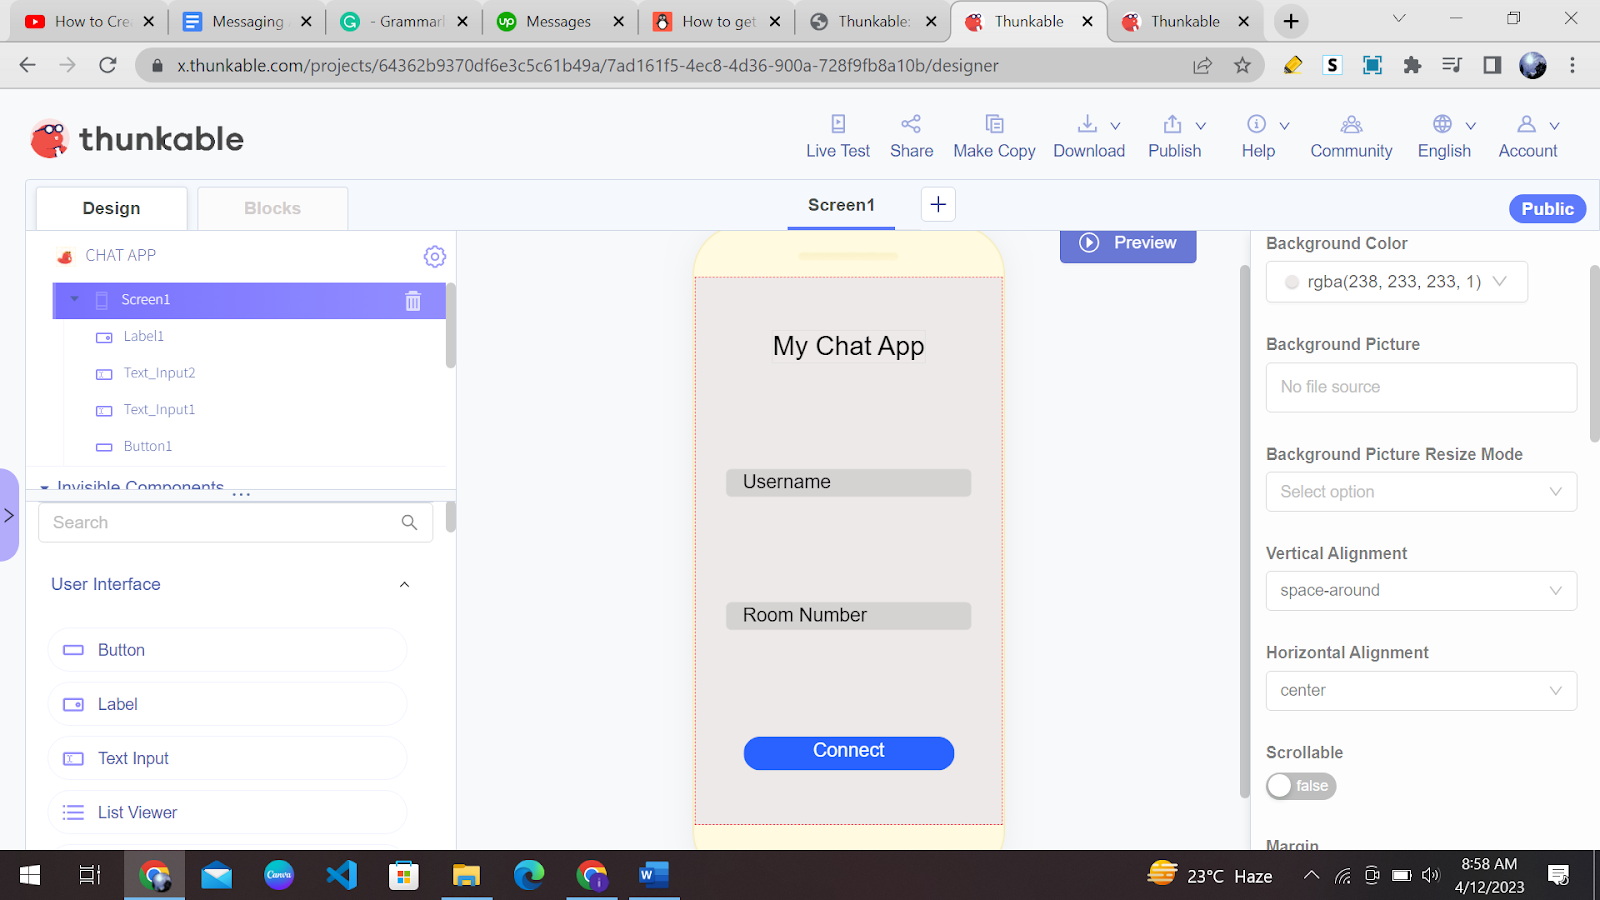
Select the label and enter the name of your game as its text. I have chosen the name “My Chat App,” so you can choose any name you want. In the first and second text input, add the text “Username” and “Room Numbers”, respectively. Lastly, you can select and name the button “Connect.” Keep in mind that this is your game, so you can customise it any way you want by changing fonts, font size, colour, orientations and all that. So let your creativity shine in your first messaging app.
![]()
Creating Room Screen
Now, you have to add screen 2 on your console. In screen 2, add two rows, and a list viewer on your console.

Add another row, button and label inside the Row1. Select the button and name it as “End”, and then name the label as “Room Key” Your console should look something like this:
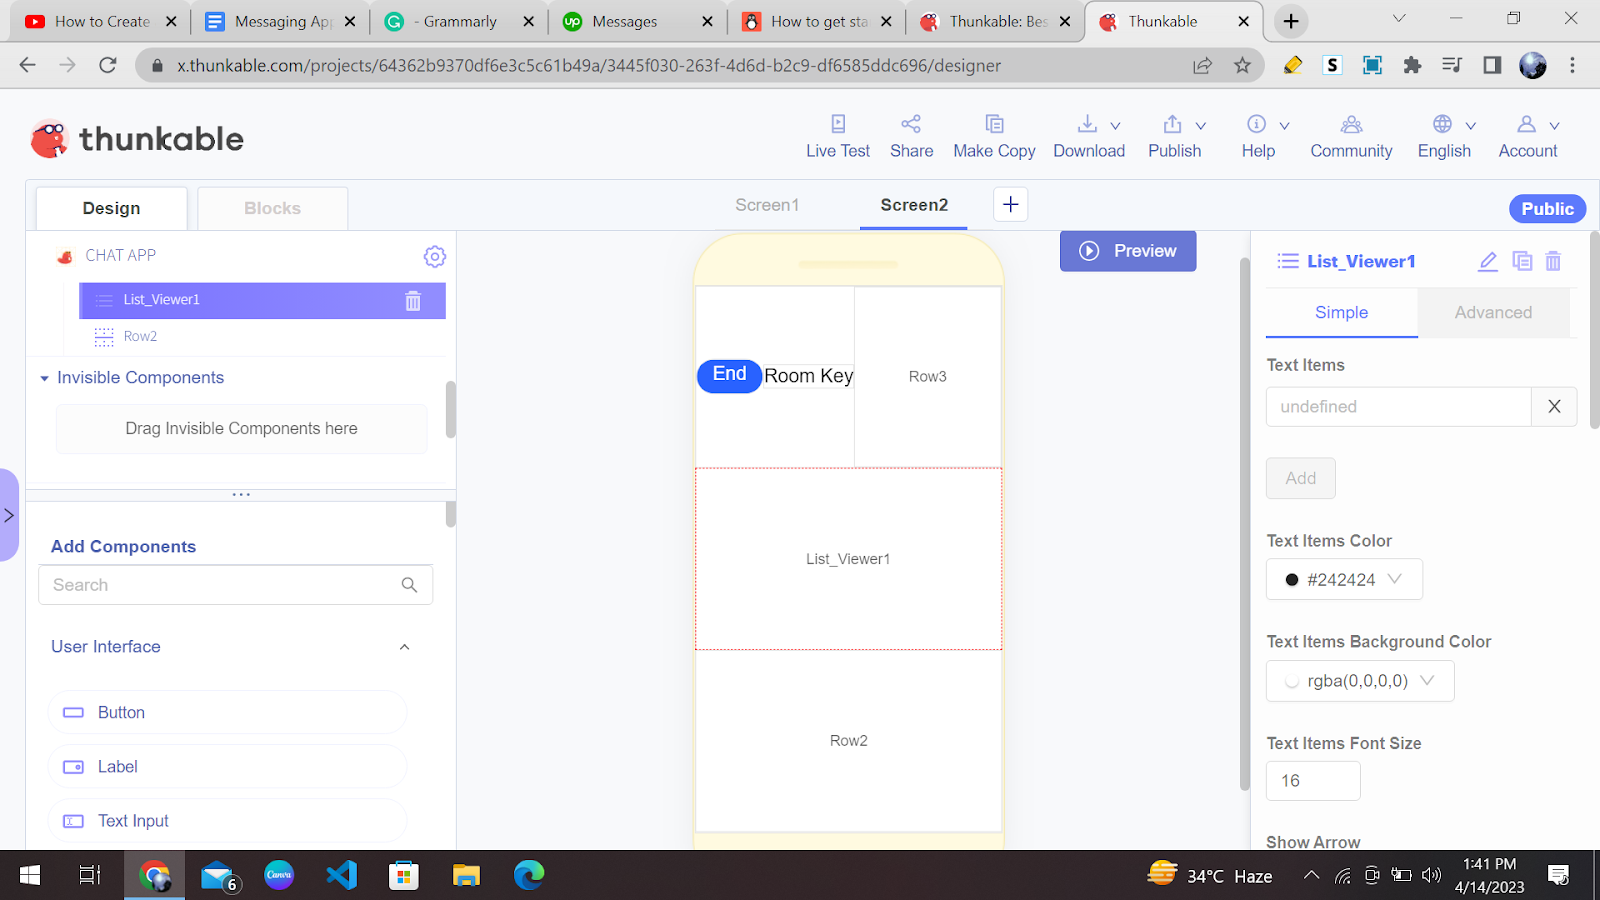
Now add a button inside the “Row3” and label it as “Invite.” You can change the colour of the text, background, and button to your liking. Now select the entire top row, and scroll down to the “Height” properties in the right settings bar. Select the option “Fill content”, and now your screen 2 should look something like this:
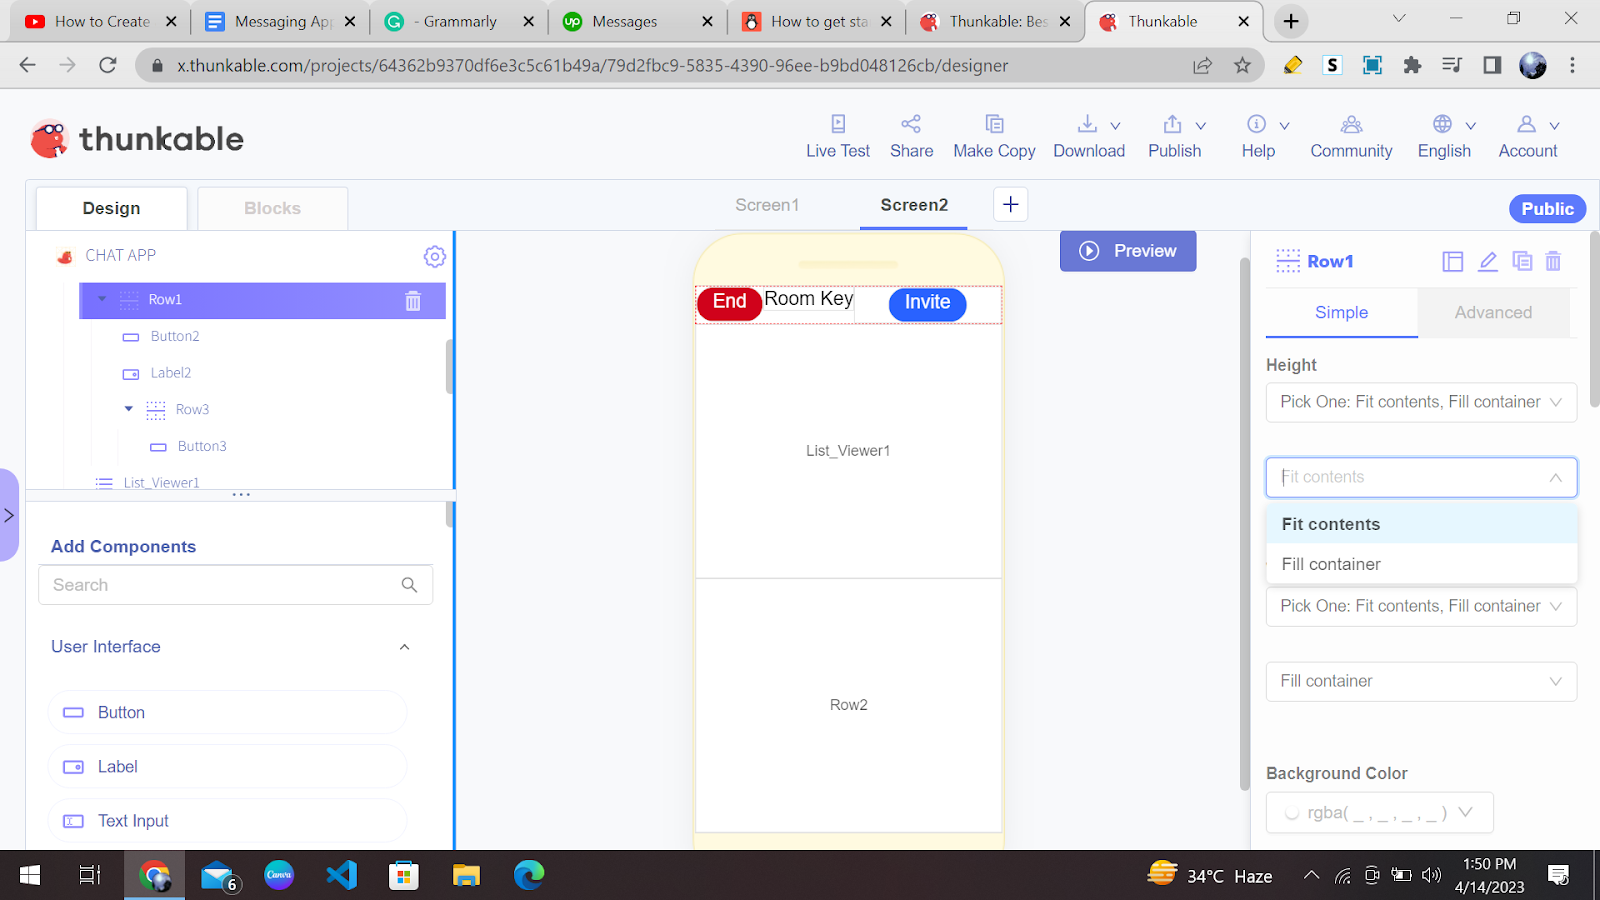
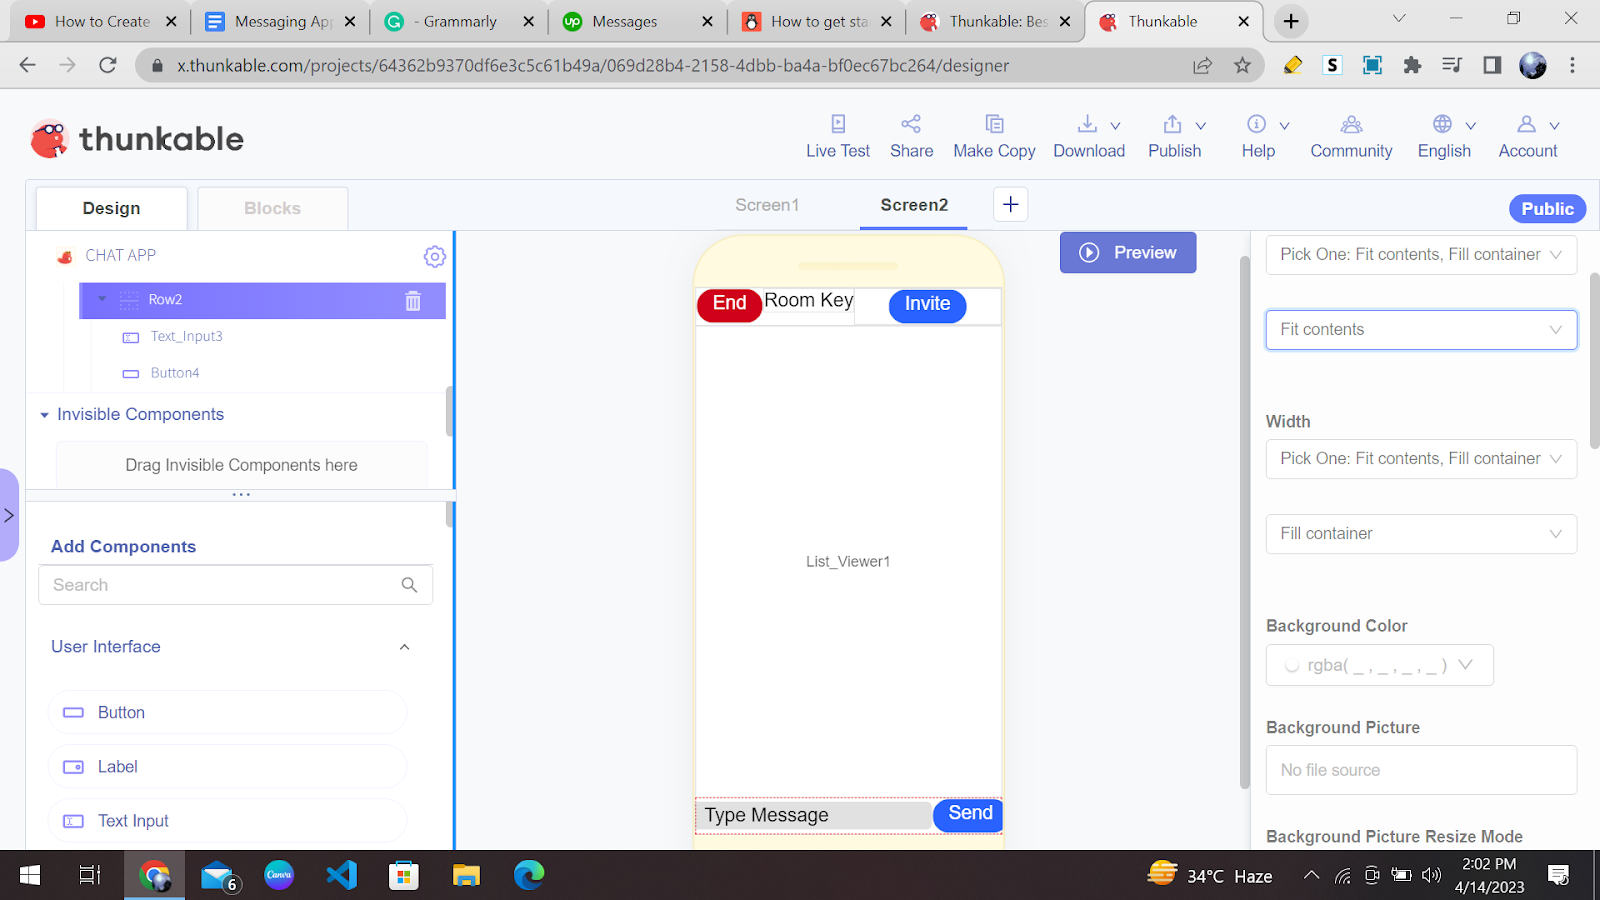
Great job! You have come this far; let’s continue! Now we have to add a text input and a button in our “Row2.” Name the button “Send” and the input string “Type Message.” Also, you have to select the entire “Row2”, go to its height adjustment properties and select the “Fill content” option as shown above.
Now you have completed the general interface of the game. Let’s get to the technical part and learn how to integrate the Firebase database with your messaging app.
Integrating Firebase with Messaging App
Integrating Firebase with Thunkable is a way to create a messaging app with real-time functionality. As you know, Firebase is a backend service that provides features such as a real-time database, user authentication, and cloud storage.
In our messaging app, real-time functionality is crucial because we expect to receive messages as soon as they are sent. In this case, Firebase’s real-time database stores and synchronises data across multiple clients.
To integrate Firebase, we first need to go to the screen 1 console and search “Firebase” in our “Add component” section. Drag and drop the “Realtime DB” to your screen 1.
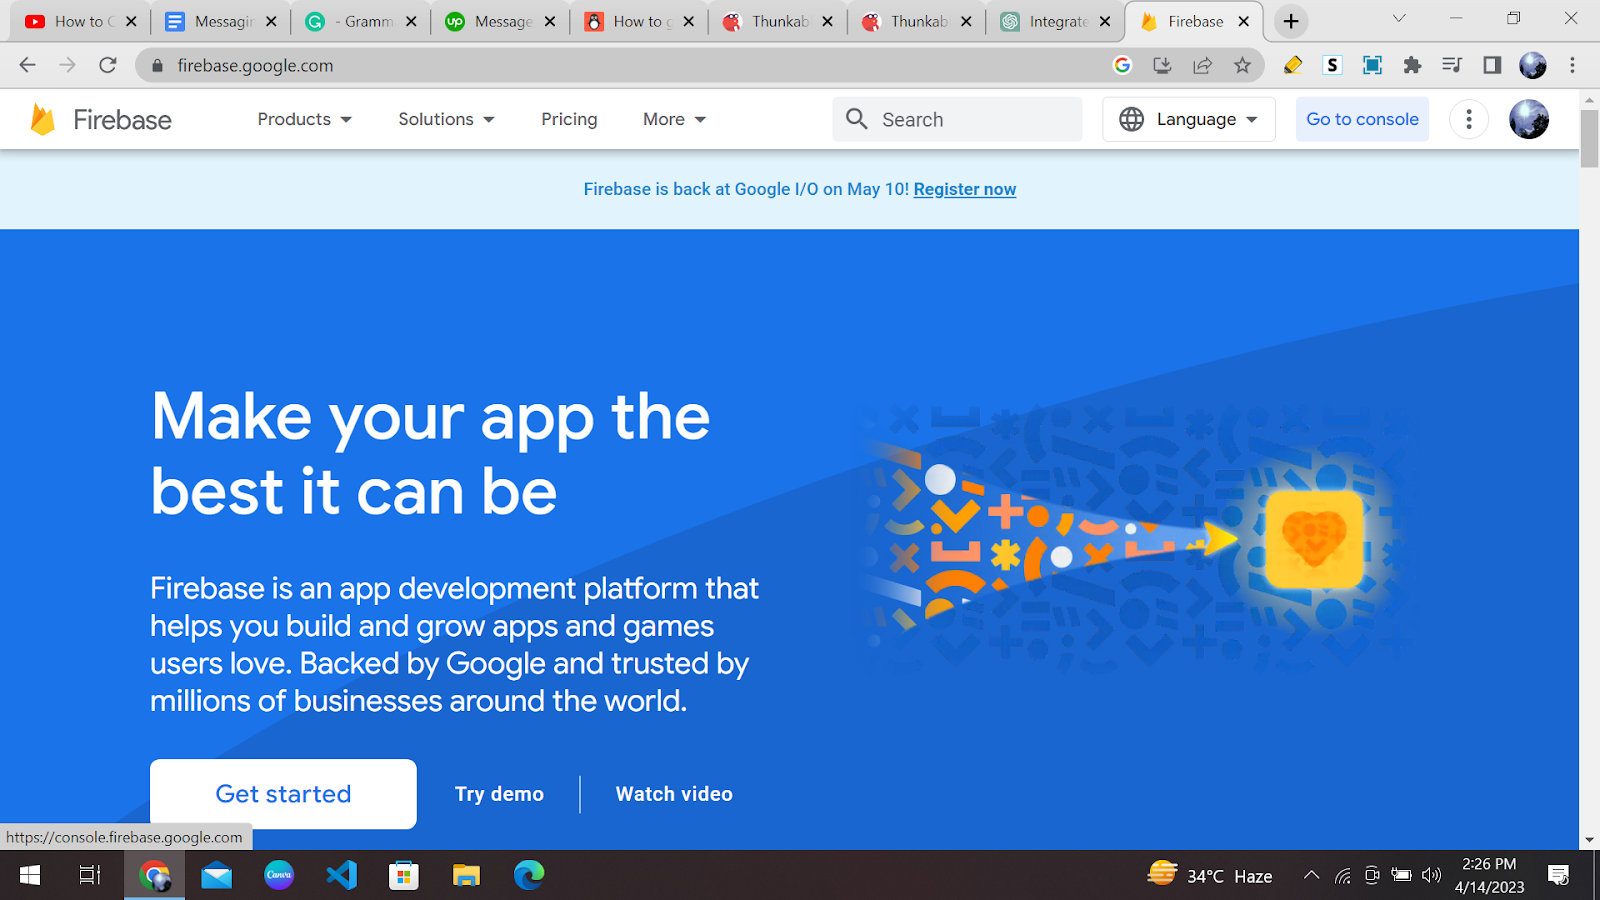
The second thing is to visit Firebase’s official website and create an account there. Firebase is a service provided by Google,
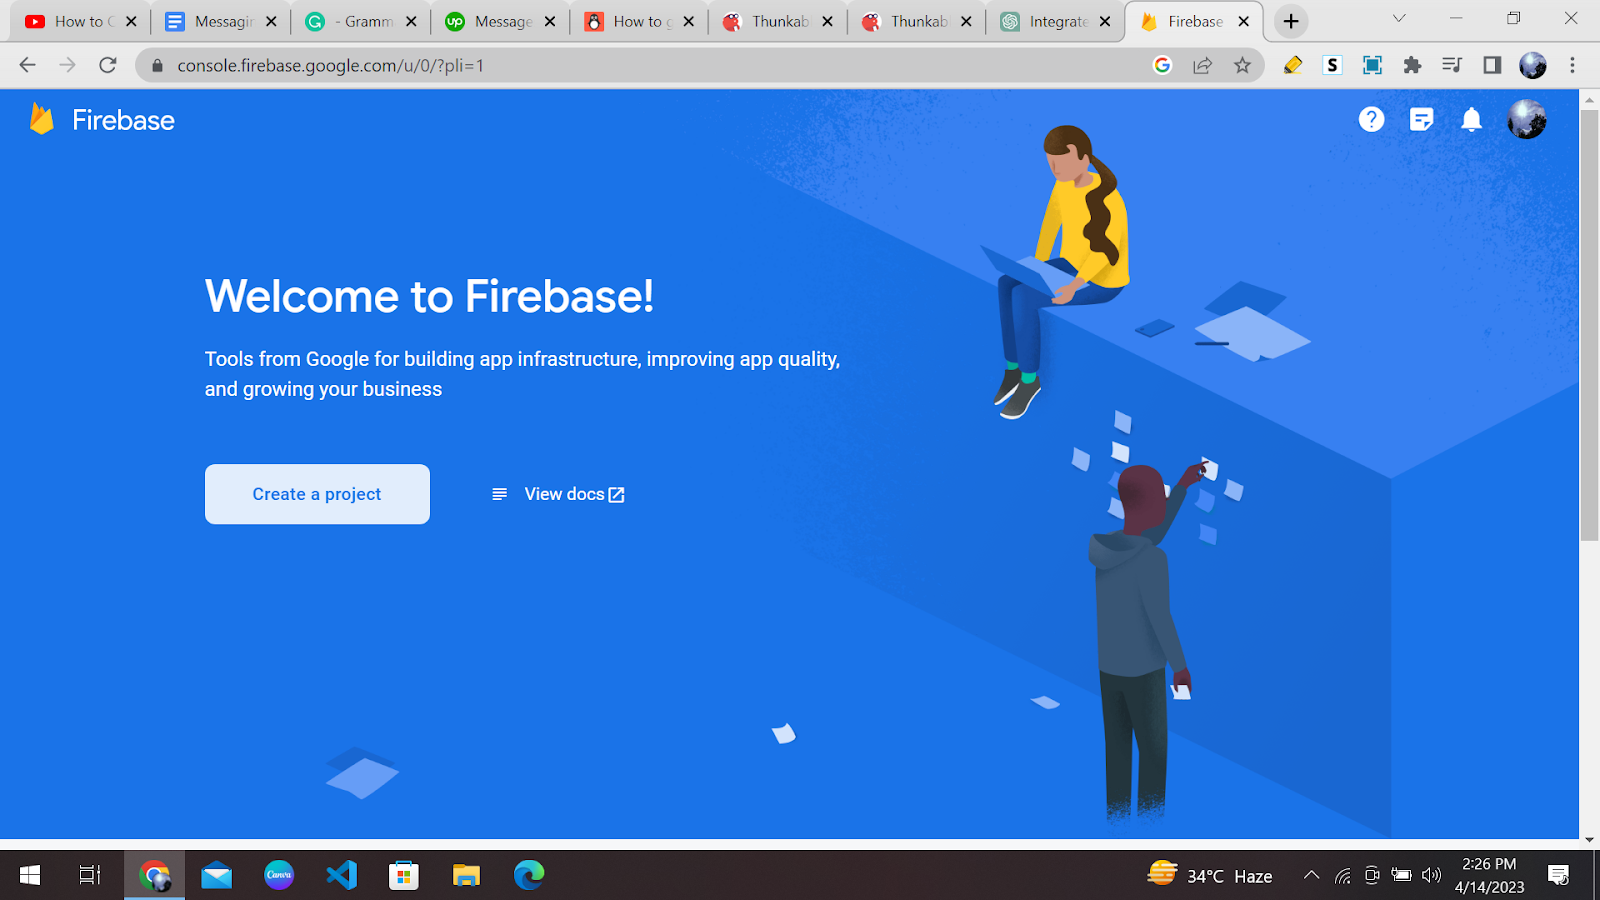
So your Google account will already be linked with Firebase. You don’t have to get into the hassle of making an account on Firebase. Click here to go to Firebase’s official website.
Click on “Go to Console” as shown:
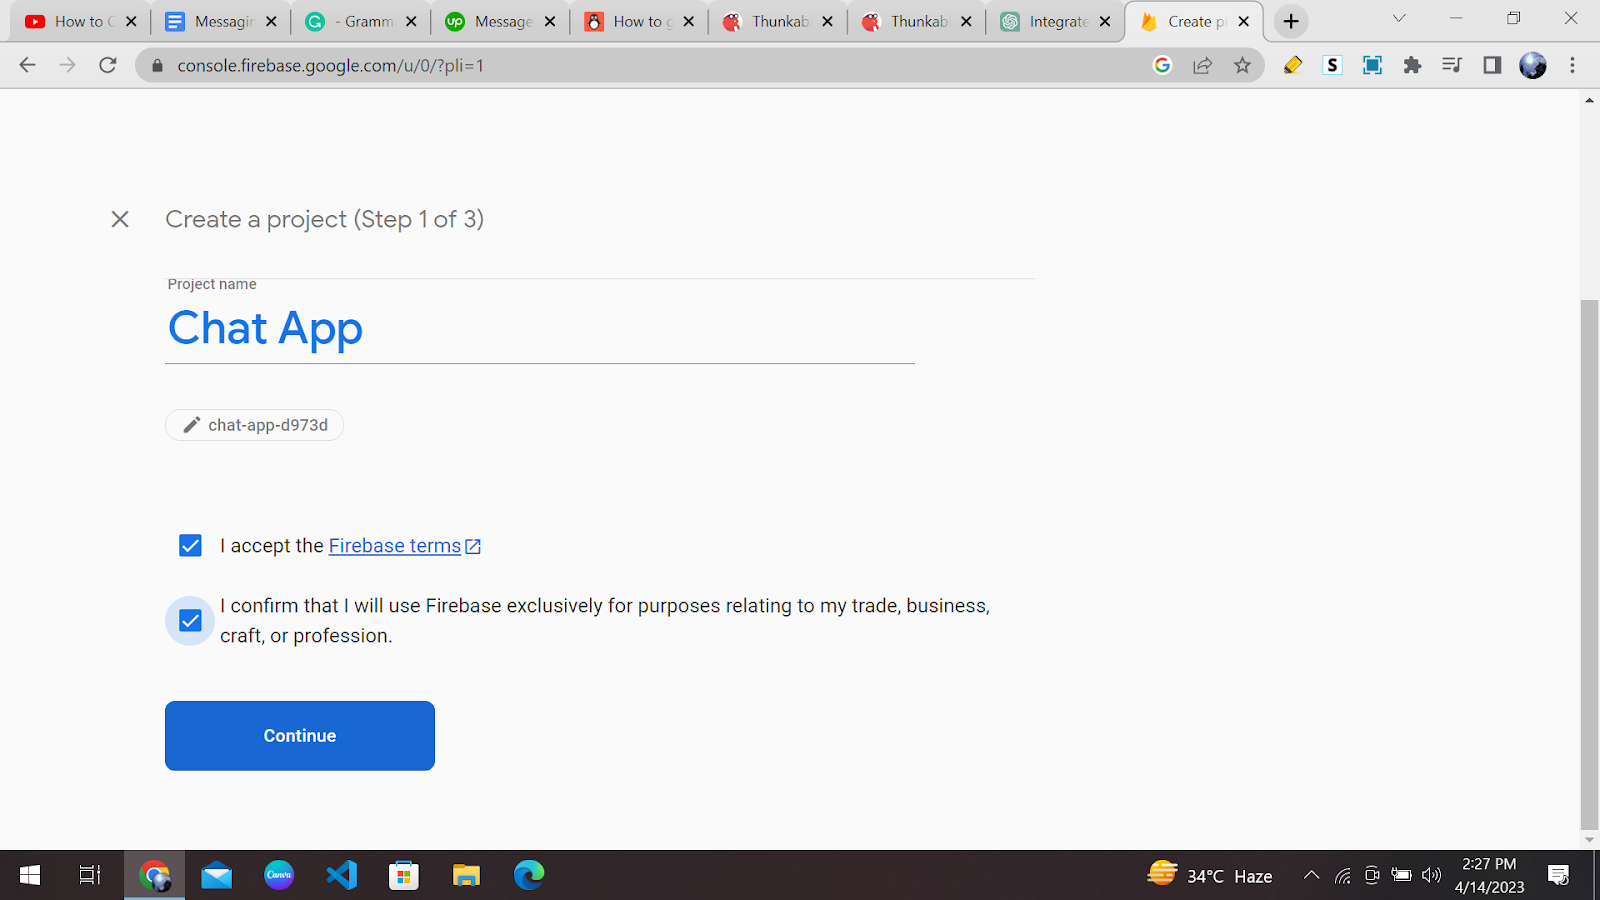
Then let’s create a new project:
Name your project anything; for coherency, I have named it “Chat App.” Check all the terms and conditions for using Firebase. And click continue:
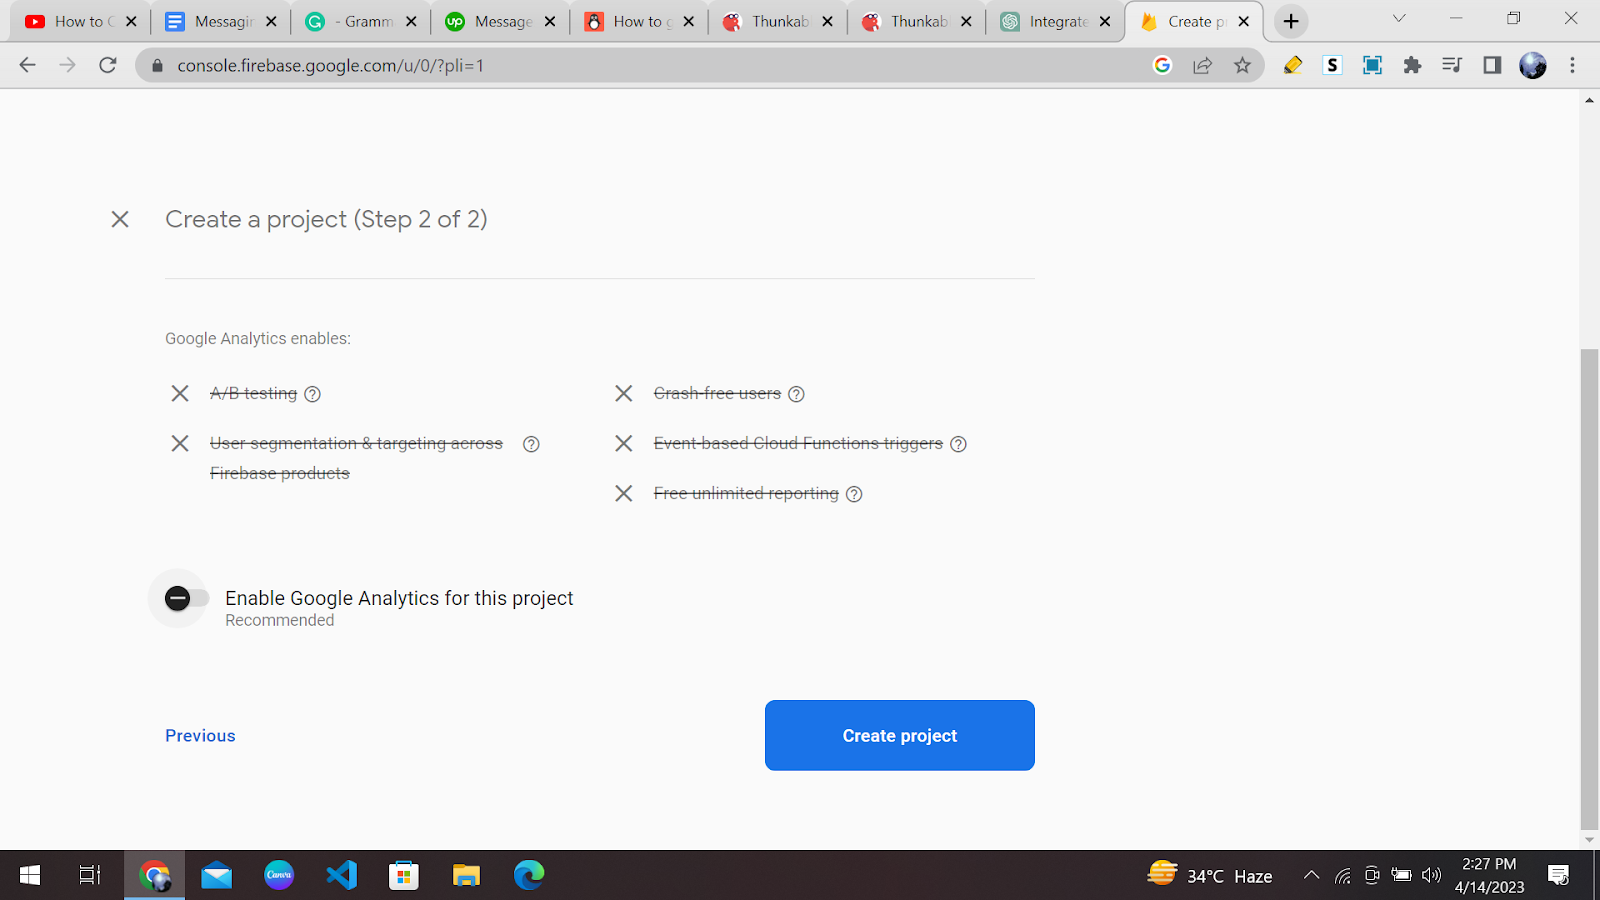
Google Analytics is a powerful tool that allows app developers to gain valuable insights into the behaviour of their users. It provides detailed information about user demographics, engagement metrics, and other key performance indicators.
However, when it comes to messaging apps built on Thunkable, the need for Google Analytics is not as clear-cut. While it can be beneficial for some apps to access this type of information, messaging apps are unique in that they prioritise user privacy and functionality above all else. As such, integrating Google Analytics may not be the best use of resources for this type of app. So we are going to swipe left on the “Enable Google Analytics for this project” option and then create our project.
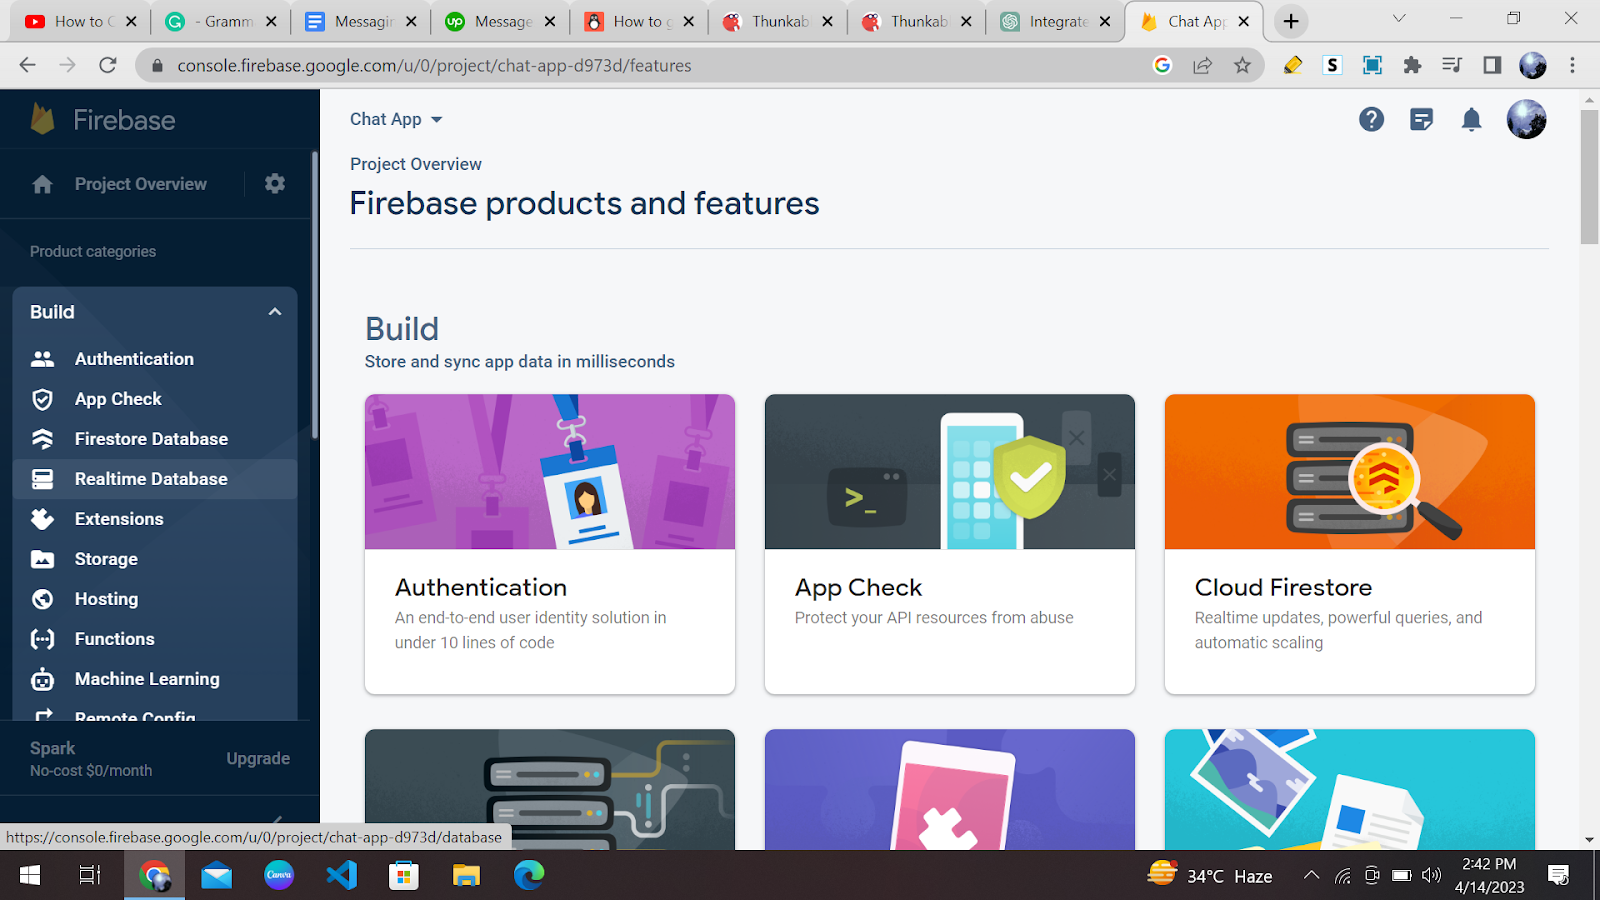
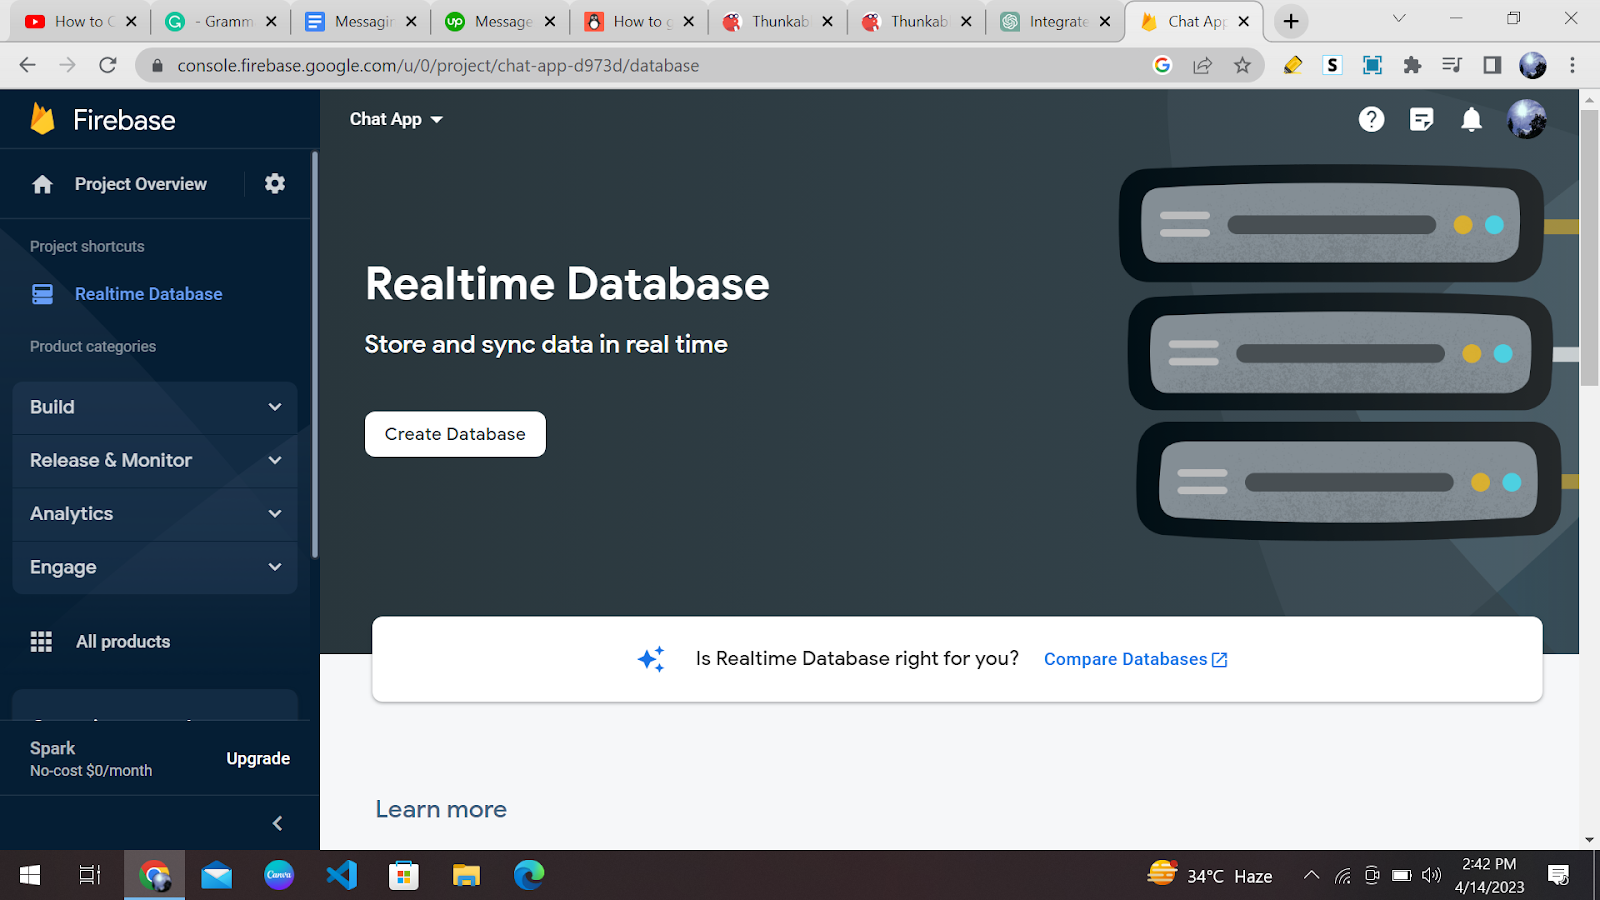
Now you will be directed to your project’s main page. Click on the real-time database option on the left side of the webpage.
Then create a new database for your project.
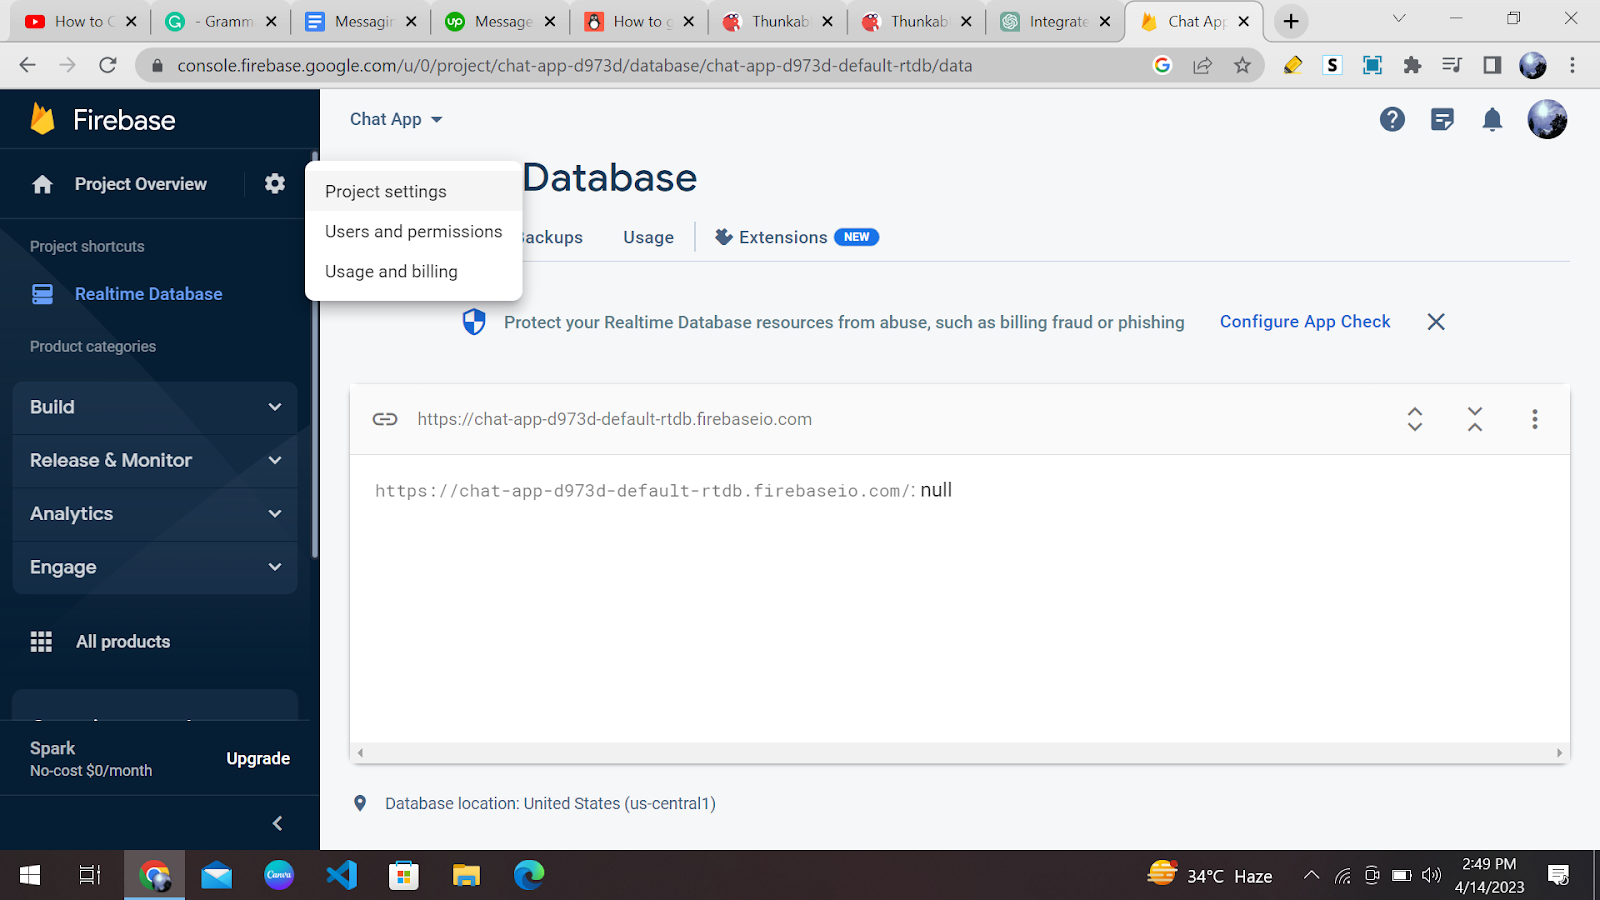
Now we have to connect our Firebase database with our Thunkable app. To do that, please follow these steps.
Go to the project overview option and click on the “project settings” as shown:
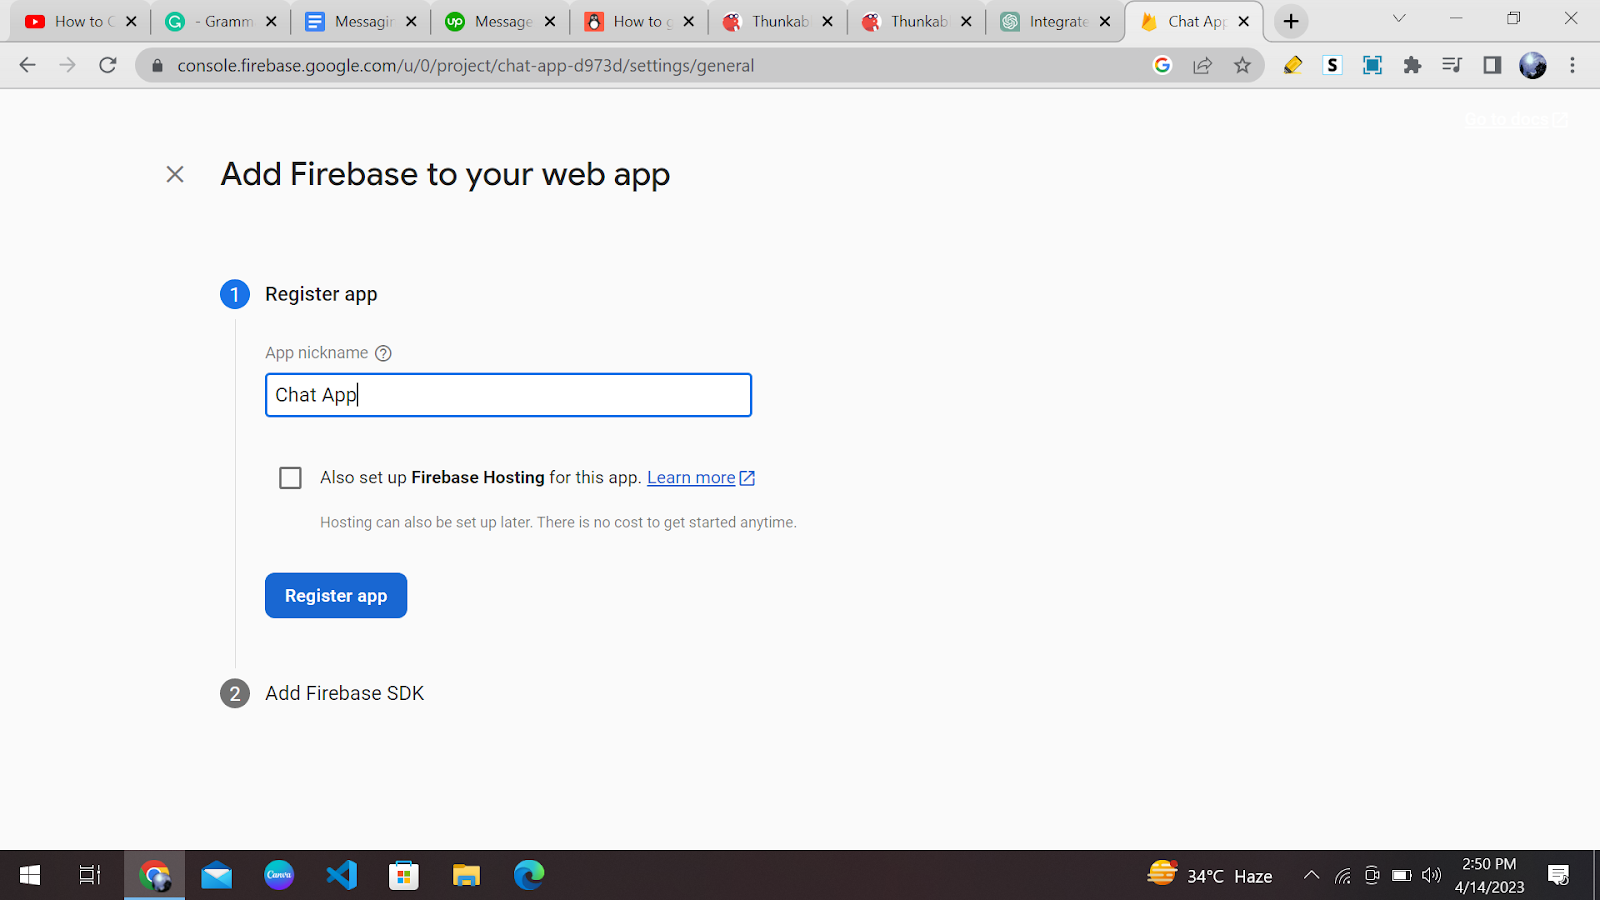
You will be redirected to a new webpage. Scroll down to the bottom of that webpage and click on this icon:
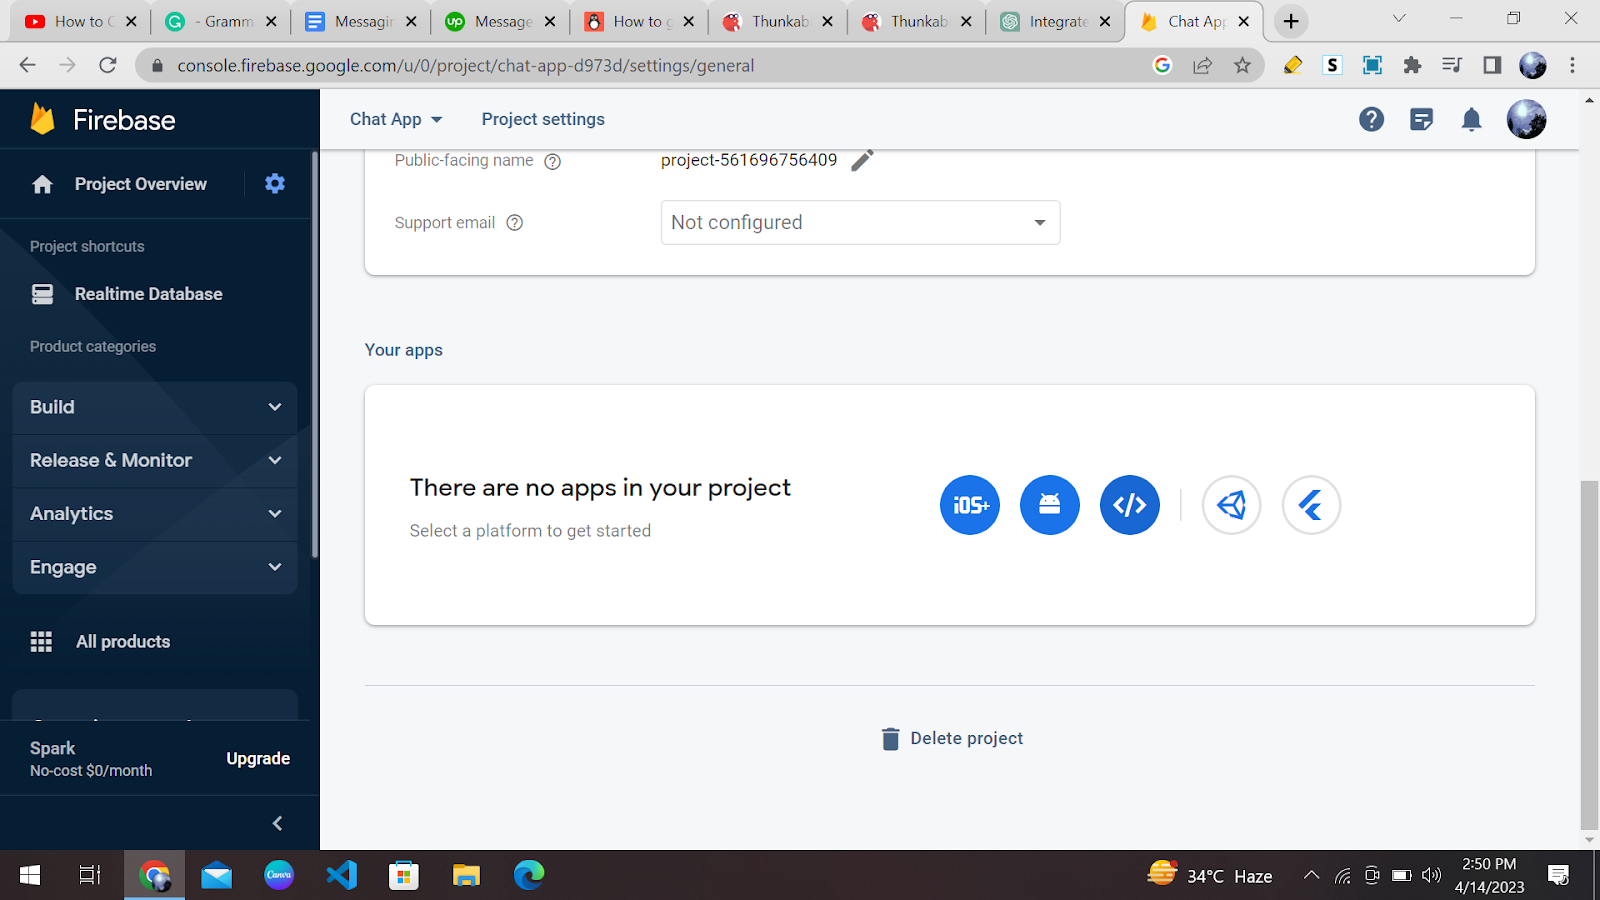
The next step is to add any name as your Application nickname and register your database:
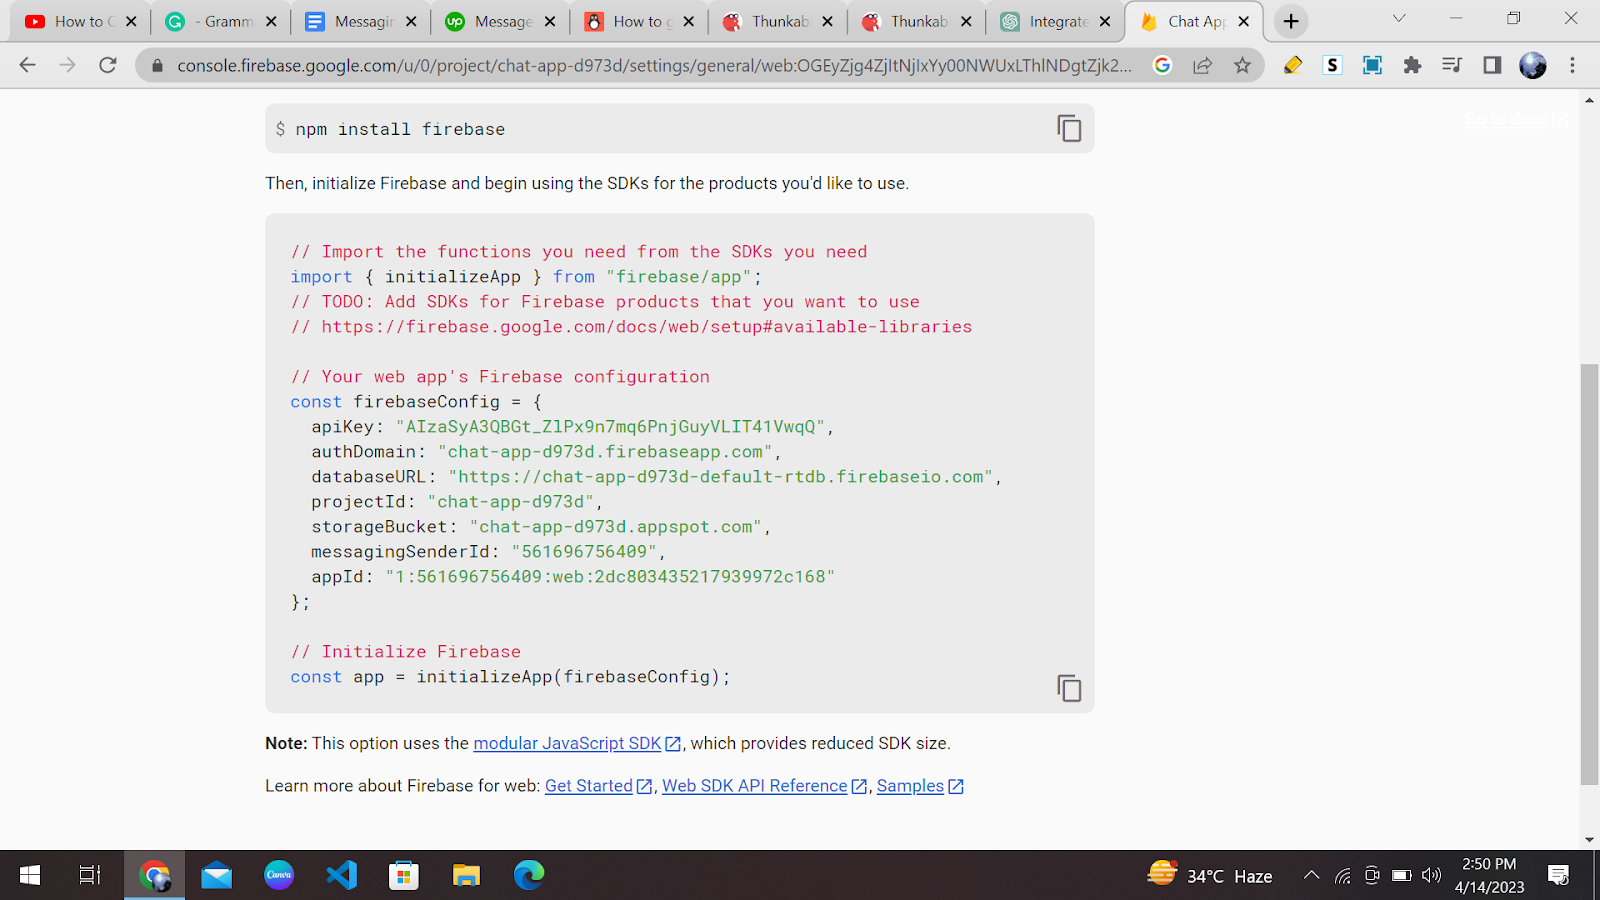
Now, you will have Software Development Kit (SDK) information on your screen. You have to copy these two links to your clipboards:
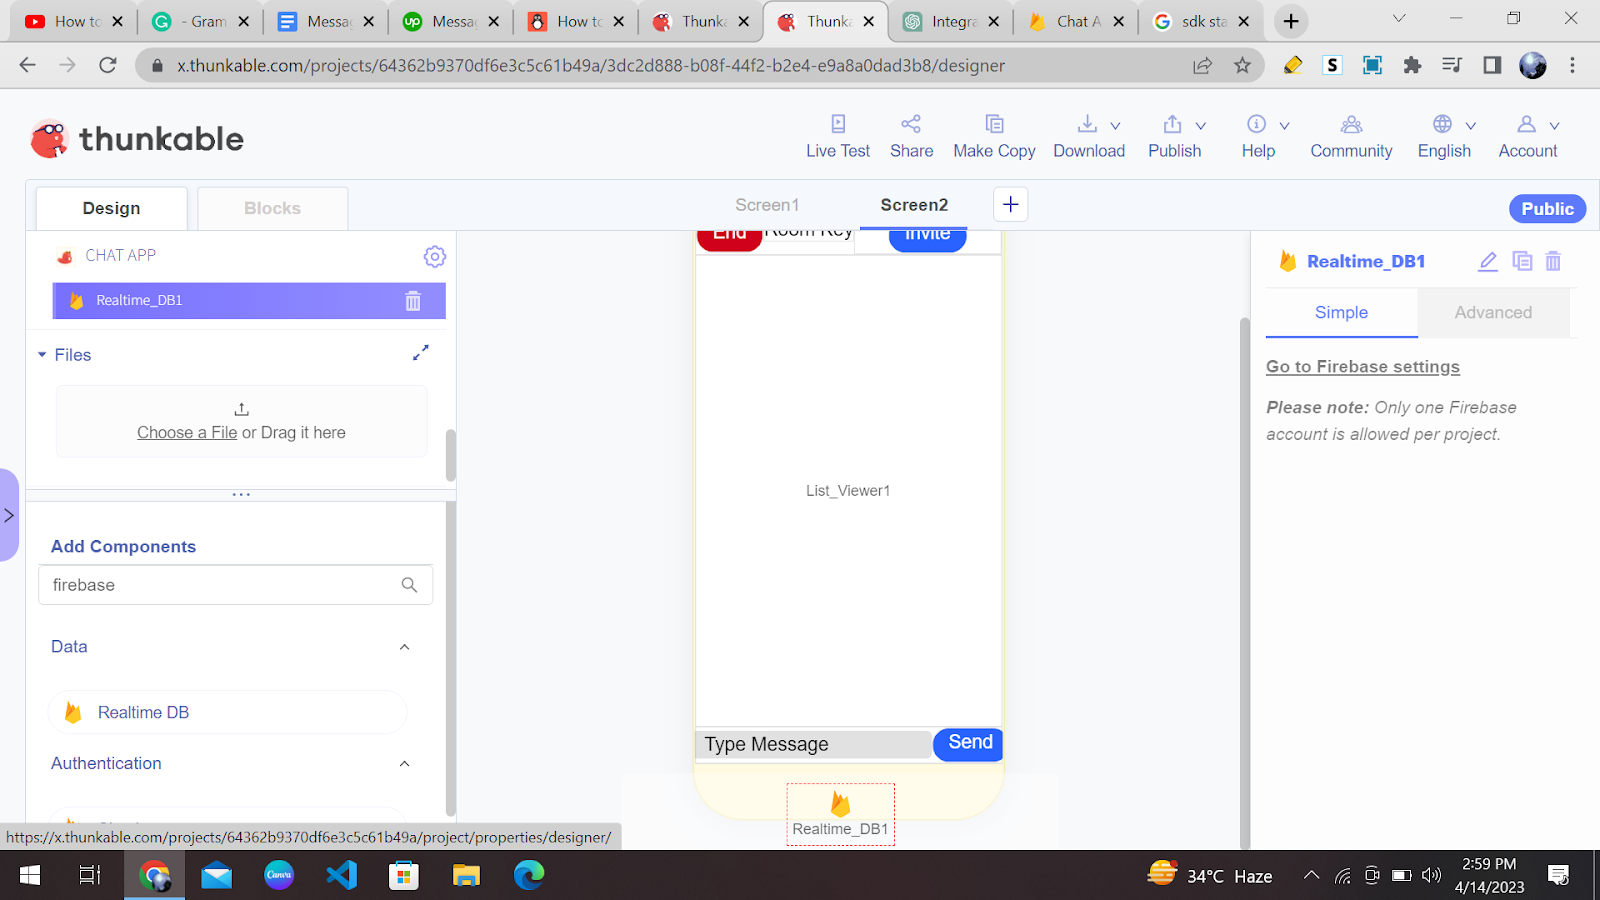
Now go back to your Thunkable web page. Click on the realtime DB you added on your Screen Console. Click on this option:
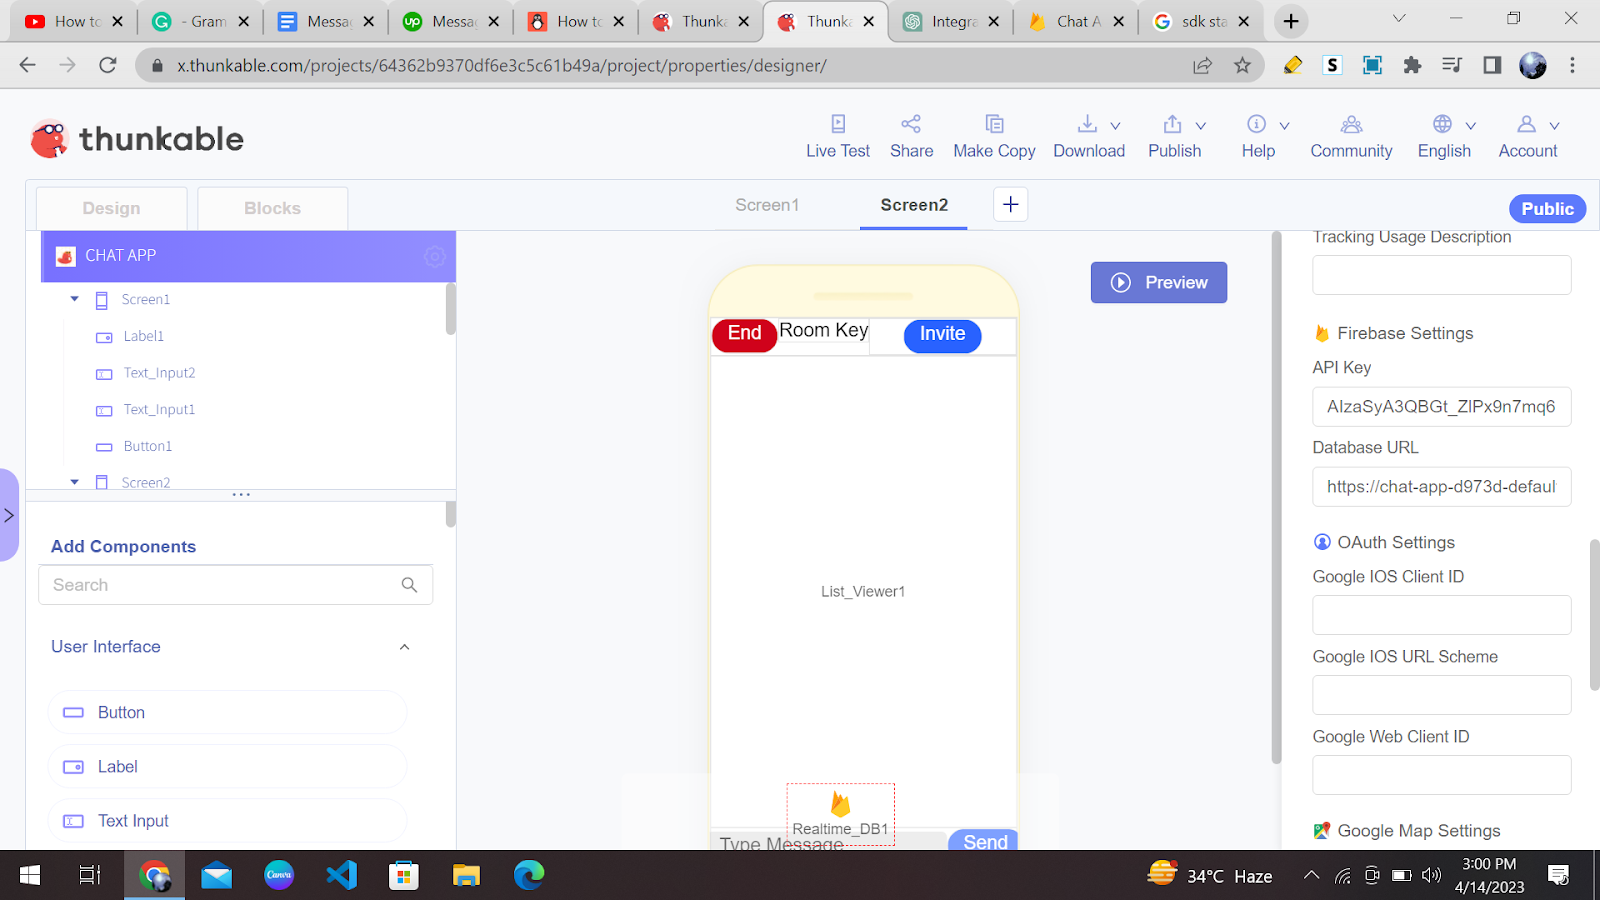
Now paste the “apiKey” you copied from the Firebase SDK to the “API Key” section. Similarly, paste the “databaseURL” in the “Database URL” section as shown:
Adding Code Blocks
Now we have to add a few code blocks so that we can interlink our messaging app with a real-time exchange feature.
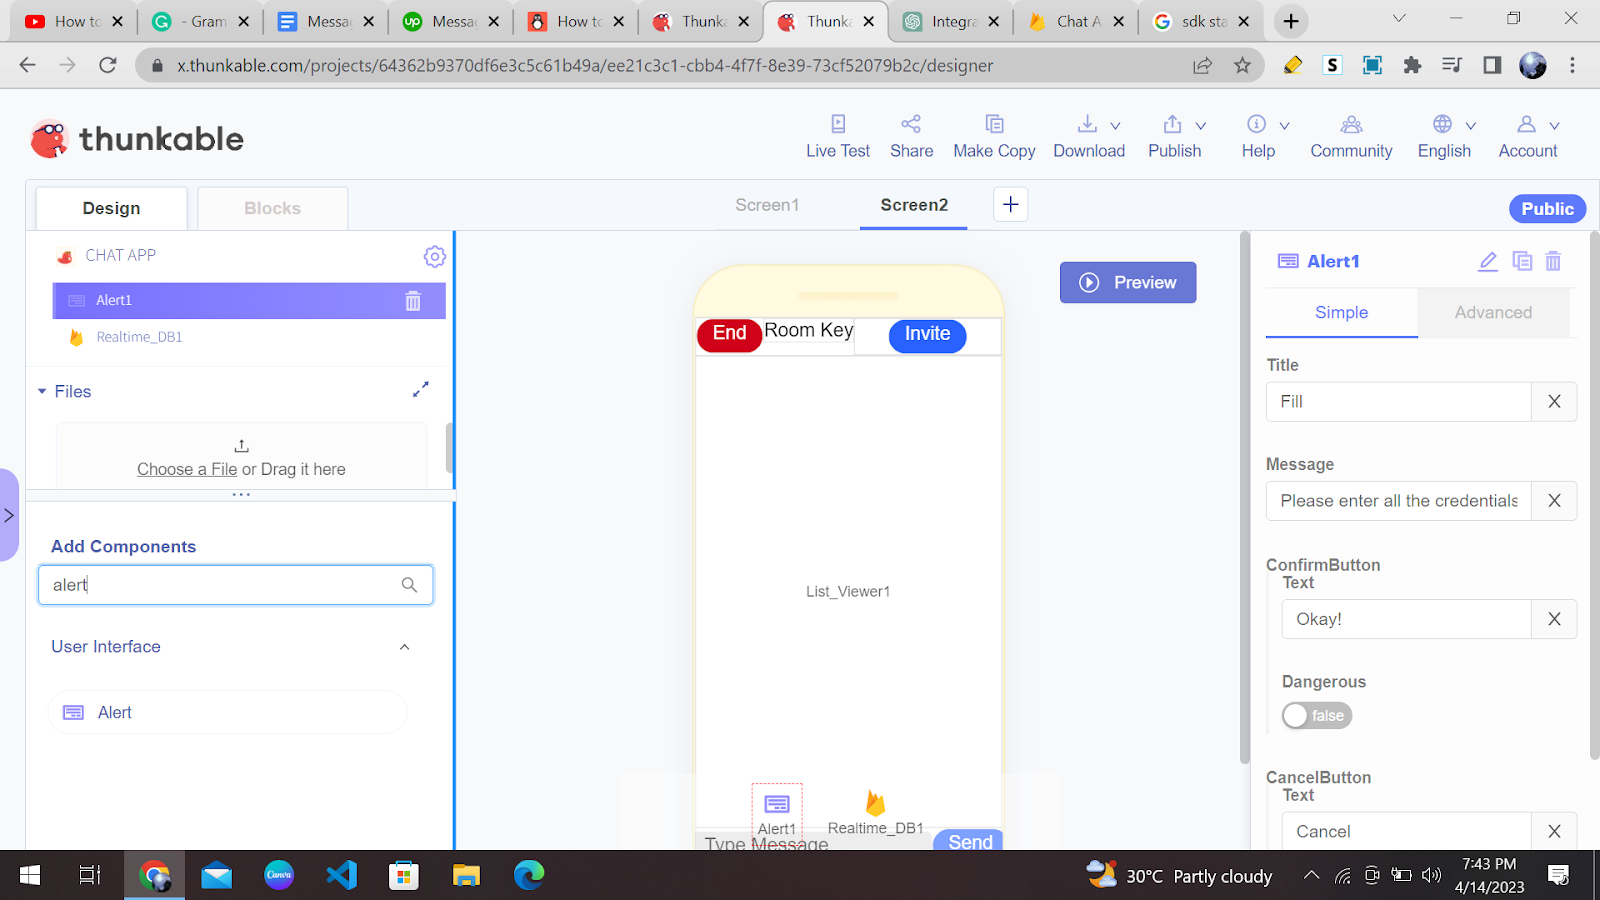
We want our app to be as human-friendly and interactive as possible. So feel free to add alerts, different snippets, and more labels to your app. I will add an alert which will prompt the user to enter all the valid credentials.
You can add an alert by searching “Alert” in the “Add Component” section. After adding an alert, add the following text:
Now, click on the “Blocks” option on the top left bar of your console. And add the following code for screen 1:
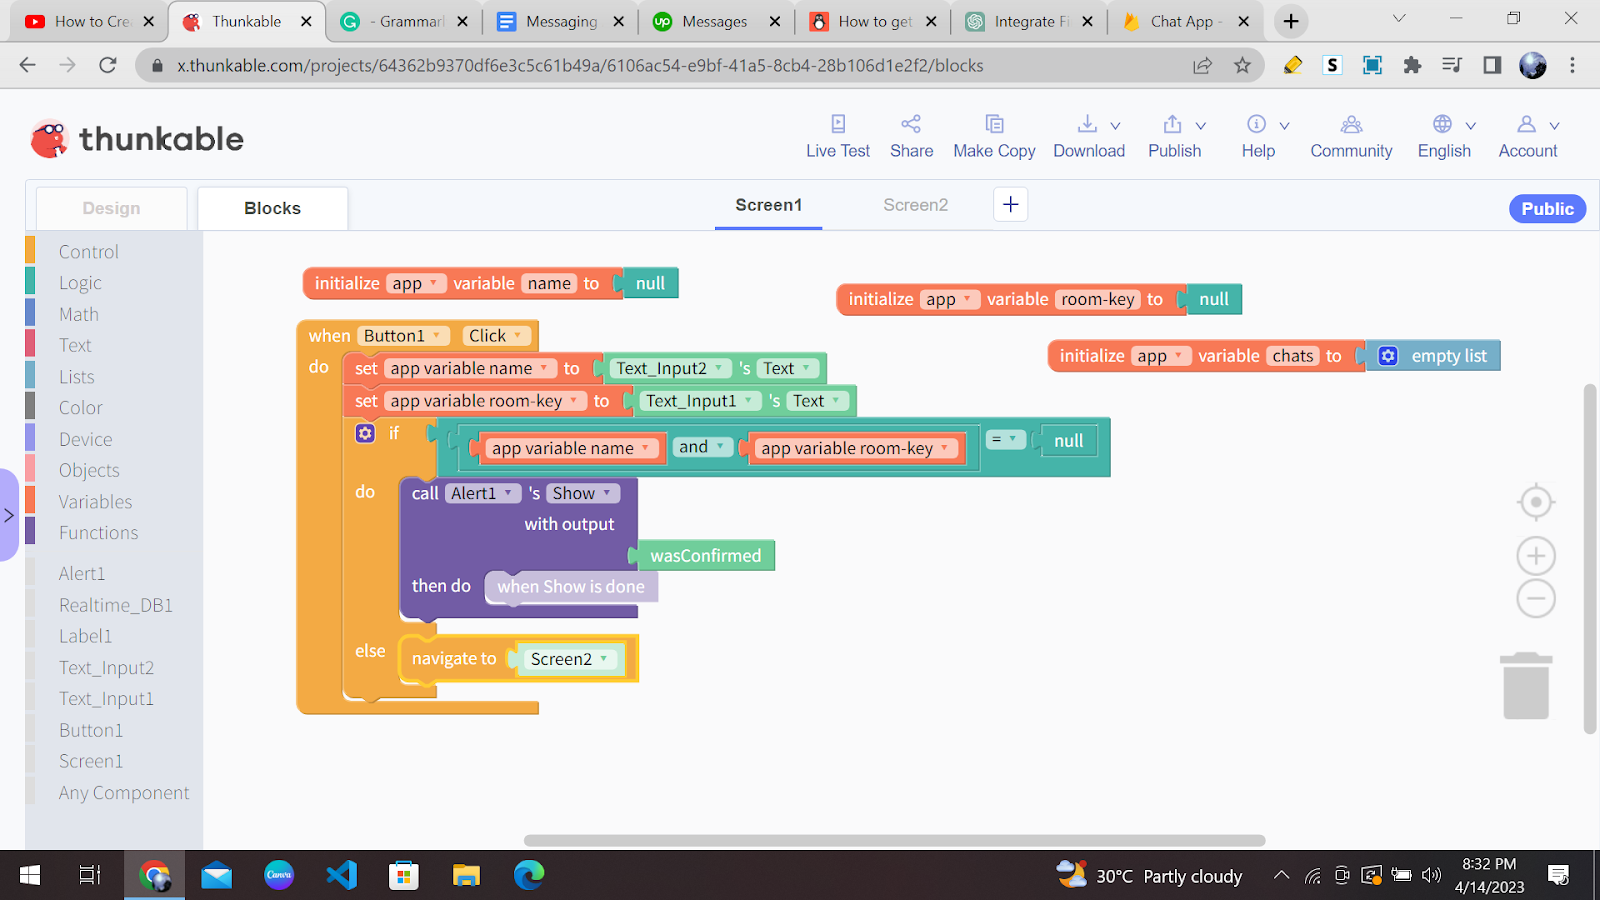
Great Job! So the above code just checks whether the user has entered any input in the username and room key fields. If yes, then they are directed to Screen 2. Else an alert pops up.
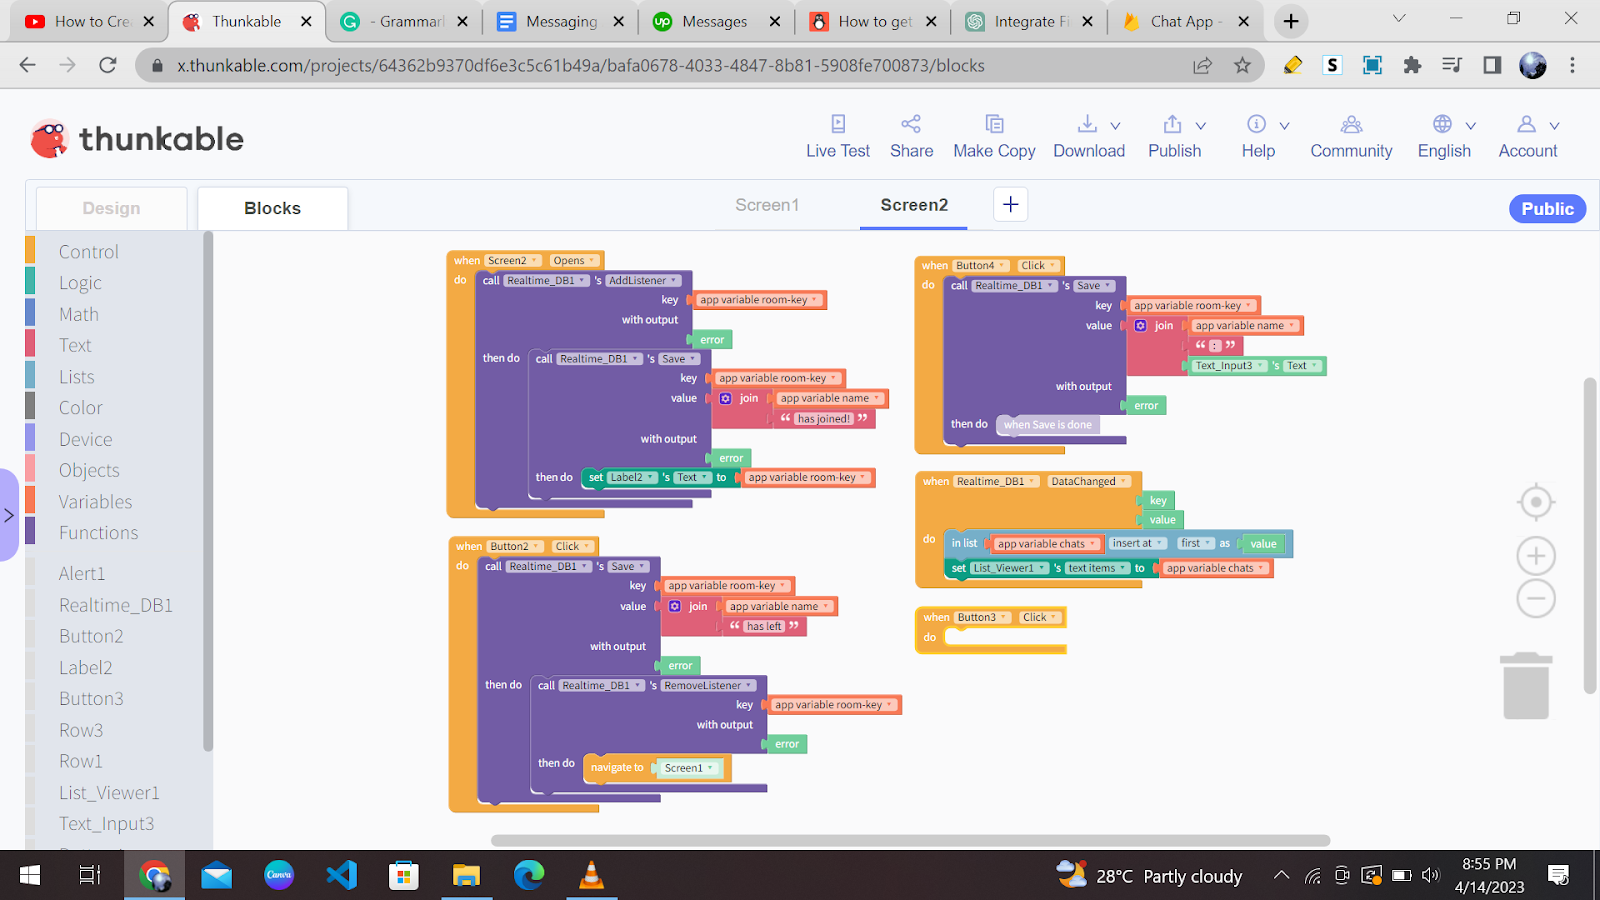
Now add the following code for screen 2:
Congratulations! You have just made your own messaging app on Thunkable. I am hopeful you have customised it according to your liking. You can test your app by doing the “Live Test.”
Conclusion
Congratulation on making your customised real-time messaging app! I am sure you must have used your creativity and logic to give this game your own touch. I am sure you will have a lot of fun chatting with your friends and family and sharing your creation with them.
From here, the sky’s the limit, and you can continue to explore and experiment with Thunkable with Codingal courses. Learn to master the art of making apps and games in Thunkable with Codingal’s app development course for kids ages 8-14. Thunkable makes it possible for anyone to design and build their own apps in a matter of minutes. In the process, they learn to think creatively, reason systematically, and work collaboratively — harnessing essential 21st-century skills.