Table of Contents
Introduction What is Thunkable? Signing up on Thunkable Getting familiar with the interface Design a simple Calculator Features of Thunkable Conclusion
Introduction
Thunkable is a fantastic tool for kids and beginners who want to learn how to build mobile apps without any prior programming knowledge. In this article, we will guide you through the process of getting started with Thunkable and getting familiar with its interface.
What is Thunkable?
Thunkable is a visual programming platform allowing users to create mobile applications for Android and iOS devices without prior programming knowledge. With Thunkable, you can create apps using a drag-and-drop interface, which means you can simply drag and drop different code blocks onto a canvas to build your app.
Thunkable was created in 2015 by a group of MIT graduates who wanted to make it easy for anyone to create mobile applications. This platform is designed to be user-friendly and accessible, with a range of templates and tutorials to help users get started.

Signing up on Thunkable
Getting started with Thunkable is very easy. It is a 100% free platform and only requires a Google account. Follow this step-by-step guide to make an account on Thunkable.
1- Create an account
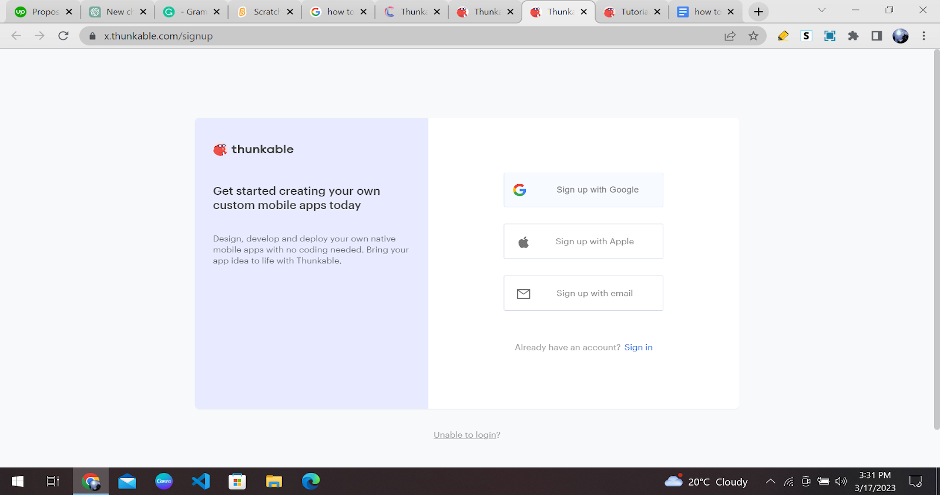
The first step to getting started with Thunkable is to sign up for an account. Visit the Thunkable website and click the “Sign up” button in the top right corner.

You can sign up using your Google, an Apple ID or any other type of email account or create a new account by entering your email and password.
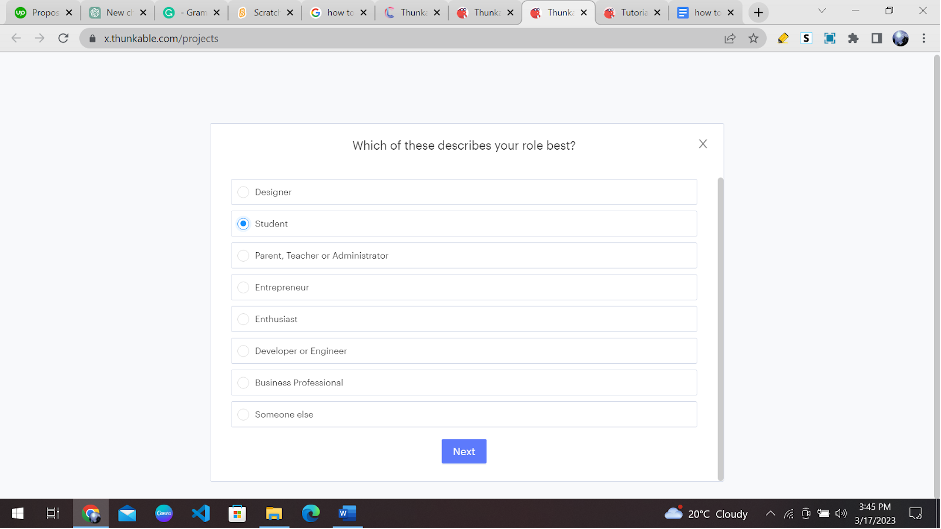
2- Answer the introductory questions
Now Thunkable will ask you about what type of user you are; you can identify yourself as a “student who wants to boost your learning.”
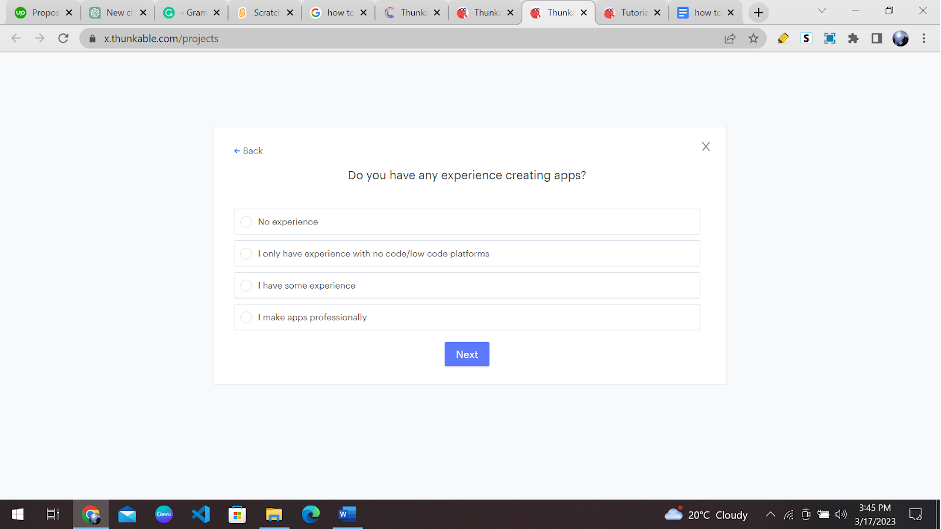
Then you’ll be prompted to enter the amount of coding knowledge you have. You can click on whatever option that suits your skill set and then hit the “next” button.
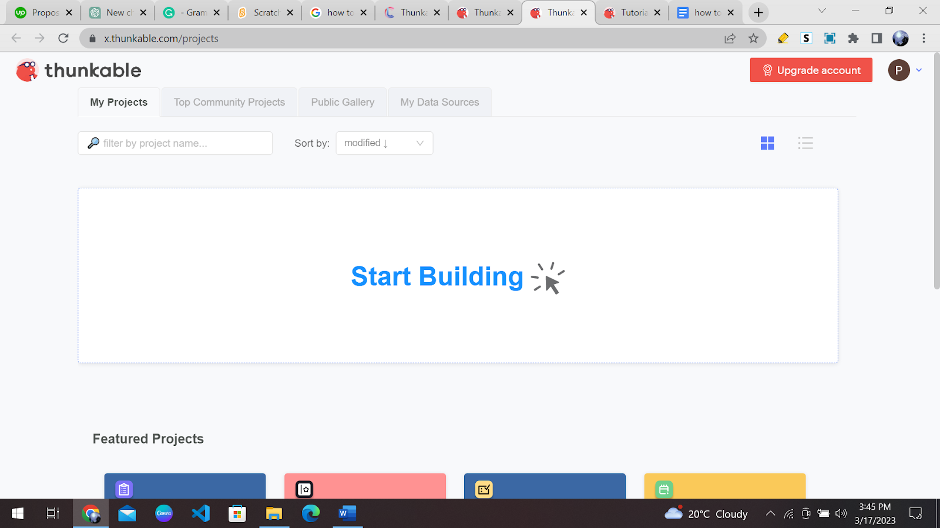
You’ll then be successfully signed in to your new Thunkable account, and this page will pop up. Click on the “Start building” area to make a new app.
Getting familiar with the interface
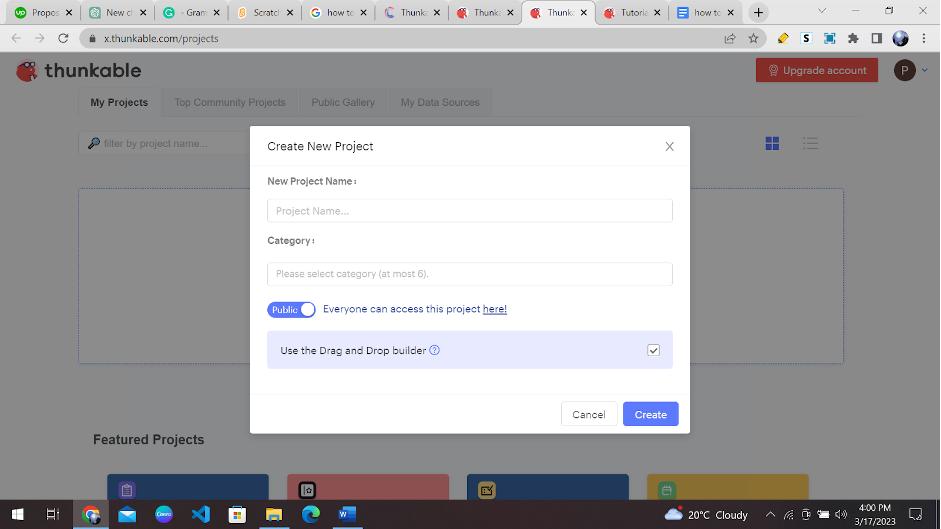
Once you click on start building, you’ll be prompted to enter the name and related category of the app you want to create. Enter the name and description of your choice.
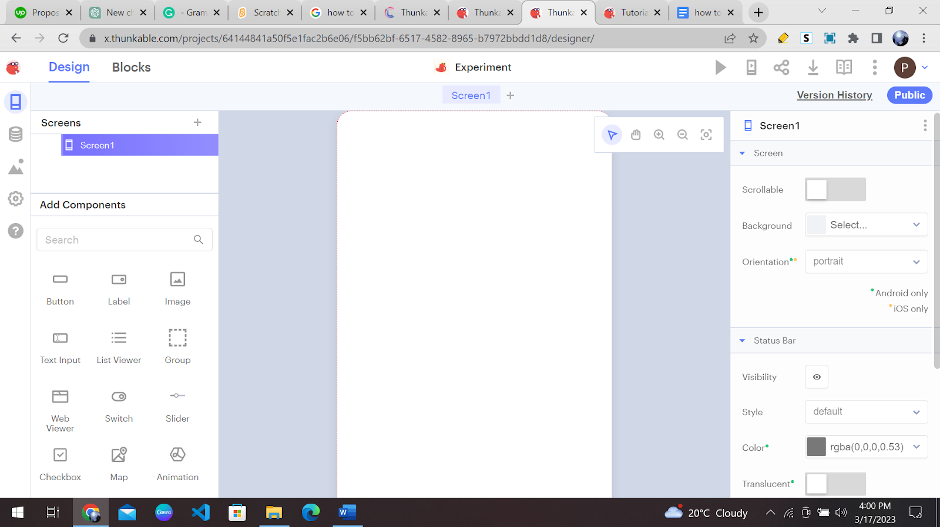
Now, we’ll have the editing area pop up on our screen.
Now to get you more familiar with the functionalities of this app, we’ll design a simple calculator on Thunkable and explain each property step by step.
Design a simple Calculator
The simple calculator app that we will be designing will perform addition, multiplication, division and subtraction of numbers and display the result. Before designing any app, we need to have a clear vision of what the purpose of our app is and what our achieved outcome will look like.
Step 1: Add components
On the left-hand side of the screen, you’ll see a list of components you can add to your app. For this tutorial, we’ll need two text boxes, one for the first number, and one for the second number, and four buttons for the addition, subtraction, multiplication, and division functions. We’ll also need a label to display the name of our game.
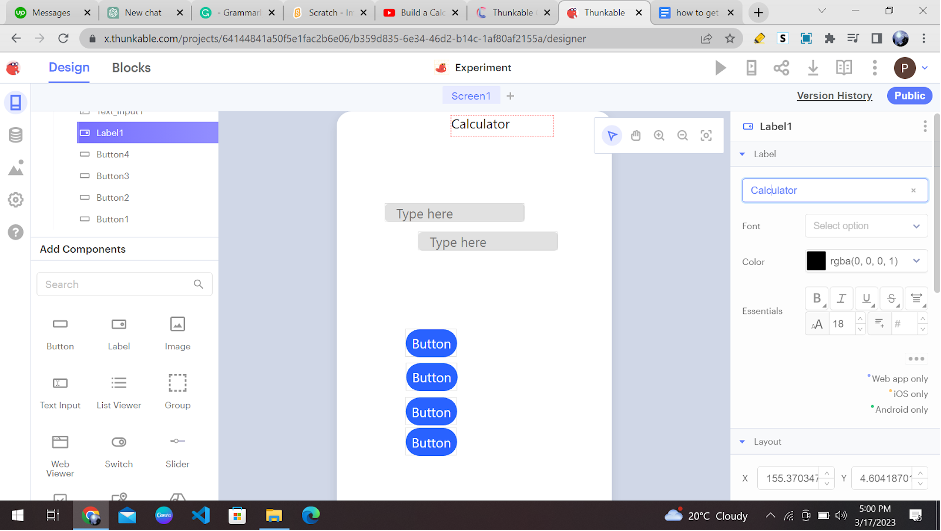
To add a component, simply drag it from the left-hand menu onto the app canvas on the right.
Step 2: Design Layout
Now that you’ve added your components, it’s time to arrange them on the screen. Click and drag each component to move it around, and use the sizing handles to adjust the size of each component. For the calculator app, we recommend arranging the text boxes on top of each other and placing the four function buttons below them.
You can name the buttons and labels by clicking here on the properties panel.

In a similar manner, you can select each button and add appropriate names to it. You can change the colour, size, and font of the text by clicking here.
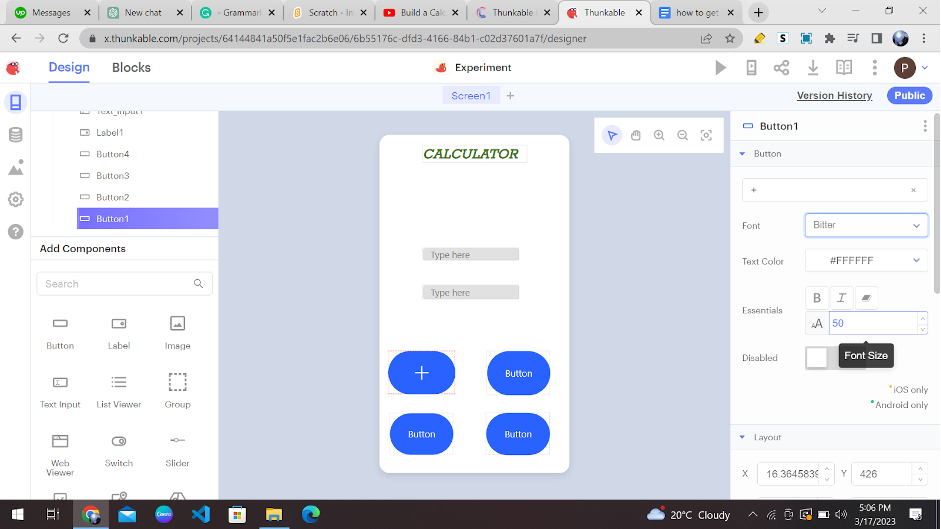
You can simply click on an element and drag it to its desired position. You can also change the background colour by clicking on the main screen and looking for the “Background” option in the properties panel.
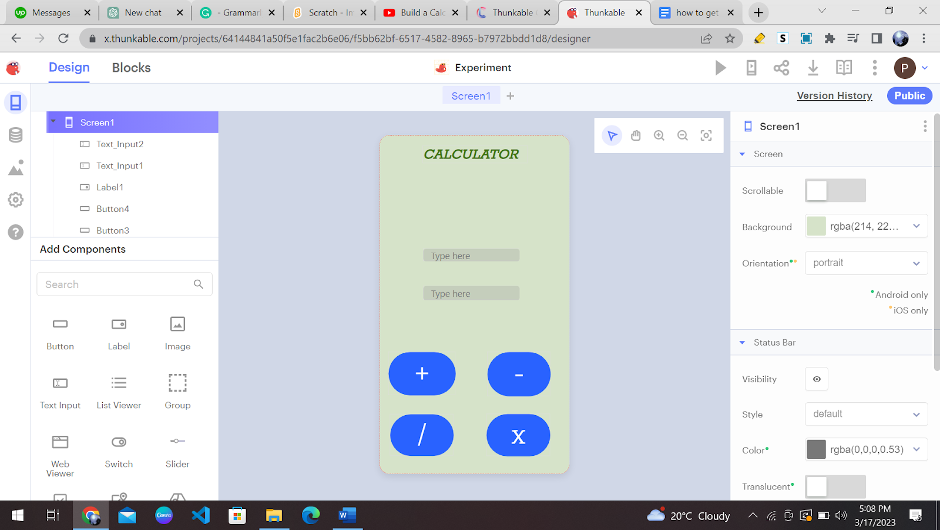
You can choose any colour for the background you want from here.

Step 3: Add functionality
Now it’s time to add the functionality to your calculator. First, we’ll need to add a block of code to each of the function buttons.
To do this, click on the “Blocks” button in the top right corner of the screen. This will open up the block editor.
You’ll see a list of components on the left side of the screen. Click on the “Button” component to see a list of available blocks.
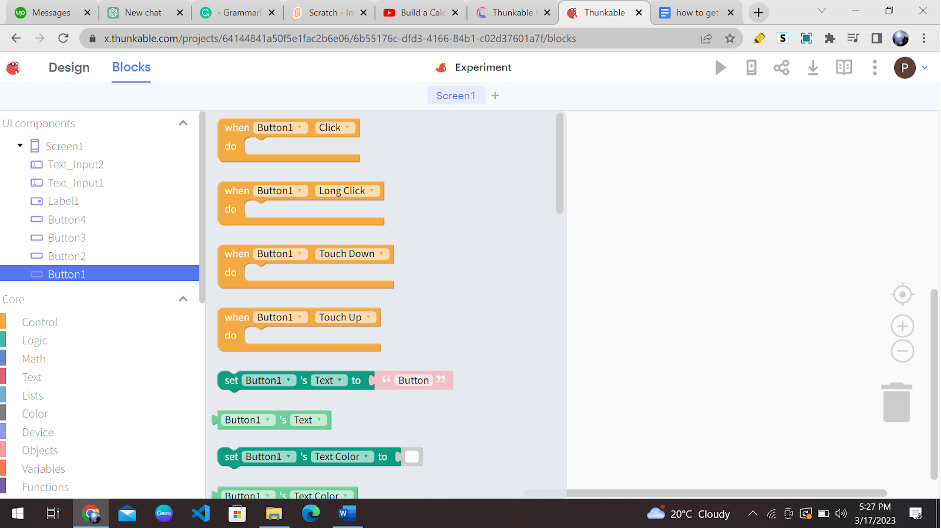
Select the “when Button1 Click” block, and drag it to the workspace. This will create a block that will trigger when the user clicks on the Button1 component.
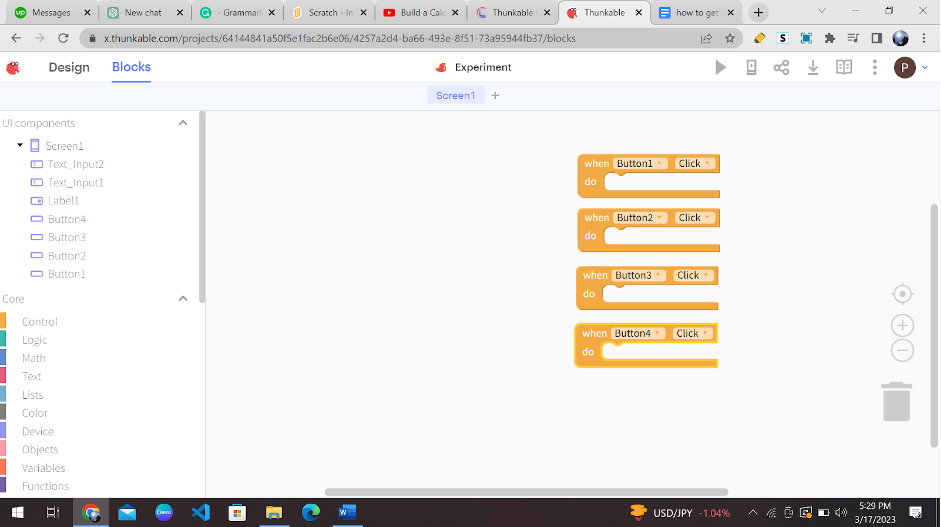
Repeat this step for the second text box and the other three buttons, making sure to select the correct operation block for each button.
Now for our ease, let’s assign tags to all the buttons, and input the text we are using. Assigning tags will help us implement our functionality in a precise manner. Click on the design view and click on the item’s list being displayed on the left side.

Now click on this little pen icon and assign a meaningful tag to each item.

Step 4: Add the math operations
Now that you’ve retrieved the values from the text boxes, it’s time to perform the math operations. Thunkable provides several math-related blocks that you can use to create the desired functionality.
Let’s first add a label that will store the result of the calculation. You will add a label in a similar manner you added the button and assign a tag to it. I have assigned the tag “result” to it. Now let’s perform the calculations.
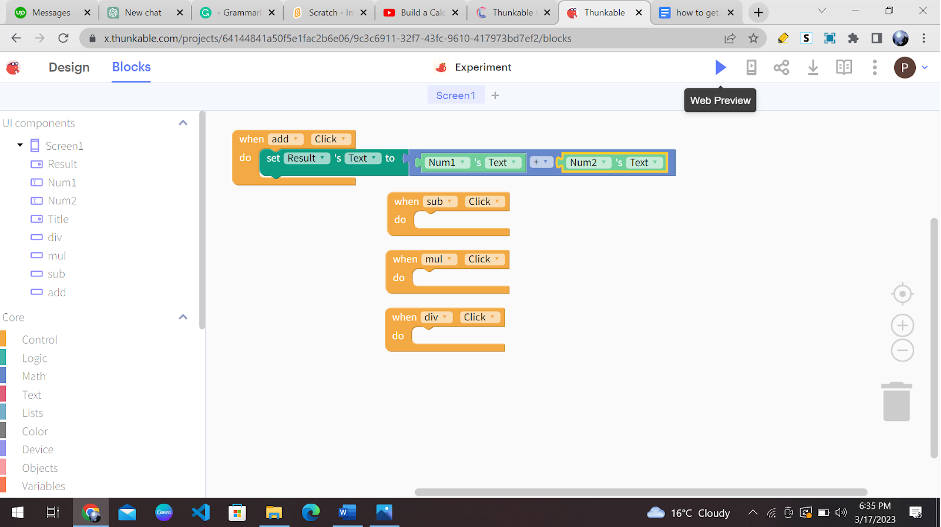
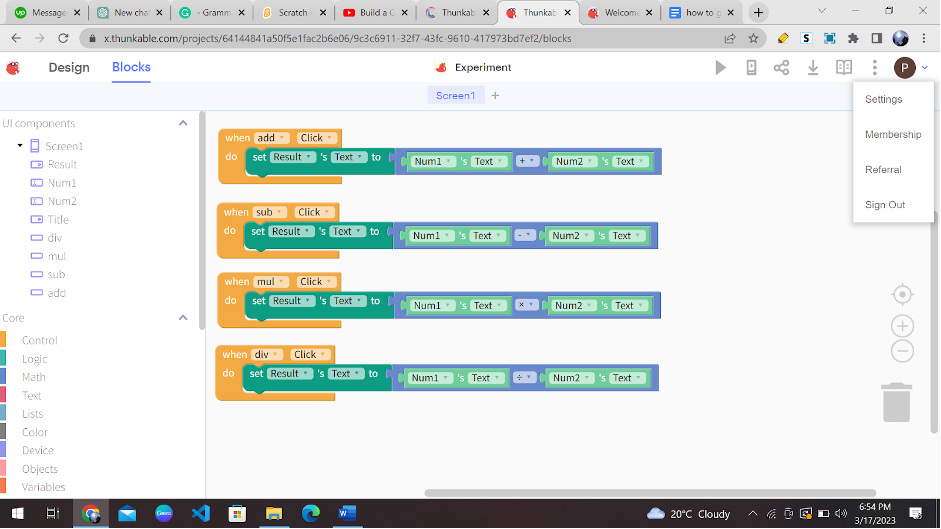
For example, if you want to add the two numbers together, drag the “add” block from the Math menu to the workspace. Then, drag the “get text” block for the first text box to the left side of the “add” block, and the second text box to the right side of the “add” block. Your code block must look something like this. We will now text the functionality of our code, by clicking on the web preview button:
Now you’ll see what your calculator app looks like and you can test the addition function by entering two numbers and clicking on the ‘+’ button.
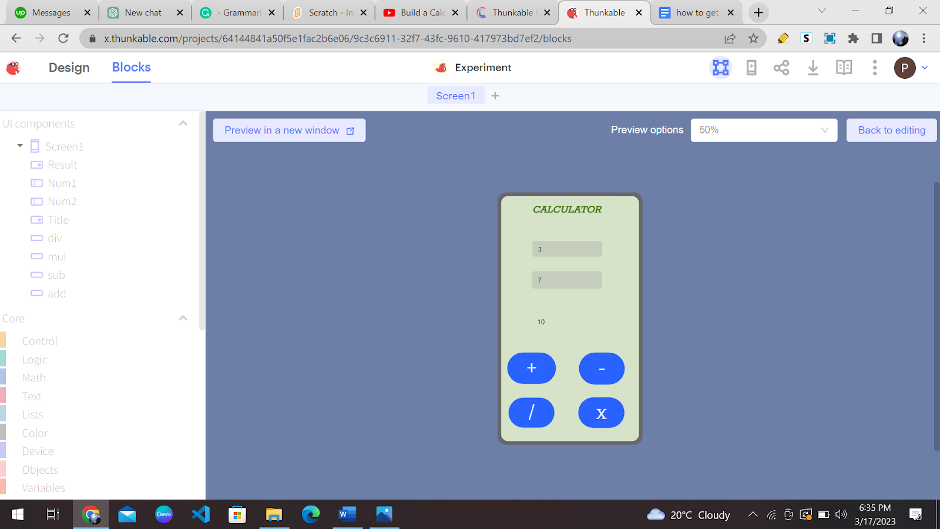
As you can see that the sum generated was correct, which means that our app logic works perfectly.
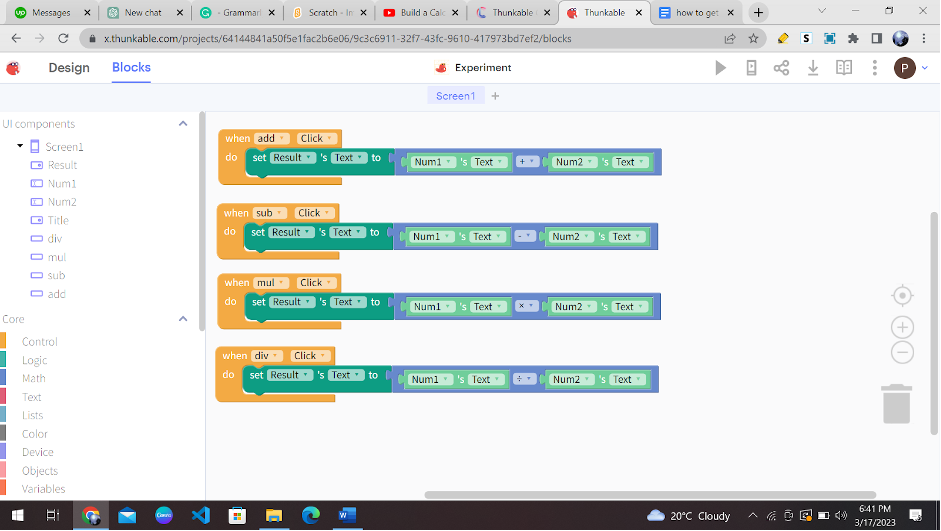
Repeat this step for the other three math functions, making sure to use the correct operation block for each button.
Step 5: Test your app
Now that you’ve designed your calculator and added the necessary functionality, it’s time to test it out. Click on the “Web preview” button in the top right corner of the screen to open the preview console.
Enter some numbers into the text boxes and click on the function buttons to make sure that everything is working as expected.

Features of Thunkable
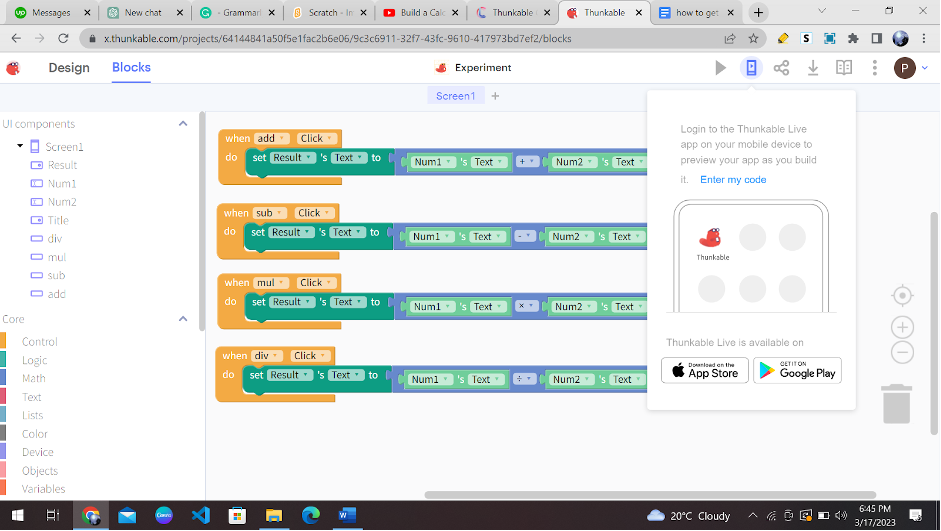
Congratulation! You have created your first Thunkable app; now you can share, use, publish, and download it anywhere. You see a few options on the editing console’s top panel. We already know what the web preview does; it helps us test the look the functionality of your app. The next option is “Live Test on Device”, allowing you to test your app on your mobile device in real time.
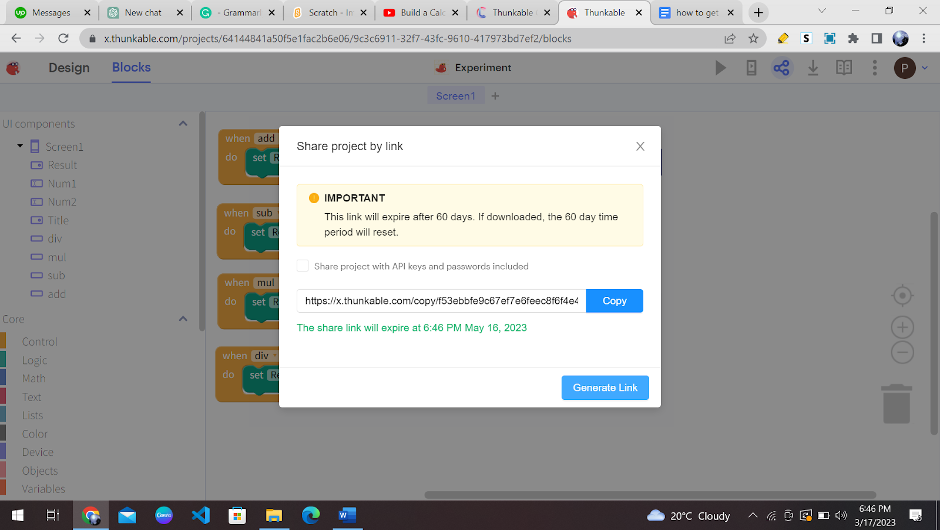
We have the share option also, which generates a link to your app. You can share this link with your friends, family and colleagues so they can also use your app.
You can also download and publish this game on IOS and Android, and you will have to upgrade your subscription plan accordingly.

The next documentation icon diverts you to an introductory webpage for Thunkable.
Lastly, you can click on the “Account” option to view details about your profile and log out.
Conclusion
After reading this blog, you must be well familiar with Thunkable and its interface. By following the steps outlined in this blog, you should now have a good understanding of how to get started with Thunkable and create your own basic apps.
From here, the sky’s the limit, and you can continue to explore and experiment with Thunkable with Codingal courses. Learn to master the art of making apps and games in Thunkable with Codingal’s app development course for kids ages 8-14.
Thunkable makes it possible for anyone to design and build their own apps in a matter of minutes. In the process, they learn to think creatively, reason systematically, and work collaboratively — harnessing essential 21st-century skills.