Table of Contents
Introduction Space Invaders game guidelines Steps for development of Space Invaders game using Python Pygame Explanation of code Overall Code for Space Invaders game using Pygame of Python Conclusion
Introduction
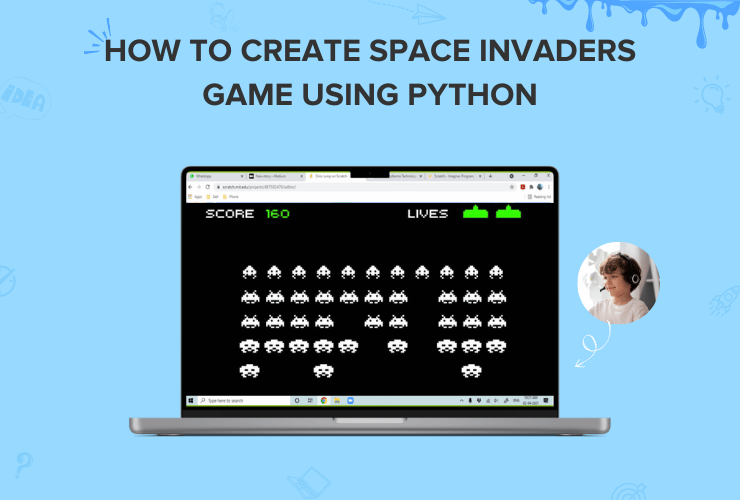
In the static shooting Space Invaders game, the player moves a laser weapon horizontally across the bottom of the screen to fire at the aliens above them.
The aliens move in a group left and right, shifting lower as they get closer to the edge of the screen.
To kill every alien by gunfire is the goal. In other words, avoid being killed in order to launch a counterattack on the invaders.
If the invaders (aliens) reach the bottom of the screen the game ends immediately, while the player still has three lives.
Using Python and Pygame, we will build a simple but completely functional version of the popular game Space Invaders.
Python is one of the most popular programming languages, and when combined with Pygame, one can quickly develop a variety of game applications.
In this blog, we will learn how to set up a Pygame program and how to apply Pygame logic to create our own games.
In addition, one may put up background music and graphics for the window.
Last but not least, we will be able to direct object movement and recognize collisions.
Space Invaders game guidelines
- The aliens should move toward the bottom once some time has passed.
- The game should stop when the aliens touch the bottom edge.
- The only possible directions for the player’s ship to go are left or right.
- A score counter should be included. If we hit the alien, players get an point.
Steps for development of Space Invaders game using Python Pygame
- Install the Pygame application.
- Developing users and space invaders.
- Using the keyboard to automate space invader movement and control user movement.
- Automated random space invader firing while controlling user shooting with the keyboard.
- Recognize item collisions and take appropriate action.
Explanation of code
import math
import random
import pygame
from pygame import mixer
Line 1: Giving access to the mathematical functions specified by the C standard requires the import of math library in Python.
Line 2: A number of functions for creating or modifying random numbers are defined in the Python import random library. The random library functions in Python employ the pseudo-random number generator function random() to produce random float numbers between 0.0 and 1.0.
Line 3: It imports all of the pygame components that are accessible into the pygame package.
Line 4: Classes for loading Sound objects and managing playback are included in the mixer library.
# Intialize the pygame
pygame.init()
Line 2: All imported pygame modules are initialised via pygame.init().
If a module fails, no exceptions are generated, but a tuple containing the total number of successful and unsuccessful inits is returned.
Although pygame.init() initialises all imported pygame modules is a quick method to get things going, you can always initialise specific modules one at a time. When a module’s init() method fails, it will throw an exception.
# create the screen
screen = pygame.display.set_mode((800, 500))
Line 2: This will create the screen. A visible picture surface is produced on the monitor when the display mode in PyGame is changed.
On platforms with a window manager, this surface can either be full screen or windowed.
A typical PyGame surface object serves as the display surface.
# Background
background = pygame.image.load('background.png')
Line 2: All we have to do to add the background picture is utilize the function image.load and pass the image’s path as a parameter.
# Sound
mixer.music.load("background.wav")
mixer.music.play(-1)
Line 2: A music filename or file object will be loaded and ready for playback. A music stream will be stopped if it is currently playing. This does not begin the music to play.
Line 3: The loaded music stream will be played through this. The song will restart if it is currently playing.
# Caption and Icon
pygame.display.set_caption("Space Invader")
icon = pygame.image.load('ufo.png')
pygame.display.set_icon(icon)
Line 2: It will Set the current window caption.
Line 3: A Surface object with the image drawn on it will be returned by using the pygame. image. load() method. The display Surface object and this Surface object will not be the same Surface object.
Line 4: It is used to change the icon.
# Player
playerImg = pygame.image.load('player.png')
playerX = 370
playerY = 380
playerX_change = 0
Line 2: A Surface object with the image drawn on it will be returned by using the pygame. image. load() method. The display Surface object and this Surface object will not be the same Surface object
Line 3: Setting the player X coordinate
Line 4: Setting the player Y coordinate
Line 5: Setting the player change X co-ordinate
# Enemy
enemyImg = []
enemyX = []
enemyY = []
enemyX_change = []
enemyY_change = []
num_of_enemies = 6
Line 2: Setting of the list for the enemy.
Line 3: Initialization of enemy X coordinate List.
Line 4: Initialization of enemy X coordinate List.
Line 5: Initialization of enemy change in X coordinate List.
Line 6: Initialization of enemy change in Y coordinate List.
Line 7: Initialization of num_of_enemies variable to keep a record of the number of enemies.
for i in range(num_of_enemies):
    enemyImg.append(pygame.image.load('enemy.png'))
    enemyX.append(random.randint(0, 736))
    enemyY.append(random.randint(50, 150))
    enemyX_change.append(4)
    enemyY_change.append(40)
Line 1: Applying for loop over num_of_enemies variable for appending and changing the enemy X and Y positions.
Line 2: Appending the enemyImg using the image.load()
Line 3: To establish the enemy’s X position at random in this example, we utilized the random function of the random library.
Line 4: To establish the enemy’s Y position at random in this example, we utilized the random function of the random library.
Line 5: Appending the enemy’s change in X position.
Line 6: Appending the enemy’s change in Y position.
# Bullet
# Ready - You can't see the bullet on the screen
# Fire - The bullet is currently moving
bulletImg = pygame.image.load('bullet.png')
bulletX = 0
bulletY = 380
bulletX_change = 0
bulletY_change = 10
bullet_state = "ready"
Line 4: Setting of bulletImg using the image.load()
Line 5: Initialization of the bullet X coordinate.
Line 6: Initialization of the bullet Y coordinate.
Line 7: Initialization of the bullet change in X coordinate.
Line 8: Initialization of the bullet change in Y coordinate.
Line 9: Initialization of the bullet state to “ready”
# Score
score_value = 0
font = pygame.font.Font('freesansbold.ttf', 32)
textX = 10
testY = 10
Line 2: Initialization of the score_value variable.
Line 3: Setting the font to ‘freesansbold.ttf’ using pygame.font.Font()
Line 4: Initialization of the text X coordinate.
Line 5: Initialization of the text X coordinate.
# Game Over
over_font = pygame.font.Font('freesansbold.ttf', 64)
Line 2: Setting the font to ‘freesansbold.ttf’ using pygame.font.Font()
def show_score(x, y):
    score = font.render("Score : " + str(score_value), True, (255, 255, 255))
    screen.blit(score, (x, y))
Line 1: Defining of function show_score(x,y) with x & y as the parameters.
Line 2: Using the render() function of the PyGame font object, create a Text surface object, or a surface object with text drawn on it.
Line 3: The screen.blit(x,y) method instructs us to draw the backdrop surface onto the screen and place it at (x,y)
def game_over_text():
    over_text = over_font.render("GAME OVER", True, (255, 255, 255))
    screen.blit(over_text, (200, 250))
Line 1: Defining of function game_over_text ()
Line 2: Using the render() function of the PyGame font object, create a Text surface object, or a surface object with text drawn on it.
Line 3: The screen.blit(x,y) method instructs us to draw the backdrop surface onto the screen and place it at (x,y)
def player(x, y):
screen.blit(playerImg, (x, y))
Line 1: Defining of function def player (x,y) with x & y as the parameters
Line 2: The screen.blit(x,y) method instructs us to draw the backdrop surface onto the screen and place it at (x,y)
def enemy(x, y, i):
screen.blit(enemyImg[i], (x, y))
Line 1: Defining of function def enemy(x, y, i) with x, y & i as the parameters
Line 2: The screen.blit(x,y) method instructs us to draw the backdrop surface onto the screen and place it at (x,y)
def fire_bullet(x, y):
global bullet_state
bullet_state = "fire"
screen.blit(bulletImg, (x + 16, y + 10))
ine 51: Defining of function def fire_bullet(x, y) with x, y as the parameters
Line 51: Defining the bullet state as global and initializing it to “fire”.
Line 52: The screen.blit(x,y) method instructs us to draw the backdrop surface onto the screen and place it at (x,y)
def isCollision(enemyX, enemyY, bulletX, bulletY):
distance = math.sqrt(math.pow(enemyX - bulletX, 2) + (math.pow(enemyY - bulletY, 2)))
if distance < 27:
return True
else:
return False
Line 1: Defining of function def isCollision(enemyX, enemyY, bulletX, bulletY) with enemyX, enemy, bullet & bulletY as the parameters.
Line 2: Calculation of distance by applying the distance formula.
Line 3, 4, 5 & 6: Applying the conditional statement if on the distance value to check whether it will return true or false
# Game Loop
running = True
while running:
Line 2: Initialization of the running variable to TRUE.
Line 3: Applying while loop on running variable.
# RGB = Red, Green, Blue
screen.fill((0, 0, 0))
Line 2: This method is used to fill the display with the color specified.
 # Background Image
screen.blit(background, (0, 0))
for event in pygame.event.get():
if event.type == pygame.QUIT:
running = False
Line 2: The screen.blit(x,y) method instructs us to draw the backdrop surface onto the screen and place it at (x,y)
Line 3: Applying for loop over in pygame.event.get()
Line 4 & 5: Applying the conditional statement if on the event.type value to check whether event.type == pygame.QUIT, if yes then running = False is initialized.
# if keystroke is pressed check whether its right or left
if event.type == pygame.KEYDOWN:
if event.key == pygame.K_LEFT:
playerX_change = -5
if event.key == pygame.K_RIGHT:
playerX_change = 5
Line 2: Applying the conditional statement if on the event.type to check whether event.type == pygame.KEYDOWN, if it is true then
Line 3 & 4: we have to again apply the conditional statement if on the event.key to check whether event.key == pygame.K_LEFT and if it is true then we will change the X coordinate of player by -5.
Line 5 & 6: we have to again apply the conditional statement if on the event.key to check whether event.key == pygame.K_RIGHT and if it is true then we will change the X coordinate of player by 5.
if event.key == pygame.K_SPACE:
if bullet_state == "ready":
bulletSound = mixer.Sound("laser.wav")
bulletSound.play()
Line 1: Applying the conditional statement if on the event.key to check whether event.key == pygame.K_SPACE and if it is true then
Line 2, 3 & 4: we have to again apply the conditional statement if on the bullet_state to check whether bullet_state == “ready” and if it is true then we will play the sound “laser.wav”
# Get the current x cordinate of the spaceship
bulletX = playerX
fire_bullet(bulletX, bulletY)
if event.type == pygame.KEYUP:
if event.key == pygame.K_LEFT or event.key == pygame.K_RIGHT:
playerX_change = 0
Line 2: Assigning the player to bullet.
Line 3: Invoking the function fire_bullet(bulletX, bulletY) with bullet and bulletY as parameters.
Line 4: Applying the conditional statement if on the event.type to check whether event.type == pygame.KEYUP and if it is true then
Line 5 & 6: we have to again apply the conditional statement if on the event.key to check whether event.key == pygame.K_LEFT or event.key == pygame.K_RIGHT and if it is true then we will change the player coordinate to 0.
# 5 = 5 + -0.1 -> 5 = 5 - 0.1
# 5 = 5 + 0.1
playerX += playerX_change
if playerX <= 0:
playerX = 0
elif playerX >= 736:
playerX = 736
Line 3: The += operator in Python adds two values and stores the result in a variable. The addition assignment operator is the name of this operator.
When adding values to a counter variable, which counts the number of times something has occurred, this operator is frequently employed.
In our case, it is playerX=PlayerX+PlayerX_change
Line 4 & 5: Applying the conditional statement if on the playerX to check whether playerX <= 0 and if it is true then we will initialize the playerX=0.
Line 6 & 7: we will again apply the conditional statement else if on the playerX to check whether playerX >= 736 and if it is true then we will initialize the playerX=736.
# Enemy Movement
for i in range(num_of_enemies):
Line 2: Applying for loop over num_of_enemies for movement of enemy.
# Game Over
if enemyY[i] > 340:
for j in range(num_of_enemies):
enemyY[j] = 2000
game_over_text()
break
Line 2, 3 & 4: Applying the conditional statement if on the enemyY[i] to check whether enemyY[i] > 340 and if it is true then we will applying for loop over num_of_enemies for initialization of enemyY[j] = 2000.
Line 5 & 6: Invoking game_over_text() function and then breaking out of the loop
enemyX[i] += enemyX_change[i]
if enemyX[i] <= 0:
enemyX_change[i] = 4
enemyY[i] += enemyY_change[i]
elif enemyX[i] >= 736:
enemyX_change[i] = -4
enemyY[i] += enemyY_change[i]
Line 1: The addition assignment operator is used again for enemyX[i] += enemyX_change[i]
Line 2, 2 & 3: Applying the conditional statement if on the enemyX[i] to check whether enemyX[i] <= 0 and if it is true then we will initialize enemyX_change[i] = 4 and addition assignment operator is used for enemyY[i] += enemyY_change[i].
Line 4, 5 & 6: Then again the conditional statement elif is applied on enemyX[i] to check whether enemyX[i] >= 736 and if it is true then we will initialized enemyX_change[i] = -4 and addition assignment operator is used for enemyY[i] += enemyY_change[i].
# Collision
collision = isCollision(enemyX[i], enemyY[i], bulletX, bulletY)
if collision:
explosionSound = mixer.Sound("explosion.wav")
explosionSound.play()
bulletY = 380
bullet_state = "ready"
score_value += 1
enemyX[i] = random.randint(0, 736)
enemyY[i] = random.randint(50, 150)
enemy(enemyX[i], enemyY[i], i)
Line 2, 3, 4 & 5: This is for collision, to check whether the collision has occurred or not. If yes then we will first play the sound “Explosion.wav” and then
Line 6: Initialization of bulletY to 380 and bullet_state to “ready”
Line 7: Incrementing the score_value variable by 1 using Addition assignment operator.
Line 8: Using the randint() function for randomly assigning integer value to enemyX[i] ranging from 0 to 736.
Line 9: Using the randint() function for randomly assigning integer value to enemyY[i] ranging from 50 to 150.
Line 10: Invoking enemy(enemyX[i], enemyY[i], i) function with parameters enemyX[i], enemyY[i] & i.
# Bullet Movement
if bulletY <= 0:
bulletY = 380
bullet_state = "ready"
Line 2, 3 & 4: Applying the conditional statement if on the bulletY to check whether bulletY <= 0 and if it is true then we will initialize bulletY = 380 and bullet_state = “ready”.
if bullet_state == "fire":
fire_bullet(bulletX, bulletY)
bulletY -= bulletY_change
Line 1, 2 & 3: Applying the conditional statement if on the bullet_state to check whether bullet_state == “fire” and if it is true then we will invoke the function fire_bullet(bulletX, bulletY) with bullet and bulletY as parameters and also we will use addition assignment bulletY -= bulletY_change.
This is done for movement of bullet.
player(playerX, playerY)
show_score(textX, testY)
pygame.display.update()
Line 1 & 2: Invoking player(playerX, playerY) with parameters as playerX & playerY and show_score(textX, testY) with parameters as textX & testY
Line 3: And then finally we will update the score and display the score on the screen.
Output
pygame 2.1.0 (SDL 2.0.16, Python 3.8.12)
Hello from the pygame community. https://www.pygame.org/contribute.html
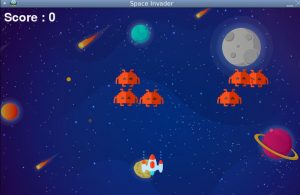
Figure 1: Output of Space Invader Game
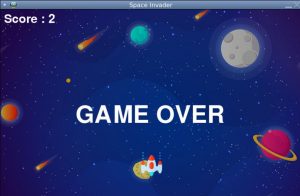
Figure 2: Game Over of Space Invader Game
Overall Code for Space Invaders game using Pygame of Python
import math
import random
import pygame
from pygame import mixer

# Intialize the pygame
pygame.init()

# create the screen
screen = pygame.display.set_mode((800, 500))

# Background
background = pygame.image.load('background.png')

# Sound
mixer.music.load("background.wav")
mixer.music.play(-1)

# Caption and Icon
pygame.display.set_caption("Space Invader")
icon = pygame.image.load('ufo.png')
pygame.display.set_icon(icon)

# Player
playerImg = pygame.image.load('player.png')
playerX = 370
playerY = 380
playerX_change = 0

# Enemy
enemyImg = []
enemyX = []
enemyY = []
enemyX_change = []
enemyY_change = []
num_of_enemies = 6

for i in range(num_of_enemies):
enemyImg.append(pygame.image.load('enemy.png'))
enemyX.append(random.randint(0, 736))
enemyY.append(random.randint(50, 150))
enemyX_change.append(4)
enemyY_change.append(40)

# Bullet
# Ready - You can't see the bullet on the screen
# Fire - The bullet is currently moving

bulletImg = pygame.image.load('bullet.png')
bulletX = 0
bulletY = 380
bulletX_change = 0
bulletY_change = 10
bullet_state = "ready"

# Score
score_value = 0
font = pygame.font.Font('freesansbold.ttf', 32)
textX = 10
testY = 10

# Game Over
over_font = pygame.font.Font('freesansbold.ttf', 64)

def show_score(x, y):
score = font.render("Score : " + str(score_value), True, (255, 255, 255))
screen.blit(score, (x, y))

def game_over_text():
over_text = over_font.render("GAME OVER", True, (255, 255, 255))
screen.blit(over_text, (200, 250))

def player(x, y):
screen.blit(playerImg, (x, y))

def enemy(x, y, i):
screen.blit(enemyImg[i], (x, y))

def fire_bullet(x, y):
global bullet_state
bullet_state = "fire"
screen.blit(bulletImg, (x + 16, y + 10))

def isCollision(enemyX, enemyY, bulletX, bulletY):
distance = math.sqrt(math.pow(enemyX - bulletX, 2) + (math.pow(enemyY - bulletY, 2)))
if distance < 27:
return True
else:
return False

# Game Loop
running = True
while running:

# RGB = Red, Green, Blue
screen.fill((0, 0, 0))

# Background Image
screen.blit(background, (0, 0))
for event in pygame.event.get():
if event.type == pygame.QUIT:
running = False

# if keystroke is pressed check whether its right or left
if event.type == pygame.KEYDOWN:
if event.key == pygame.K_LEFT:
playerX_change = -5
if event.key == pygame.K_RIGHT:
playerX_change = 5
if event.key == pygame.K_SPACE:
if bullet_state == "ready":
bulletSound = mixer.Sound("laser.wav")
bulletSound.play()

# Get the current x cordinate of the spaceship
bulletX = playerX
fire_bullet(bulletX, bulletY)
if event.type == pygame.KEYUP:
if event.key == pygame.K_LEFT or event.key == pygame.K_RIGHT:
playerX_change = 0

# 5 = 5 + -0.1 -> 5 = 5 - 0.1
# 5 = 5 + 0.1
playerX += playerX_change
if playerX <= 0:
playerX = 0
elif playerX >= 736:
playerX = 736

# Enemy Movement
for i in range(num_of_enemies):

# Game Over
if enemyY[i] > 340:
for j in range(num_of_enemies):
enemyY[j] = 2000
game_over_text()
break

enemyX[i] += enemyX_change[i]
if enemyX[i] <= 0:
enemyX_change[i] = 4
enemyY[i] += enemyY_change[i]
elif enemyX[i] >= 736:
enemyX_change[i] = -4
enemyY[i] += enemyY_change[i]

# Collision
collision = isCollision(enemyX[i], enemyY[i], bulletX, bulletY)
if collision:
explosionSound = mixer.Sound("explosion.wav")
explosionSound.play()
bulletY = 380
bullet_state = "ready"
score_value += 1
enemyX[i] = random.randint(0, 736)
enemyY[i] = random.randint(50, 150)
enemy(enemyX[i], enemyY[i], i)

# Bullet Movement
if bulletY <= 0:
bulletY = 380
bullet_state = "ready"
if bullet_state == "fire":
fire_bullet(bulletX, bulletY)
bulletY -= bulletY_change
player(playerX, playerY)
show_score(textX, testY)
pygame.display.update()
Conclusion
In this blog, we’ve covered the Python Pygame library and methods that we used to create the space invader game. Pygame is a Python library that can be used to create other games.
Coding for kids has many beneficial advantages that develop cognitive abilities, enhance communication and entrepreneurship skills, and stimulate creativity. Kids can learn how to create different games using Python. Codingal offers Python for kids course to help your child enhance cognitive, logical, and computational skills. We provide 1:1 live interactive online coding classes with expert coding instructors for kids. Along with lifetime access to course content and downloadable learning resources, to cater to every child’s need by providing a personalized journey. Try a free class today!