Table of Contents
Introduction Step 1: Create a New Project in Thunkable Step 2: Add a Camera Component Step 3: Add an Image Recognizer Component Step 4: Configure the Image Recognizer Component Step 5: Set up the Camera and Image Recognizer Component Step 6: Test your application ConclusionIntroduction
What is Thunkable
Thunkable is a powerful and user-friendly app development platform that allows users to create cross-platform applications for Android and iOS devices. One of the many features of Thunkable is the ability to create image recognition applications. Thunkable offers a range of features that make it easy for non-technical users to create mobile applications. These include a user-friendly interface, pre-built templates, and a range of pre-built components, such as buttons, labels, and text fields, that can be easily customized and added to an application.
What is an Image Recognizer
An image recognizer is a type of computer vision system that uses machine learning algorithms to identify and classify images. These systems can analyze digital images and recognize the objects, people, or features depicted in them.
Step 1: Create a New Project in Thunkable
The first step to creating an image recognizer application in Thunkable is to create a new project. To do this, log in to your Thunkable account and click on the “Create New App” button. Give your project a name and select the category of your project. Then open the project you have just created.
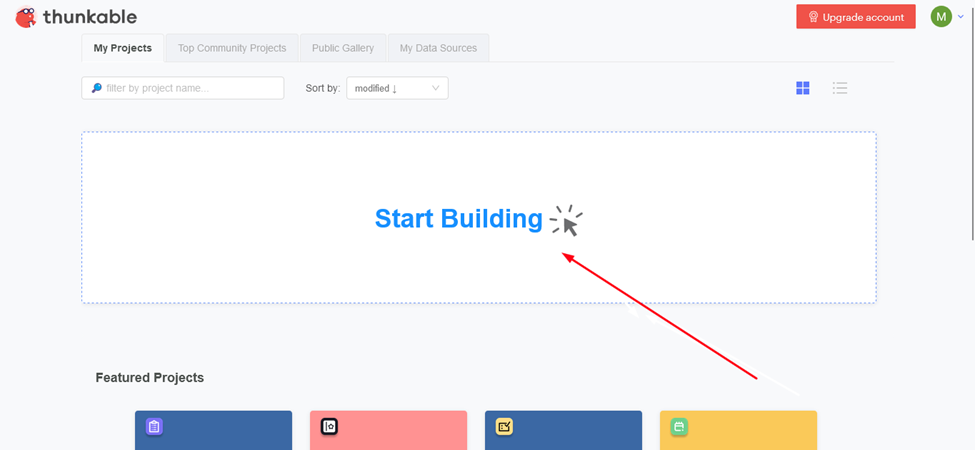
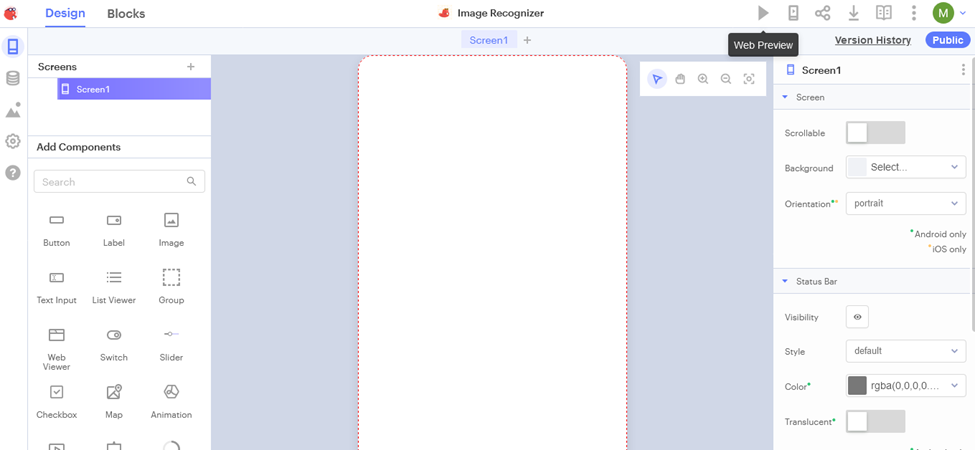
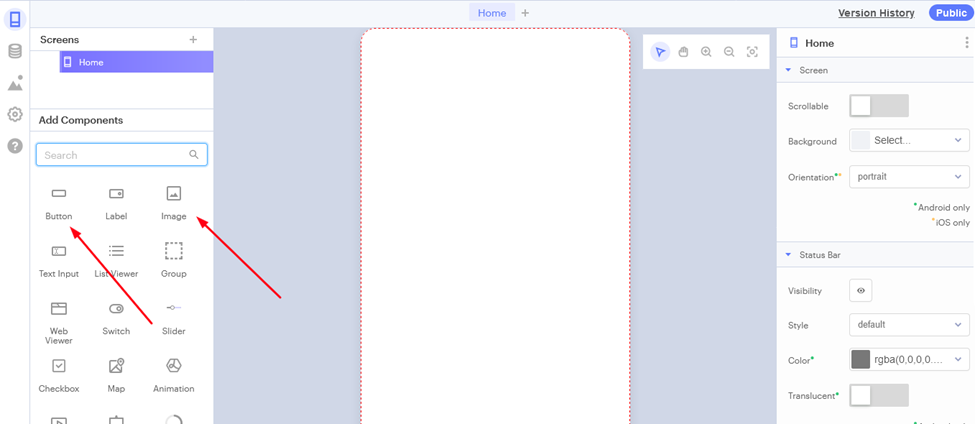
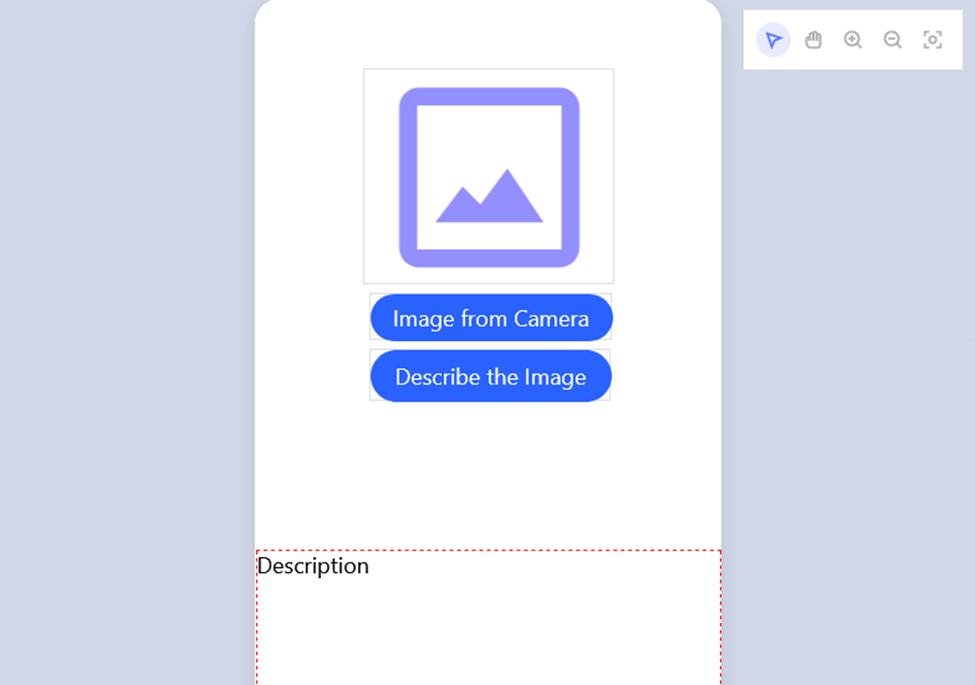
Once you have opened your project, this will be your screen.
Step 2: Add a Camera Component
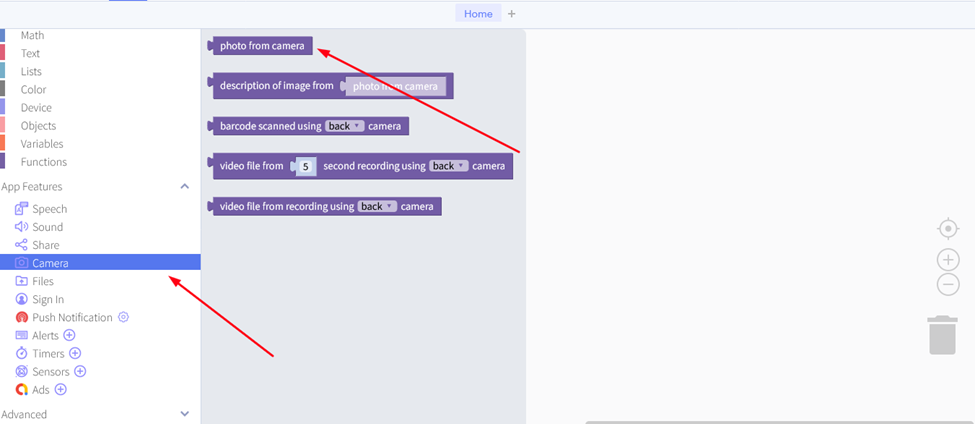
To recognize images, your application will need access to the device’s camera. To do this, add the camera block to your project. You can do this by clicking on the “Block” icon on the top left and then selecting “Camera” from the app features. And drag the “photo from the camera” to the stage.
Now go to the “Design” and from the “Components”, drag and drop “Image” and the “Button” to the screen.
Give the “Button” a helpful and rememberable name so it can be easily recognized later.
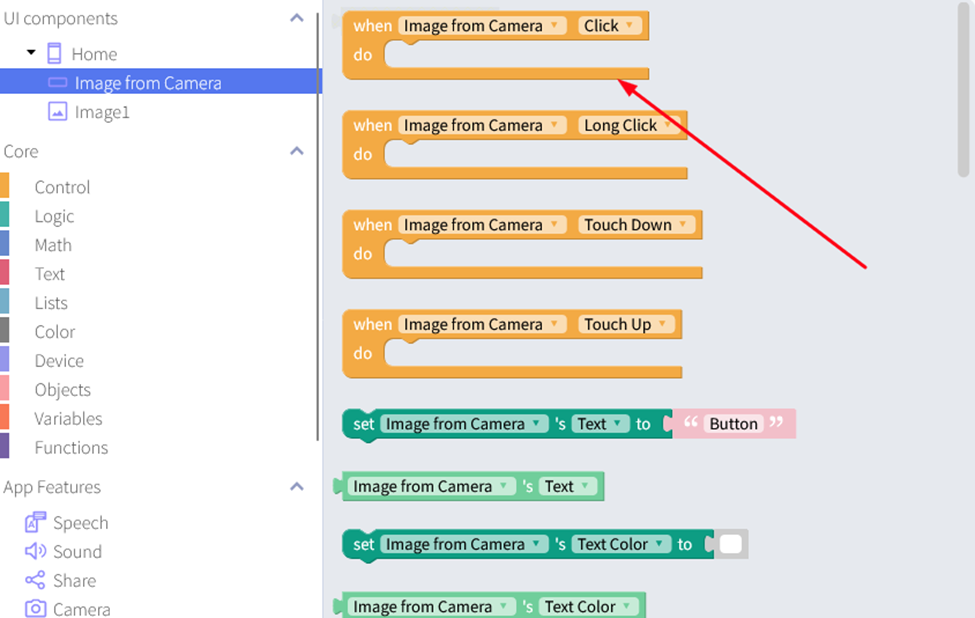
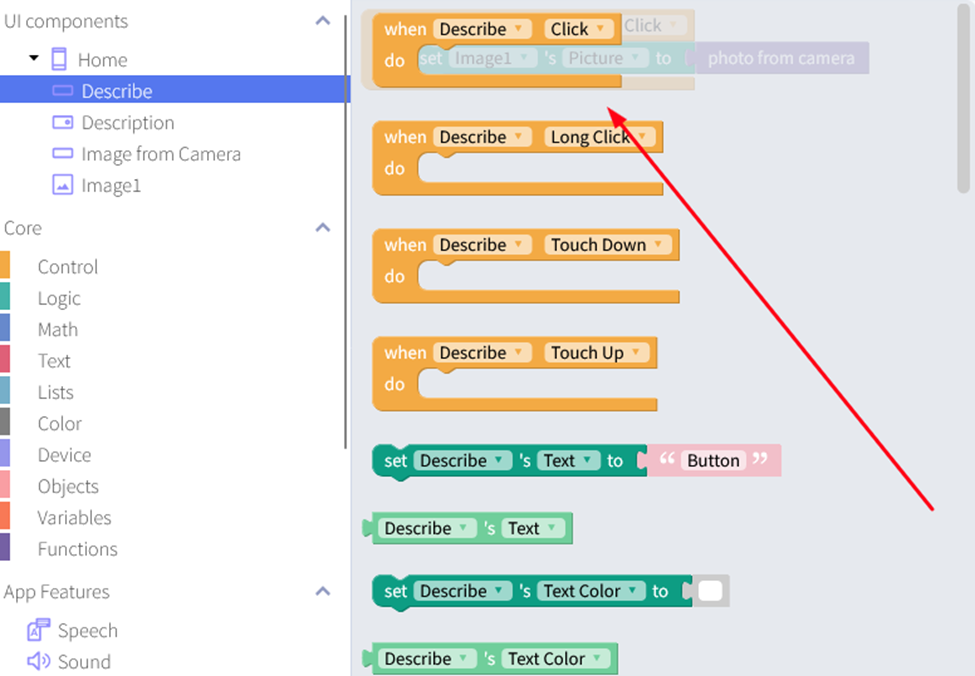
Now go to the “Blocks” and click on “Camera” from the “UI Components.” Select “When click, do” and drag it to the stage.
Then click on “Image” and drag the “set Image’s to” and drag it into the stage.
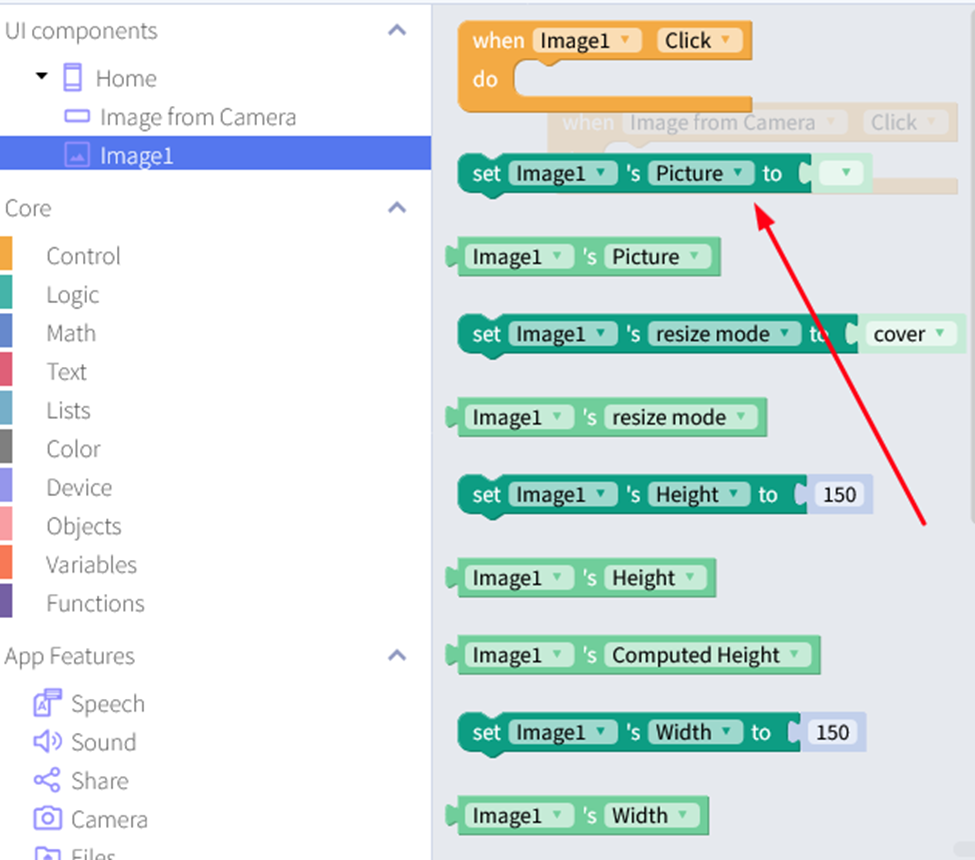
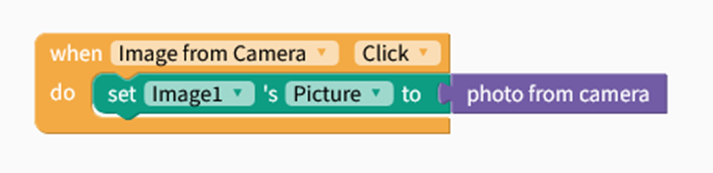
Place this block under the “When click, do” block and join the “photo from camera” with it.
Step 3: Add an Image Recognizer Component
The next step is to add an image recognizer component to your project. This will allow your application to identify images captured by the camera. To do this, add another “Button” and add a “Label” from the “Components” tab to the screen.

Set the name of the “Button” to “Describe” as it will describe the image. And set the name of the “Label” to “Description” as the description will be displayed here. Position them on the screen as you want.
Step 4: Configure the Image Recognizer Component
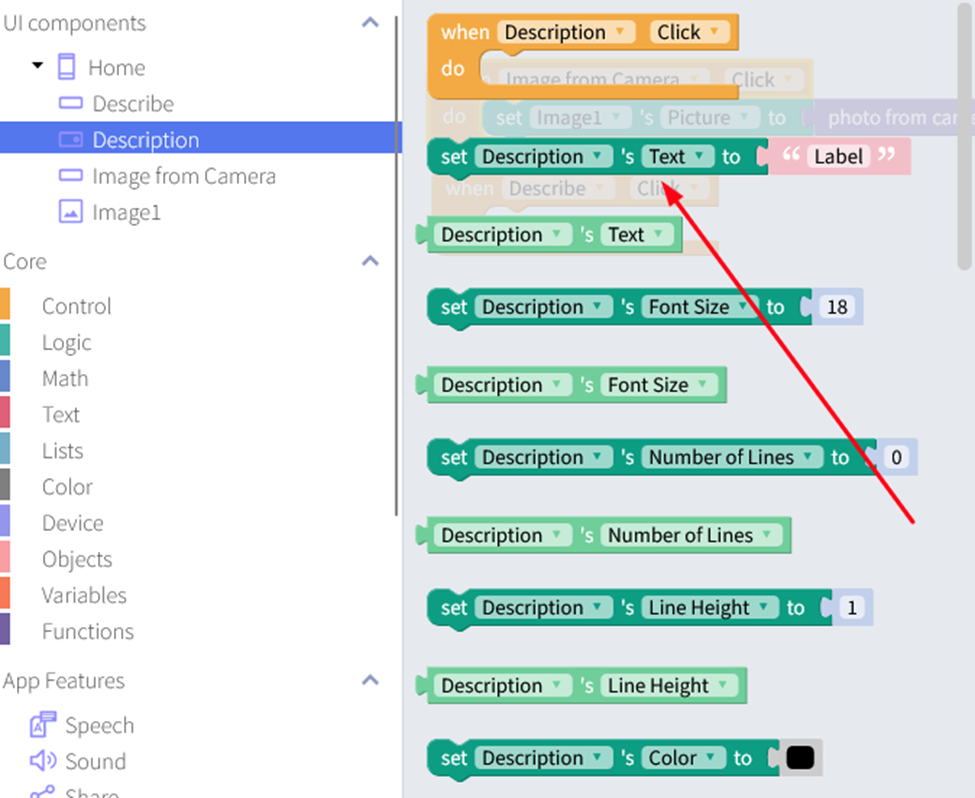
Once you have added the image recognizer component to your project, you will need to configure it. To do this, go the “Blocks” and drag out the “When click, do” block,
Now click on the label you created, here named as “Description” and drag out the “Set Description’s text to” block to the stage.
Step 5: Set up the Camera and Image Recognizer Component
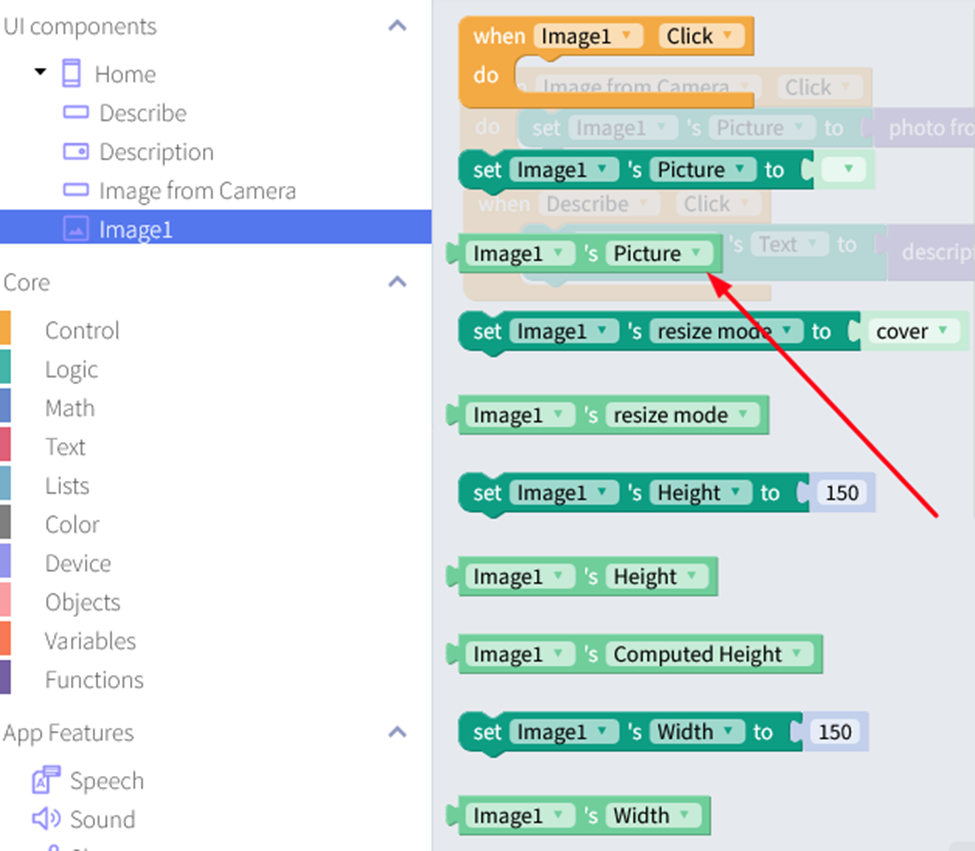
To set up the camera and the image recognizer, click on the “Camera” in the “App Features” and drag out the “description of image from photo from camera.” And join it with the “Set Description’s text to” block.
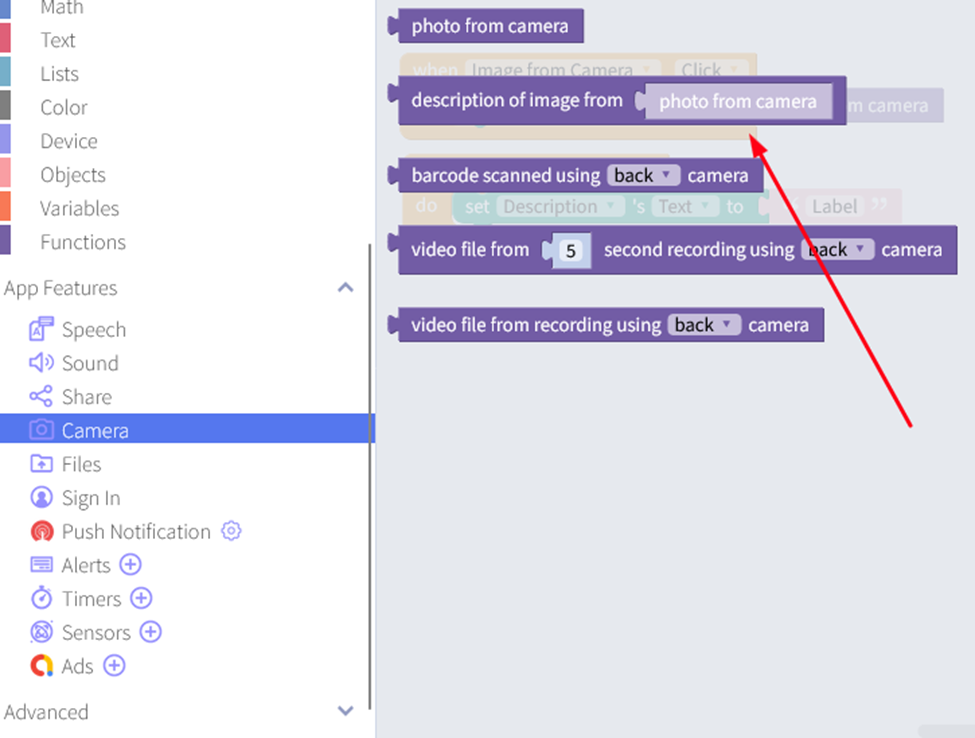
We have already stored the image from camera to “Image” so just click on “Image” from “UI Components” and drag out “Image’s Picture” block and place it in the “photo from camera.”
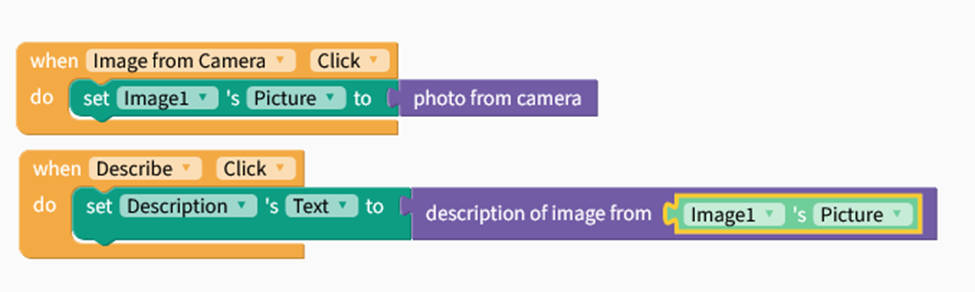
The Blocks screen should look like this:
Step 6: Test Your Application
Once you have set up your application logic, it’s time to test your Image Recognizer. To do this, click on the “Test” button at the top of the screen. This will open a preview of your application in a web browser. Thunkable also offers live testing which enables users to test their apps in real time on their mobile phones.
With Thunkable’s live testing service, users can download the Thunkable Live app on their mobile phones and connect it to their Thunkable project. Once connected, they can see the changes they make to their app in real time on their phone, without needing to publish the app to an app store or emulator.
This feature offers several advantages to app developers. First, it saves time and effort by eliminating the need to build and test the app on an emulator or upload it to an app store for testing. Second, it allows for quick iteration and troubleshooting, as users can immediately see the impact of their changes on their app.
Thunkable’s live testing service also offers a collaborative feature that enables users to share their app with others for testing and feedback.
Conclusion
Building an image recognizer application using Thunkable is an exciting and rewarding experience. With Thunkable’s user-friendly interface and drag-and-drop functionality, even those without prior programming knowledge can easily create an app that can identify objects and images. Throughout the development process, it is important to pay close attention to the details and ensure that the app is properly setup to accurately recognize images. Additionally, testing the app thoroughly and making necessary adjustments is crucial to ensure that it performs smoothly and as intended. And once the app is complete, it can be shared with others and used to enhance a variety of industries.
Coding for kids has many beneficial advantages that develop cognitive abilities, enhance communication and entrepreneurship skills, and stimulate creativity.