Table of Contents
Introduction Understanding Canvas in Thunkable Using Sprite in Thunkable Tips and Tricks ConclusionIntroduction
Thunkable is a popular platform for building mobile applications. With its intuitive drag-and-drop interface and a wide range of tools and features, it has become a go-to solution for those looking to create custom mobile apps quickly and easily. One of the most powerful features of Thunkable is its canvas and sprite components, which allow developers to create interactive and engaging user interfaces.
In this article, we will take a closer look at canvas and sprite in Thunkable and explore some tips and tricks for getting started with these powerful tools.
Understanding Canvas in Thunkable
The canvas component in Thunkable allows developers to draw shapes, lines, and images on a canvas. With this feature, you can create custom designs, logos, and graphics to enhance your mobile app’s user interface. To get started with the canvas component, drag and drop it onto your app’s interface from the components palette.
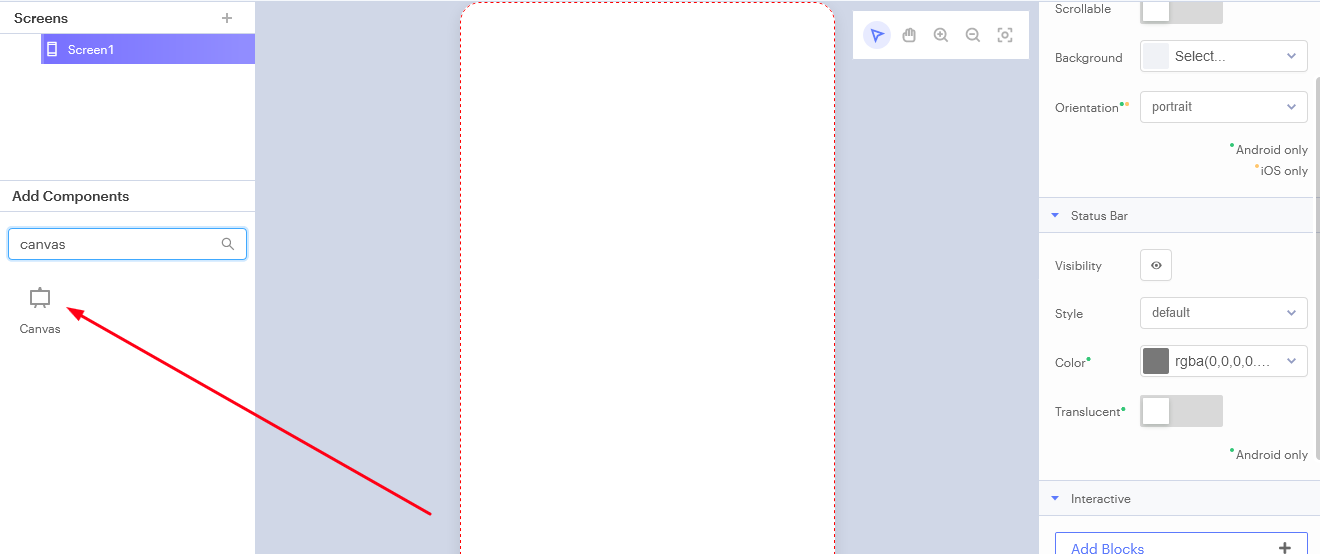
Once you have added the canvas component, you can start customizing its properties to fit your needs. You can set the canvas’s width and height, choose a background color or image, and select the stroke color and width.
Using Sprite in Thunkable
The sprite component in Thunkable is a powerful tool for creating animated and interactive user interfaces. With the sprite component, you can create custom animations, add interactivity to your app’s interface, and even create simple games. To make use of sprites on your project, after adding the “Canvas” to your screen. Click on “Sprite_Type1” on the screens tab on the top-left corner. Then you can add your own sprite or make use of the sprite that is already there. To add your own image and use it as a sprite, click on “Add Sprite Type” under the “Sprite Class” on left-hand side, then click on “No file source” to upload your own Sprite. You can upload multiple sprites and give meaningful names to them.
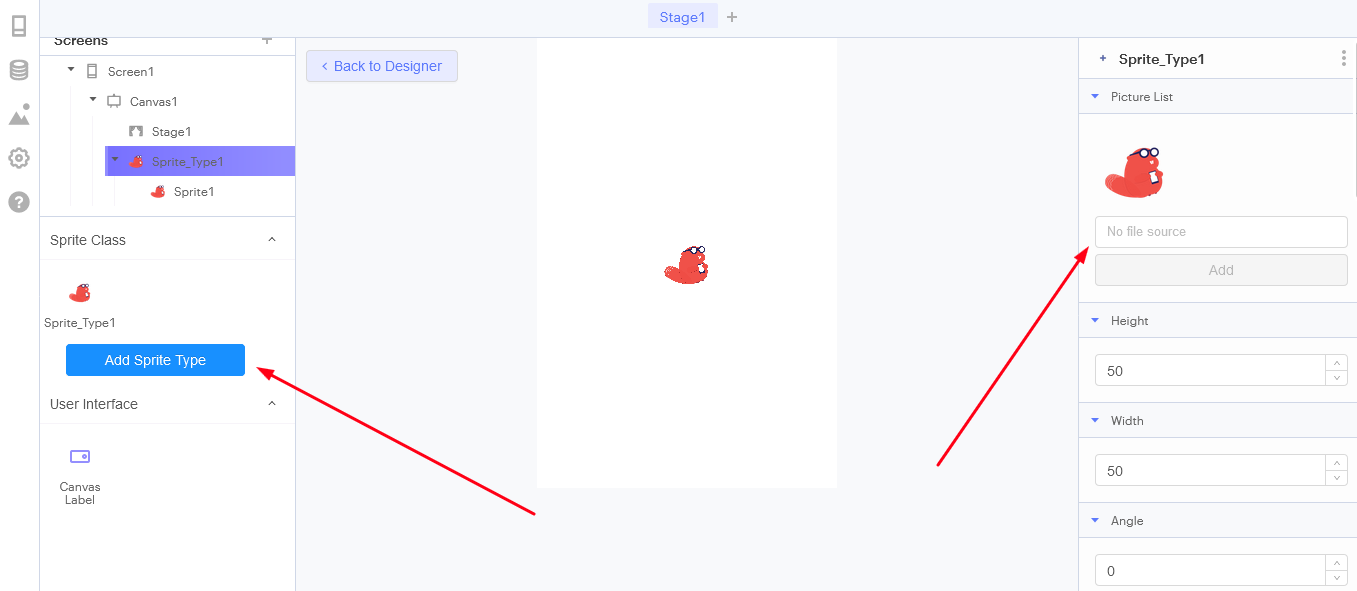
Once you have added the sprite component, you can start customizing its properties to fit your needs. You can set the sprite’s size, image, and position, and choose how it will behave when interacted with. You can also use the sprite’s built-in functions to create animations, change its position on the screen, and add sound effects.
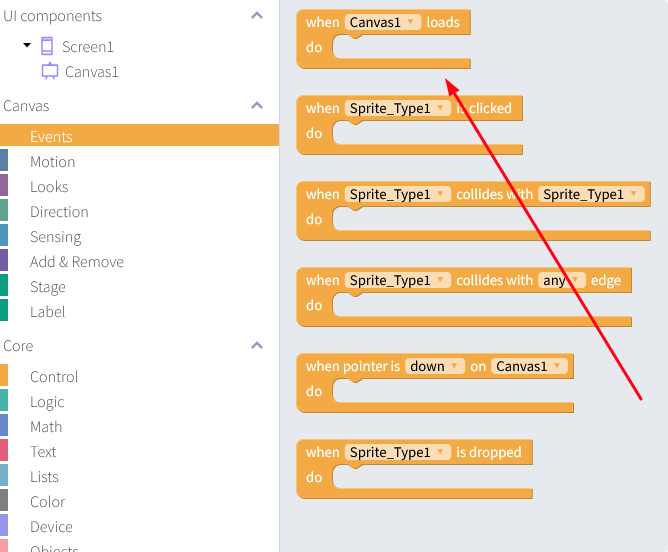
To add animation to a sprite, go to the “Blocks” screen. Click on the “Events” tab on the left-hand side and drag out the “When Canvas1 loads, do” block, and place it on the screen.
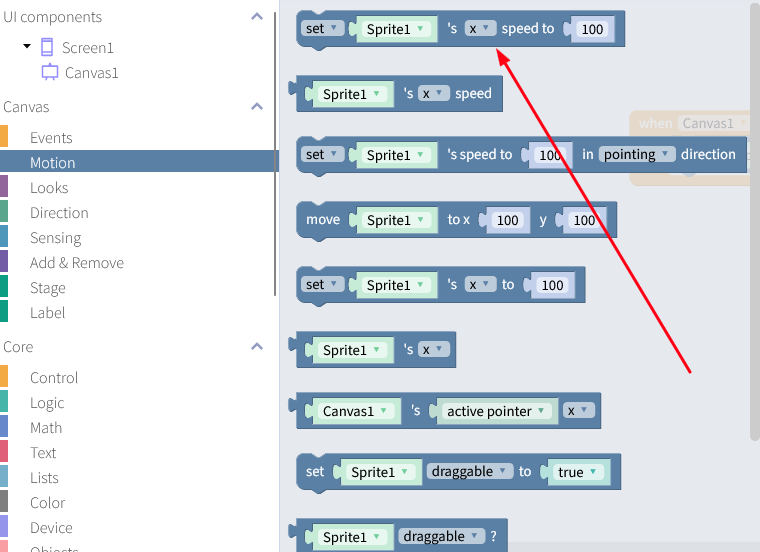
Now click on the “Motion” tab on the left-hand side and drag out the “Set Sprite1’s x speed to 100” block and place it inside the “When Canvas loads, do” block. You can set the speed of motion of the sprite in place of “100” in the block.
Now when you use the “Web preview” the sprite on the screen will glide to the right side of the screen. If you set the value to negative, it will glide to the left side of the screen.
While using canvas and sprites in Thunkable you should be thinking outside the box to create a unique and eye-catching application for the users. You can use your own imagination to design how your application will look like.
Tips and Tricks
Here are some tips and tricks to help you get started with canvas and sprite in Thunkable:
- Start with simple designs and animations: If you are new to canvas and sprite, start with simple designs and animations before moving on to more complex projects.
- Use pre-made graphics and sound effects: Thunkable has a library of pre-made graphics and sound effects that you can use in your app. This can save you time and help you create professional-looking designs and animations.
- Use variables to control sprite behavior: You can use variables in Thunkable to control the behavior of your sprite. For example, you can use a variable to track the sprite’s position on the screen or to determine when an animation should start or stop.
- Experiment with different drawing and animation techniques: There are many different techniques you can use to draw on the canvas or animate your sprite. Experiment with different techniques to find the ones that work best for your app.
Conclusion
Canvas and sprite are powerful tools in Thunkable that allow developers to create custom graphics, animations, and interactive user interfaces. With a little practice and experimentation, you can use these tools to enhance your mobile app’s design and create engaging user experiences. Whether you are a seasoned developer or new to app development, canvas, and sprite are tools you should definitely explore in Thunkable.
The benefits of learning app development for kids doesn’t require prior knowledge of coding. At Codingal, kids start app development at a very young age. They learn concepts in coding through practical activities and creating fun projects.
Our specialized course in app development focuses on amplifying critical skills like problem-solving, game design, logical thinking, and building complex games using text-based programming.
Try a free class with us and see how your child can create their first functional game in under an hour!