Table of Contents
Introduction Benefits of Scratch Games for Kids Four Main Components of Scratch Steps for Creating Games in Scratch Bouncing Ball Game in Scratch Steps to Make Brick Breaker Game ConclusionIntroduction:
Brian Silverman, Paula Bonta, and Mitchel Resnick co-founded Scratch, an event-driven visual programming language created by the MIT Media Lab and Playful Invention Company.
Kids were originally introduced to Scratch programming in 2003 as a technique to learn coding in an easy-to-understand manner. To start their coding journey, people of various ages now employ programming from Scratch.
Scratch is utilized in more than 160 nations and is available in more than 70 languages. Students of diverse backgrounds and academic disciplines learn to code on Scratch since it gives them the chance to develop the necessary skills for the twenty-first century (math, liberal arts, social sciences). While working, studying, and working in teams, encourages creative thinking in people.
In reality, Scratch has been recognized as the world’s 19th most popular computer programming language as of May 2020! Scratch, though, is undoubtedly very different from the other programming languages on that list.
Scratch gets its name from the “scratching” method employed by disc jockeys, in which vinyl records are clipped together and manipulated on a turntable to create various sound effects and music.
By developing and “remixing” projects like video games, animations, and simulations, the website allows users to creatively combine various materials (including visuals, sound, and other applications), much like scratching.
Scratch is a fun way to learn the fundamentals of programming. It serves as a tool for developing fascinating stories, games, and other block-based programming.
Its own sound designer and paint editor are available. Even those without prior experience with programming languages and ideas can begin learning programming with Scratch.
Benefits of Scratch Games for Kids:
- Enhanced Originality: By enabling children to create and code their own interactive stories, games, and animations, Scratch games encourage originality exploration and creativity in young kids.
- Solving Problems: Kids are encouraged to use their imaginations and a visual programming language to solve challenges.
- Math abilities: It encourages the use of math abilities like addition, subtraction, and counting.
- Communication: Effective communication is a skill that children acquire via exchanging ideas and cooperating to produce a final result.
- Collaboration: Since kids may collaborate to create their game concepts, playing Scratch games encourages teamwork among them.
- Tech Skills: It aids with the development of children’s technical abilities in areas like animation, game design, and coding.
- Critical Thinking: By letting youngsters discover and try out various problem-solving techniques, some of the Best Scratch games for kids develop creative thinking abilities.
- Self-Expression: Children may explore their ideas and express themselves artistically via the use of Scratch games.
Four Main Components of Scratch:
- Stage: The stage employs x and y coordinates, with 0,0 serving as the stage center, and the stage area displays the results.
- Script: Everything in the script specifies the type of operation that should be performed by sprites. It directs what the characters should say or do. Every sprite has a script written into it. It may be executed by clicking the code itself or the green flag.
- Sprite: Sprites are the program’s primary characters. The sprites are used for all actions. Users can design their sprite, by default a cat avatar sprite is shown on the sprite panel.
- Blocks Palette: It has puzzle-piece forms that may be used to write Scratch programming. Like jigsaw pieces, these blocks are vertically attached. Each block has a unique structure that prevents syntactic errors. Scripts are what these blocks become after being joined. Hat, Stack, Boolean, Reporter, C, and Cap are the six various forms that are offered by Scratch.
Steps for Creating Bouncing Ball Games in Scratch:
- Planning: In this step, you choose the fundamental idea behind the game. For instance, you may choose to create a maze-solving game or a two-player pong game. Choosing the target audience for your game and the appropriate level of difficulty are crucial decisions.
- Pre-Production: One of the most important stages is this one. It’s time to demonstrate your originality. Here is where you create your game’s storyboard. The characters you pick, the setting they will be in, and the interactions they will have with one another must all be planned. Sprites are used in Scratch to generate characters, and backgrounds are used to construct the environment.
- Production: The Scratch Editor is where you start coding your game at this point. You will choose your backgrounds and sprites, add code, specify how they interact, and add sounds and effects. For more complex games, you will put up a score system and the reasoning for moving on to higher levels.
- Debugging and Testing: Once your game is set up, you will check to see if everything is working according to plan. Check to see whether the interactions between your sprites and backgrounds are occurring as intended and if your scoring system is functioning as intended. Game development is the process of analyzing results and making adjustments. Getting the game tested with a couple of your pals is always a smart idea. New players can frequently spot problems that the game creator missed since we want our game to be the best.
- Publish or Launch: Your significant bugs have been fixed. It’s time to clean up any last-minute bugs and improve your game. For instance, you might wish to check that the sounds you choose are appropriate. When everything is ready, the launch can begin. Once you’ve hit publish in the Scratch Editor, then we are good to go.
A variety of projects, including games, storytelling, and animation, may be created with Scratch. These are the five stages that a typical game development process goes through. However, there may be other phases, such as Pre-Launch and Post Production, depending on how sophisticated the game is.
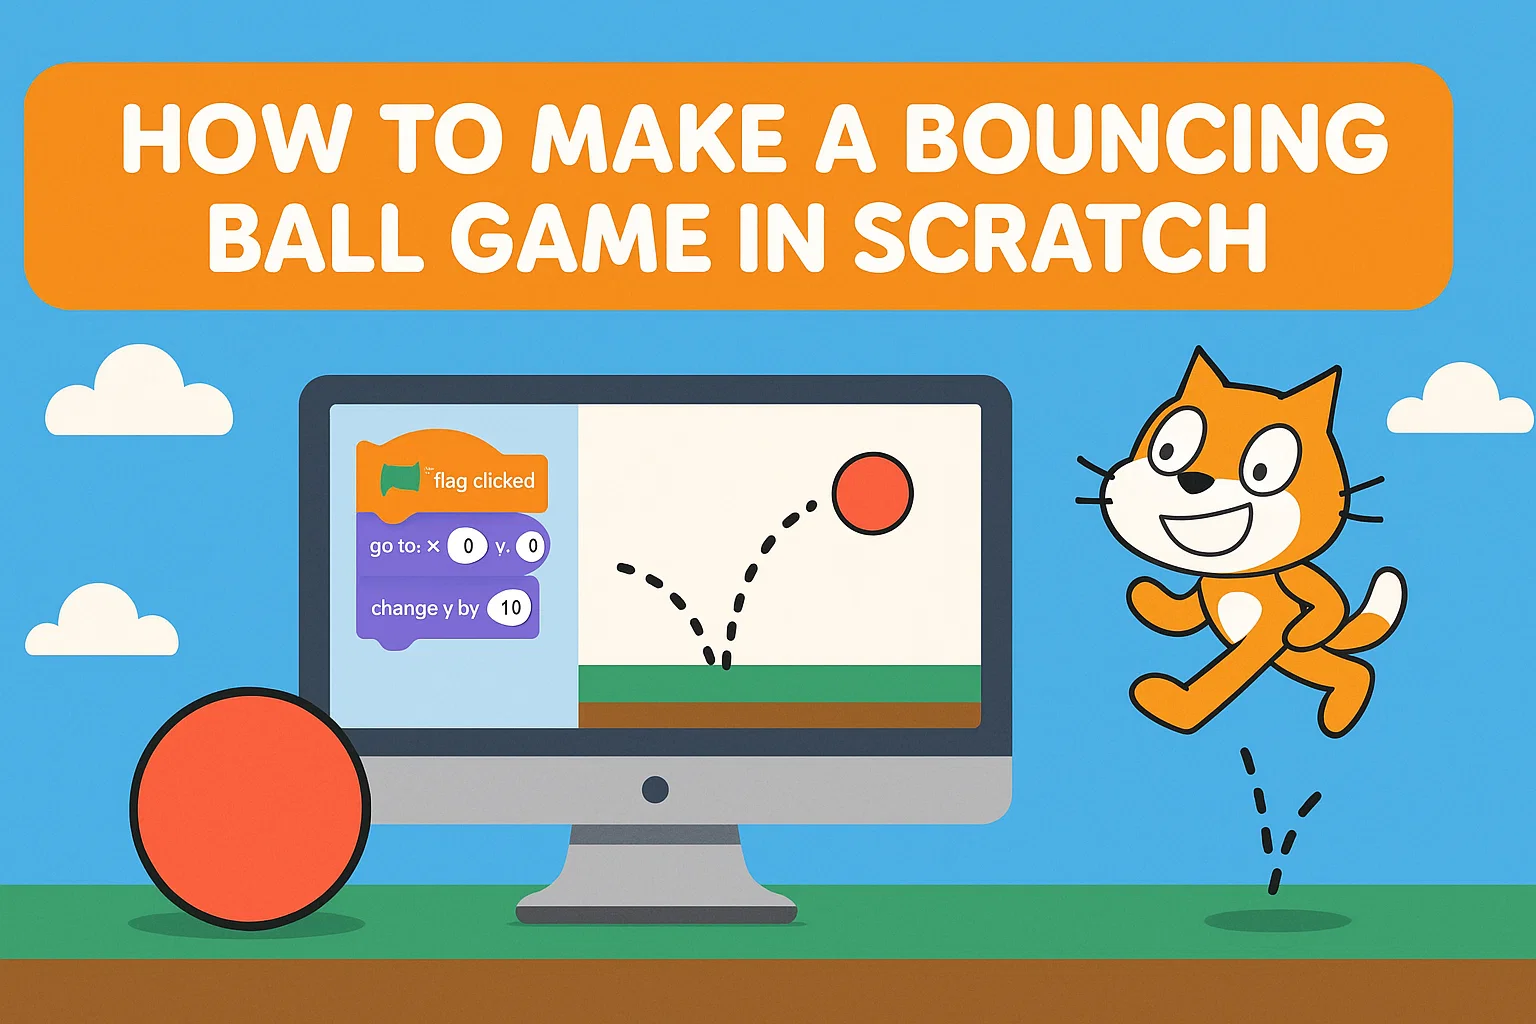
Bouncing Ball Game in Scratch (Brick Breaker Game):
Brick Breaker Games on Scratch may have a variety of various types depending on the goal, rewards, and sprite movement.
In a brick-breaking game, your goal is to prevent a ball from striking the bottom of the screen by using a paddle and a continually moving item, such as a ball. The ball bounces off of the paddle each time it strikes it, and if the ball contacts a brick, you score.
In Bouncing Ball, the player has to dodge balls that bounce all over the stage by using their mouse pointer.
More points are awarded the longer we play the game. To set up the paddle, bricks, and ball in Scratch, use sprites. To complete the game’s goals and establish the scoring system, write code.
Steps to Make Brick Breaker Game:
1. On the Scratch stage, set up the stage and make the Ball sprite bounce:
Setting up the sprite (ball), backgrounds, and ball bounce on the Scratch stage is the initial step in creating the pong game. The following explains how to do this in the Scratch editor:
There will be a Sprite catalog shown. Any character from Scratch’s sprite library may be chosen. We will click on the Ball sprite to choose it for this game.
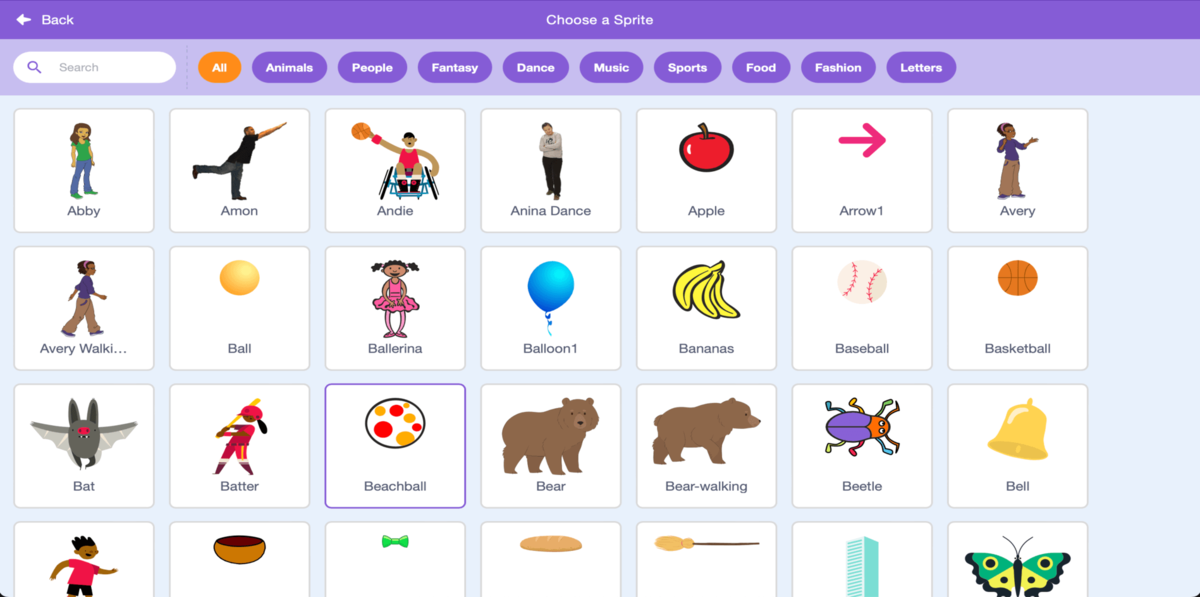
Fig 1: Sprite Library
In this game, we will click on backgrounds to choose the paint. Additionally, we’ll create three backdrops: a basic background for the game & you win, and a backdrop representing the game’s end. From Scratch’s background collection, you may select any backdrop.
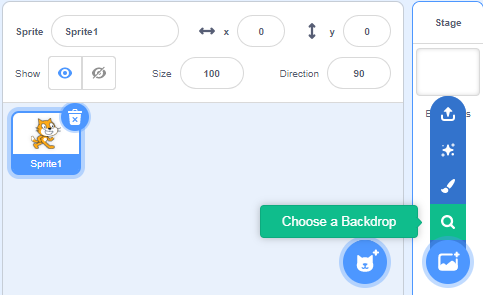
Fig 2: Backdrop Window
The ball will move the specified amount of steps when you click and drag the “move steps” block from the motion category of blocks. Include this block in an infinite forever loop. Drag and drop the “forever” block from the control category of blocks.
- The ball will now move until it reaches the wall or stage’s edge, at which point it will stop. To regain control of the ball, drag and drop the “if on edge bounce” block. This will cause the ball to bounce around the stage.
- Nonetheless, the ball will continue to travel in a single, straight horizontal path back and forth. Instead of having it bounce in a single line, let it bounce around the screen. Drag and drop the “point in direction” from motion blocks.
- The ball will now be seen traveling across the stage and bouncing off its four edges.
- To make the ball move when you click on the green flag, drag the “when green flag clicked” block to the top. After that, enter the paddle and brick-touching conditions.
- Include a condition using if-then block from conditions, and “touching [brick]” from sensing block.
- The ball should now bounce if it makes contact with the brick.
- To do that, drag and drop the “turn degree” block from the “motion category” of blocks.
- Set the turn angle to 180 degrees, which will cause the ball to travel oppositely after it comes into contact with the brick.
- Include a condition using if-then block from conditions, and “touching [paddle]” from sensing block.
- Add some variety to the ball’s bounce to improve the game.
- Drag and drop the “pick random” block from the “operator” category to change the turn angle to a random value between 90 &120 degrees.
- The ball will now bounce off the paddle in any direction once it strikes it, and we can control the paddle with the mouse cursor.
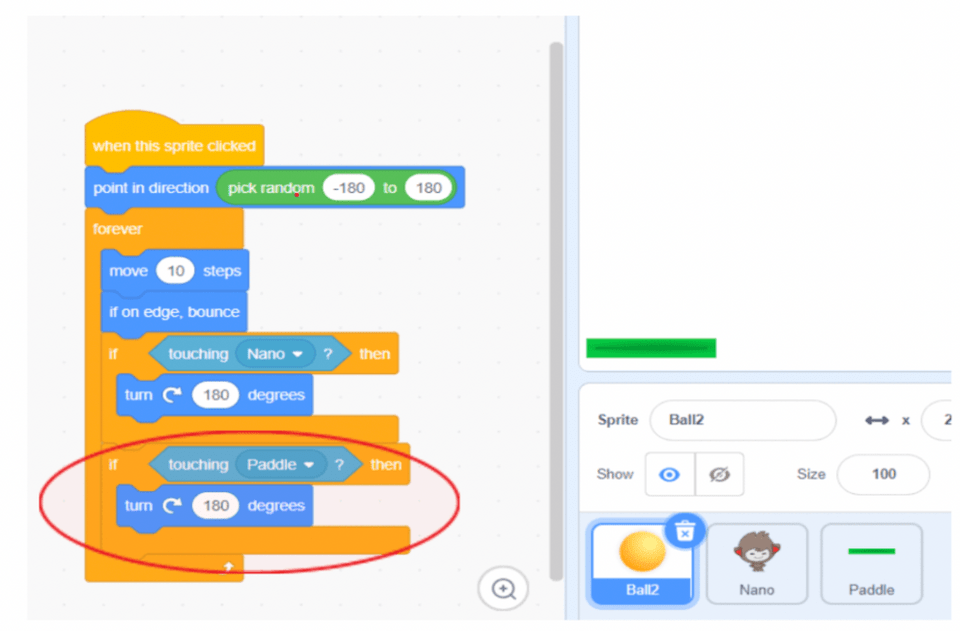
Fig 3: Code for Ball Sprite
2. Insert a Paddle Sprite along with the code of moving left and right direction.
Choose Paddle Sprite> Click on “Choose a Sprite”.
- Search for the Paddle spite in the search bar and click on it to select it.
- Drag the Paddle sprite to the bottom center of the stage.
- The Paddle sprite has to be configured such that it moves in response to left and right mouse movements.
- For this, we’ll combine the “go to x and y” and “mouse x” blocks. In the coding area, drag and drop the “go to x and y” block.
- The Paddle may be made to move from the left to the right side of the screen by changing the value of x.
- Now, we’ll connect the value of x to the mouse’s movement. Drag & drop “mouse x” from the sensing category of blocks, then set its value to x. Put the “go to x and y” block within a “forever block” that you use.
- The paddle will enter a never-ending loop as a result. The paddle will move left and right in sync with your mouse movements.
- To move the “when green flag clicked” block to the top of the code, drag and drop it.
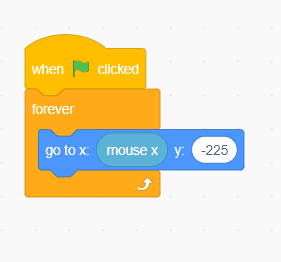
Fig 4: Code for paddle sprite
3. Add bricks to the game; there will be three lines of various colored bricks.
As seen in the below screenshot, we now need to add brick with three different colored costumes.
Fig 5: Brick Sprite
- We want to create ten identical copies of every colored brick utilizing the cloning concept. There will be three lines, each with ten bricks of the same color. You may use a variable in Scratch to store a value, like the score of your game. Select the “Variables” block category. Select “Create a Variable.” Give the variable name as count.
- There is a count variable that keeps track of how many bricks we have broken; it starts at 30 because there are 30 bricks overall. As the ball strikes the bricks, the count value also drops by 1.
- The user wins the game when the count number reaches 0, at which point the “you win” background will appear.
4. Add the Line Sprite:
- The idea behind Line Sprite is that if the ball touches the bottom border of the screen, the game should be over.
- Click on “Choose a Sprite”.
- Type Line in the search bar and select the “Line” sprite by clicking on it.
- Now drag the red line sprite to the bottom of the screen.
- It is now necessary to create a condition that verifies the game must end if the ball hits the red line. Drag & drop the “if-then” block. Drag and drop the “touching” block from the sensing category and choose “Ball.”
- Drag & drop the “stop all” block. Put this within a forever block so that the red Line sprite is always determining if the ball has touched it. Add a when the “green flag” clicked block.

Fig 6: Code for Line sprite
The Bouncing Ball game has been finished in scratch! To begin playing Bouncing Ball, click the “green flag”.
Conclusion:
Block-based language Scratch programming has an interactive graphical user interface and is simple to learn. Children may use this to create a variety of projects, including games, animations, and stories. Scratch is a true coding environment for kids and the world’s largest coding community.
Learning scratch programming may foster your child’s creativity, help them become more mathematically proficient through real-world applications, improve their capacity for logical and analytical thinking, and undoubtedly benefit their coding education.
Explore Scratch through Codingal’s interactive learning platform, and we’re offering a FREE Scratch programming class for kids in grades 1 to 12. Reserve your spot now!