Creating any animation from scratch requires sufficient knowledge of the Scratch platform. So we have to first imagine the animation we have to make, including its background, the character, and the motion. The next step is to create the animation in Scratch, which can be proceeded by sharing the animation with others on the scratch platform.
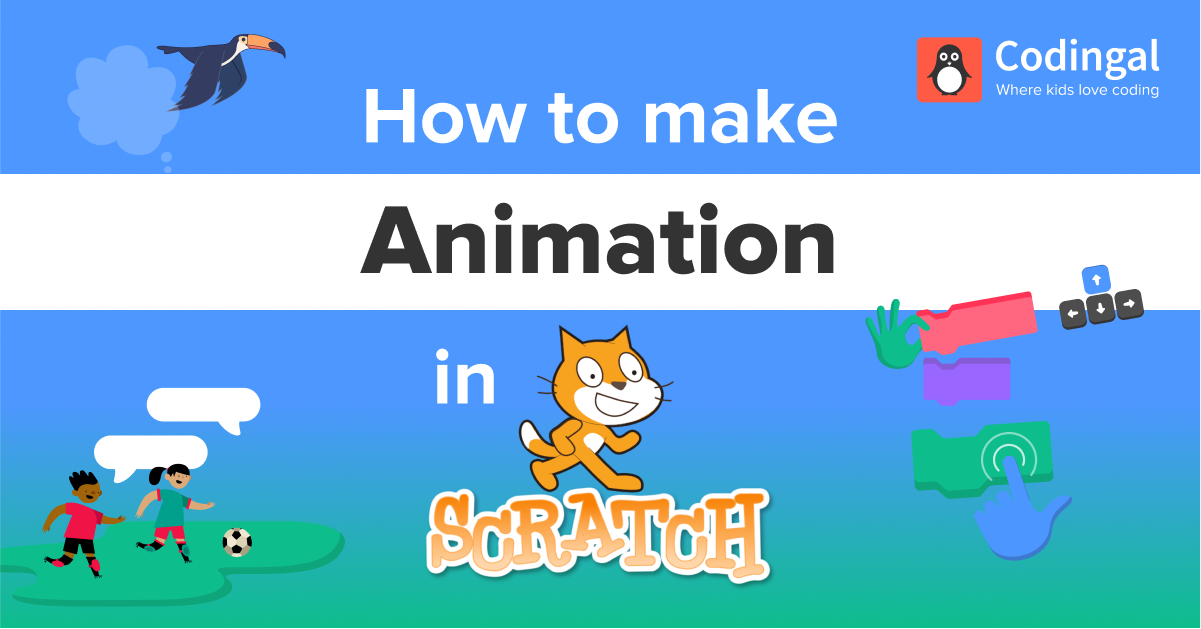
Introduction
An animation project consists of a sequence of images of the motion of objects to create a video. On Scratch, users can make short movies, music videos, comical shorts, and more through various techniques. Animation can involve programming sprites to talk, move, and interact.
In this blog, we will discuss the prerequisites that you should be aware of before creating animations in Scratch. The steps required to follow generally while creating any scratch animation, an example that will demonstrate creating animation in Scratch.
Prerequisites
You must know various elements of the Scratch platform before proceeding to make an animation. Let’s discuss some of the most important ones among them.
Stage
An area where you can see the output of the project and how it’s running by clicking on the green flag above it. You can stop running your project by clicking on the red button.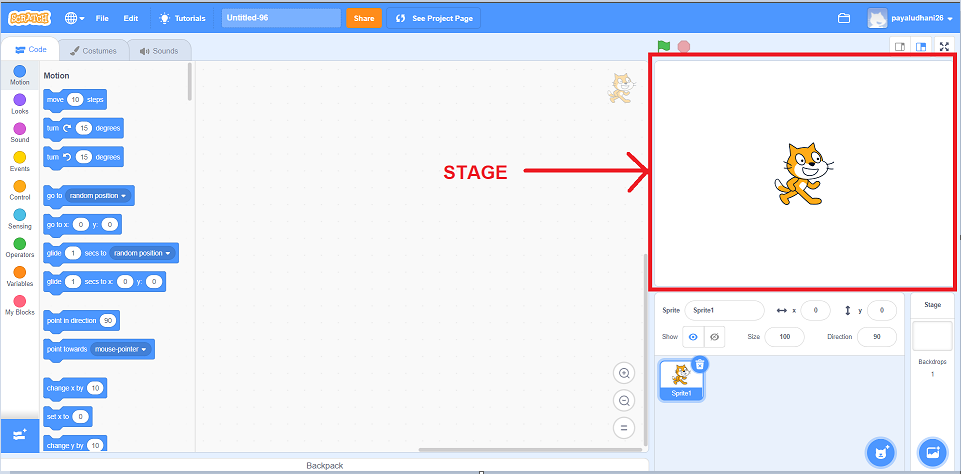
Script area
This is the place where you will have all your instructions and your blogs placed. Scratch provides different script areas for each sprite and the background section.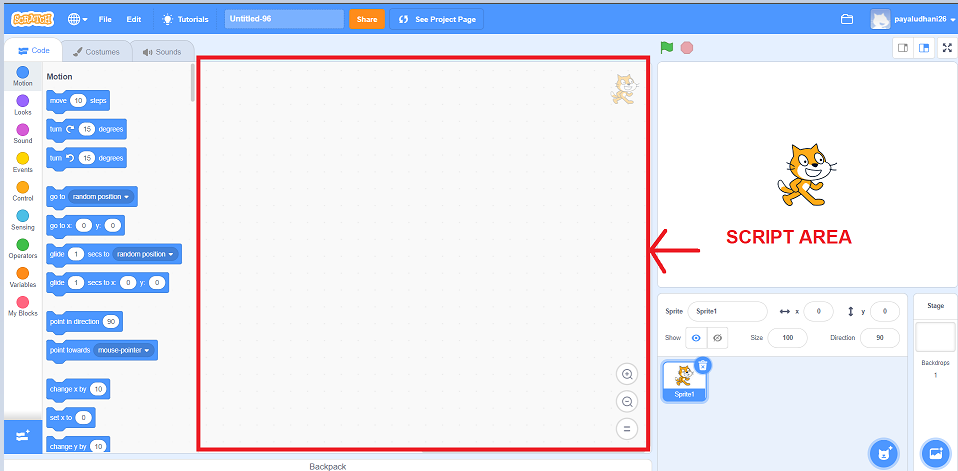
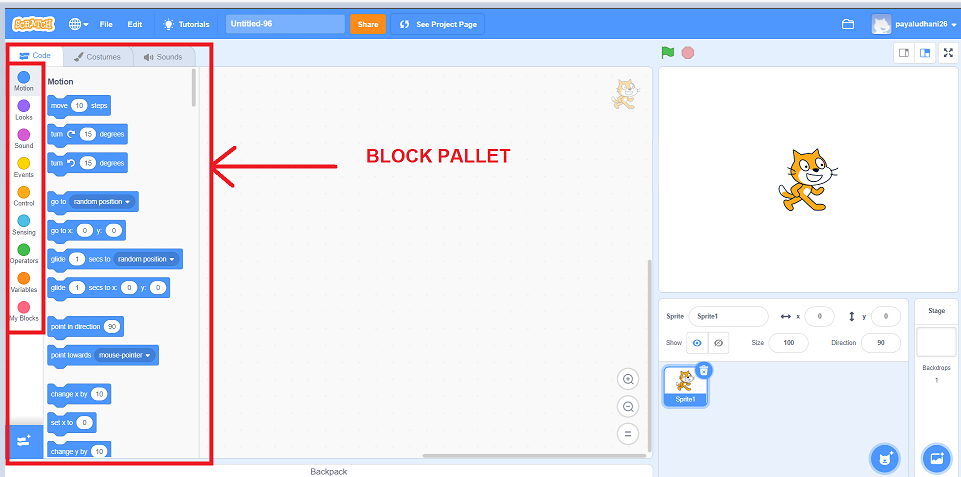
Block Pallet
It contains nine categories of blocks that can be used to code for the project in the script area. All you need to do is drag the required block and drop it on the script area.
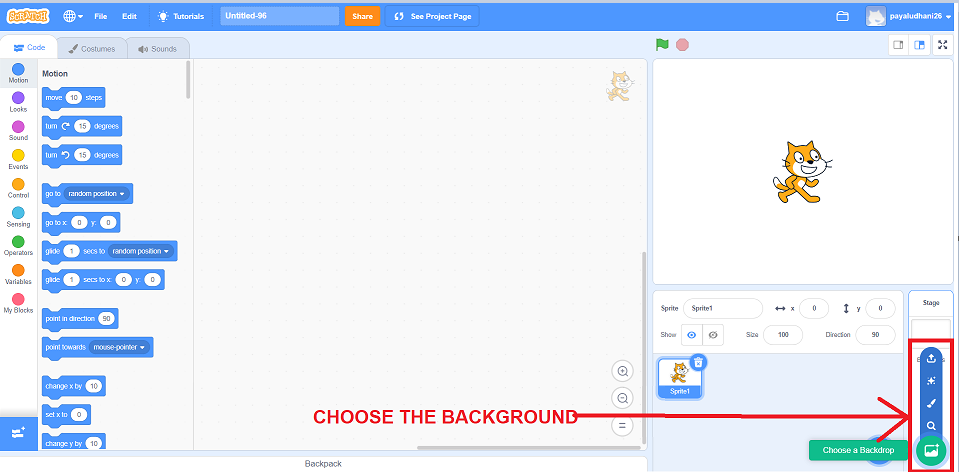
Background selection
You can either upload an image stored on your device or select the background from the Scratch gallery or opt for painting your own background or get a random surprise background by clicking on the surprise option. All you need to do is to hover your mouse over the icon as shown below and choose the appropriate option.
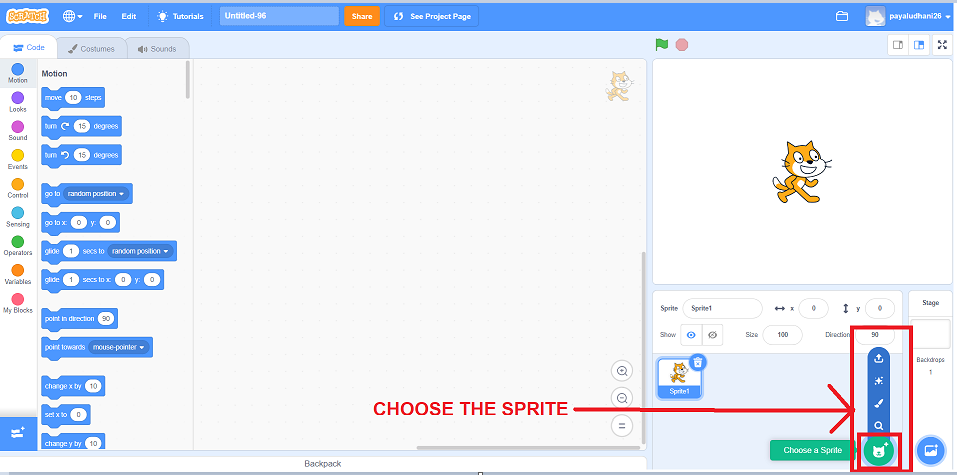
Choose the sprite:
Sprites are nothing but the characters that you want in your project. You can choose the sprites in the same way you select a background. You get four options here: uploading from your device, getting a random surprise sprite, painting your sprite, and choosing the sprite from the gallery, as shown in the image below. The process of selection remains the same as that of background selection. Hover your mouse over the icon and choose the appropriate option. You can have more than one to any number of sprites you require on stage.
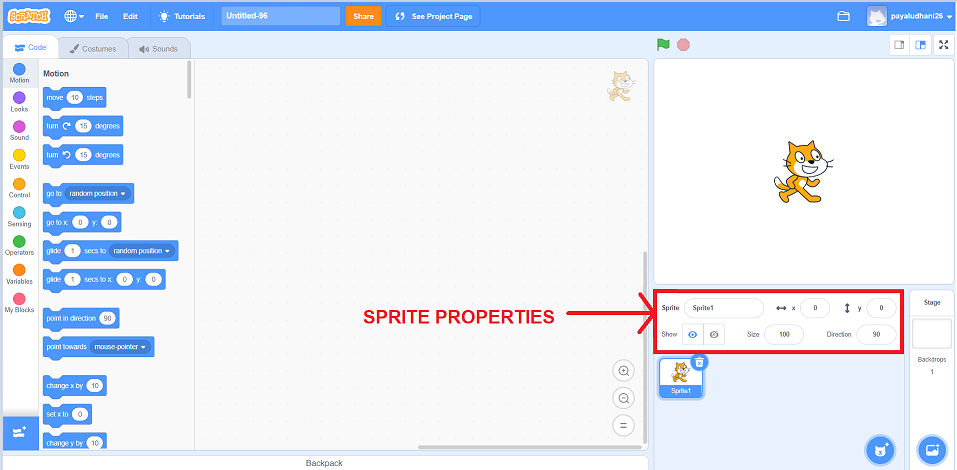
Sprite properties
Here, you can look at and modify the name of the sprite, the x and y coordinates or position of the sprite, whether it is shown or hidden on stage, the size of the sprite, and its direction of it. The section is located right above where you see all the sprites you have added to your project
Costumes of sprites
A single sprite in Scratch can have multiple costumes which can have the same sprite in different postures, in different colors, etc. You can navigate to have a look at the selected sprite’s costumes in the costumes section shown below.
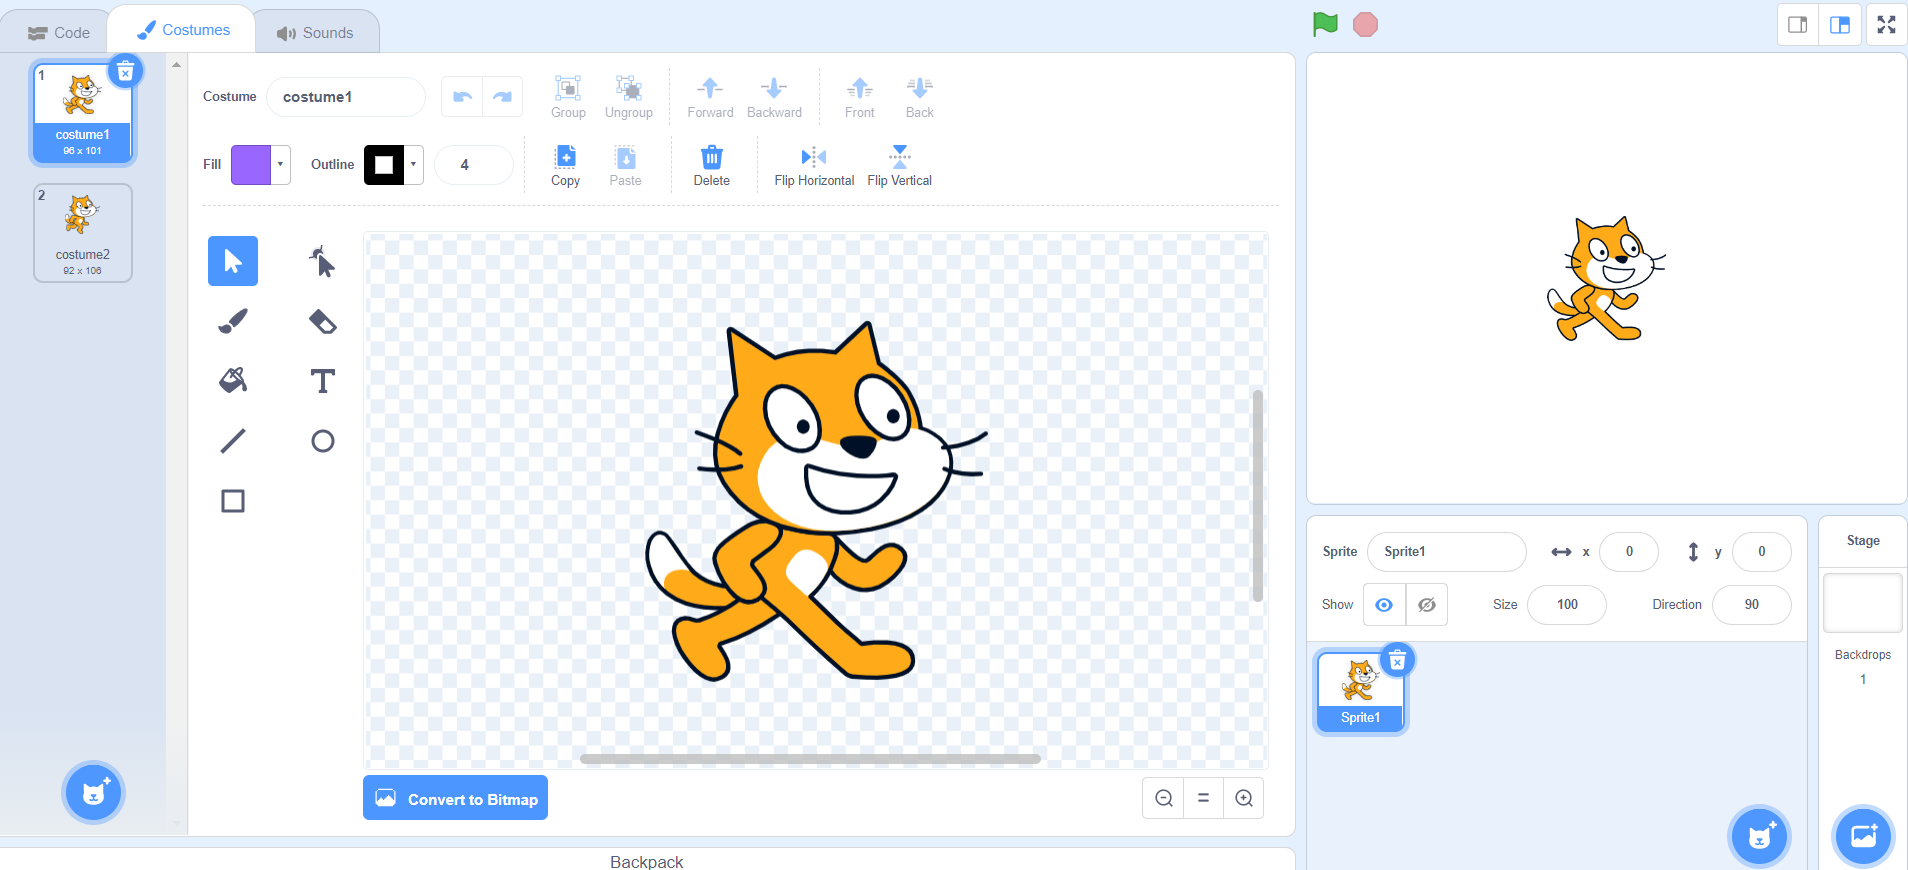
In the above figure, we can see that the cat sprite with the name sprite1 has two costumes costume1 and costume2.
Steps to create animation in Scratch
After you are well versed with the Scratch platform, you must imagine making the best Scratch animations. If you have an idea of the animation in your mind to create the same, follow the below-mentioned steps.
- Select the background for the stage.
- Choose your sprite or sprites.
- Place your sprite at the initial position on stage by dragging them on stage to the desired location.
- Check out all the costumes of the selected sprites. Add more or delete if any of the costumes are not required.
- Start doing the coding by arranging the blocks as per the logical flow of the animation.
- Click on the green flag to check out whether the animation is working properly or not.
Example for making animation in Scratch
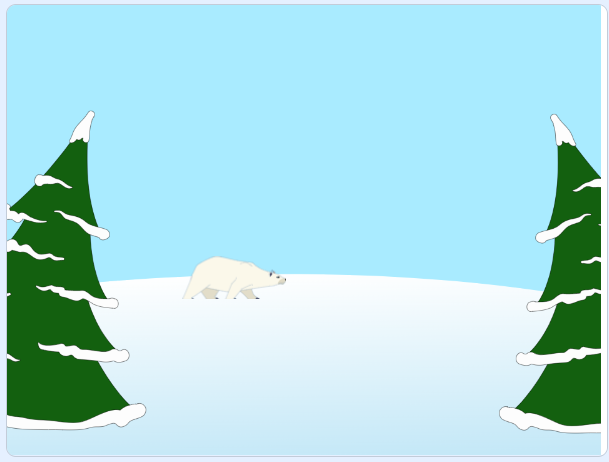
Let us make an animation where the Polar Bear walks from one tree to the other as shown in below image.
We will need to follow the below-mentioned procedure to create this animation
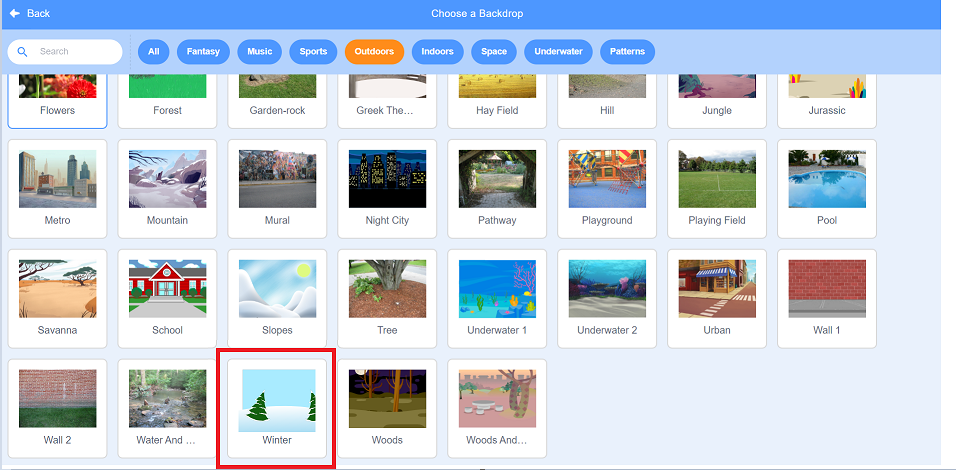
- Step1: Choose the background of the stage. Here, we will choose the “winter” background available in the “Outdoors” categories of the Scratch background gallery as shown in the below image.
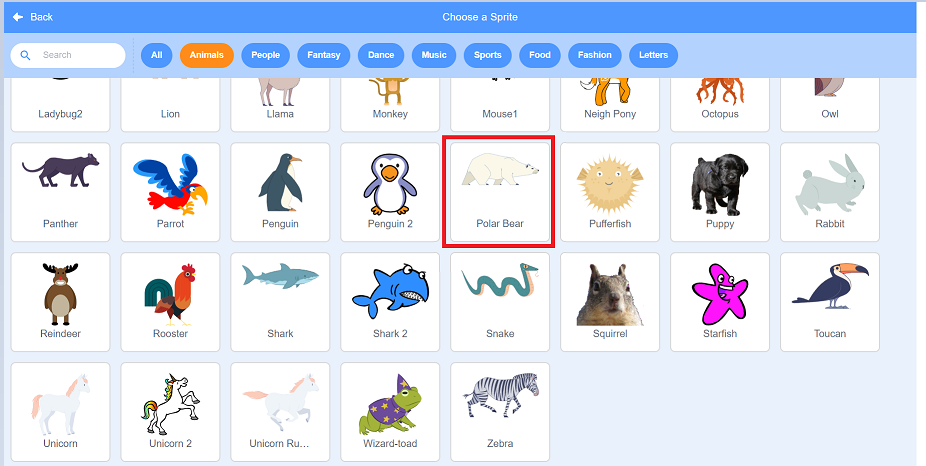
- Step2: Choose the sprite. We will now go for selecting the Polar Bear sprite from the Scratch gallery itself by navigating to choose a sprite option and then clicking on its magnifying glass option to see the Scratch sprite gallery. We will select the “Polar Bear” sprite from the “Animals” category of the sprite gallery, as shown below.
- Step3: Let’s have a look at all the costumes of Polar Bear by navigating to the outfits section above the block pallet as shown below.
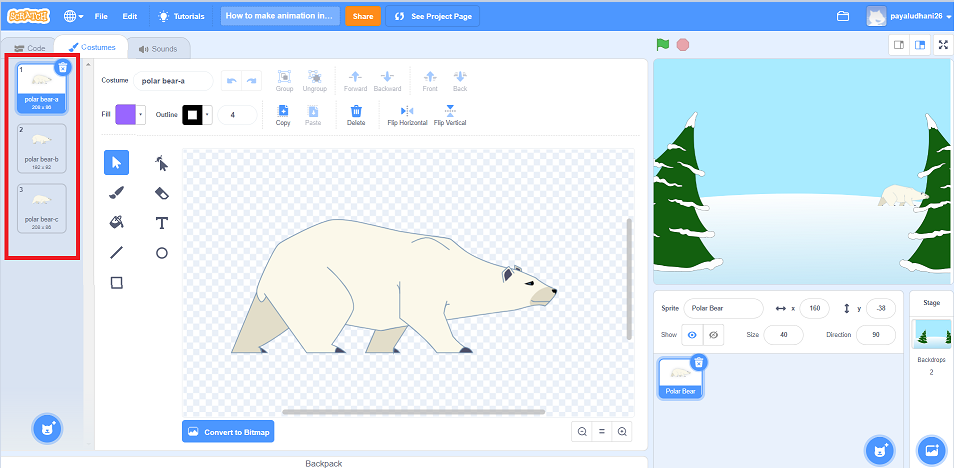
As we can see Polar Bear sprite has three costumes namely – polar bear-a, polar bear-b, and polar bear-c. In each of the costumes, the bear is taking different steps further which when together looked at will help you make an animated effect of the walking bear.
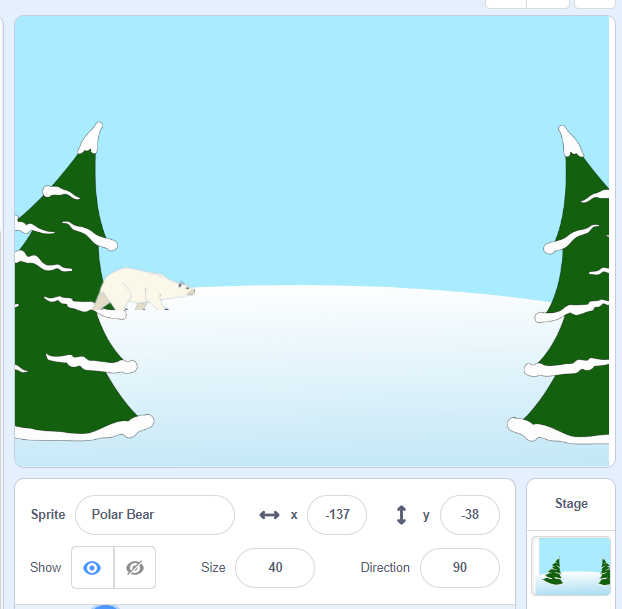
- Manage the initial properties of the bear – Now we will set the size of the bear to 40 and move our bear to the starting position on stage which is near the first tree where the x and y positions are -137 and -38 as shown below in figure.
- Animate bear to make him feel as if he is walking – For this, we will have to code and arrange the blocks. Let’s first think technically about what will happen. Whenever we click on the green flag bear should come at his starting positions of x and y. Until it reaches the other corner, itshould keep changing its costume.
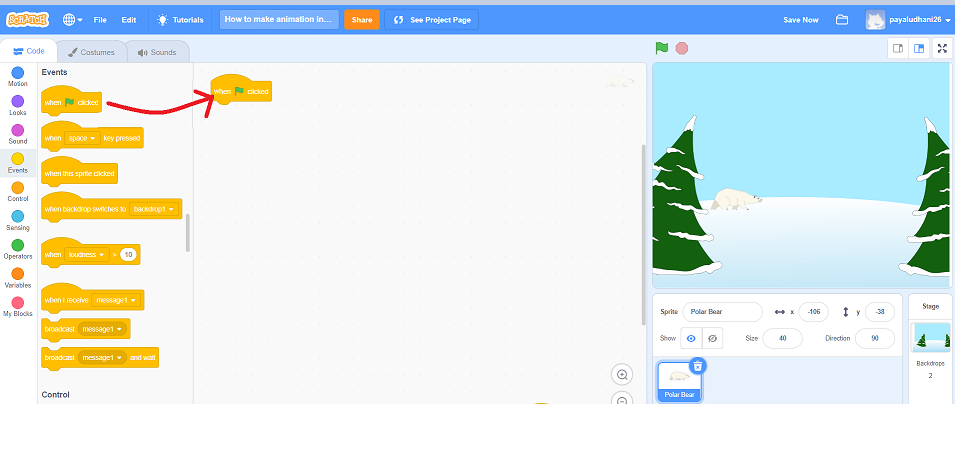
- Step4: We will first go to the events block section and get the block off when the green flag is clicked on the script area.
![animation in scratch]()
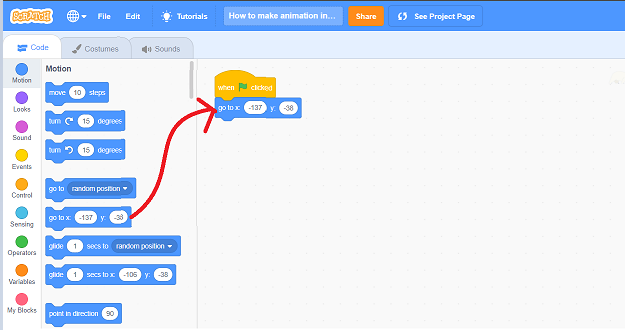
- Step5: Now, we will go to motion and get the block of Go to x and y and attach it below when the green flag is clicked. The initial position of the bear is -137 and -38. Hence will specify that in this block as shown below.
![animation in scratch]()
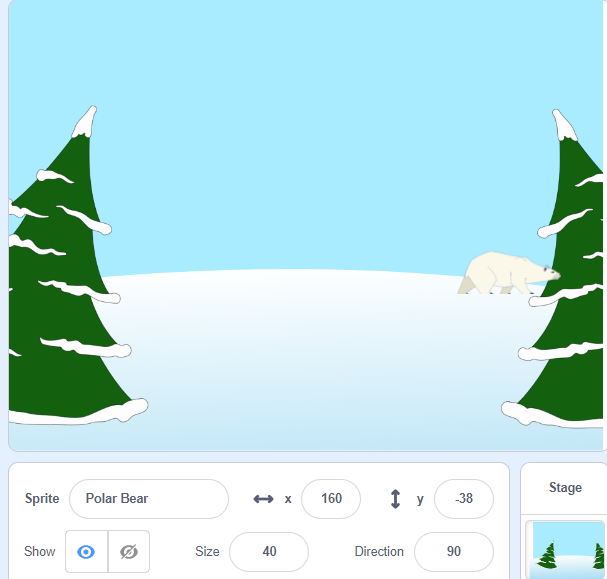
- Step6: Now, what we want to do is the Polar Bear should keep changing its costume until it reaches another tree. Let’s move our polar bear on stage till another tree is reached. The x and y position on that point is 160 and -38 as can be seen below.
![animation in scratch]()
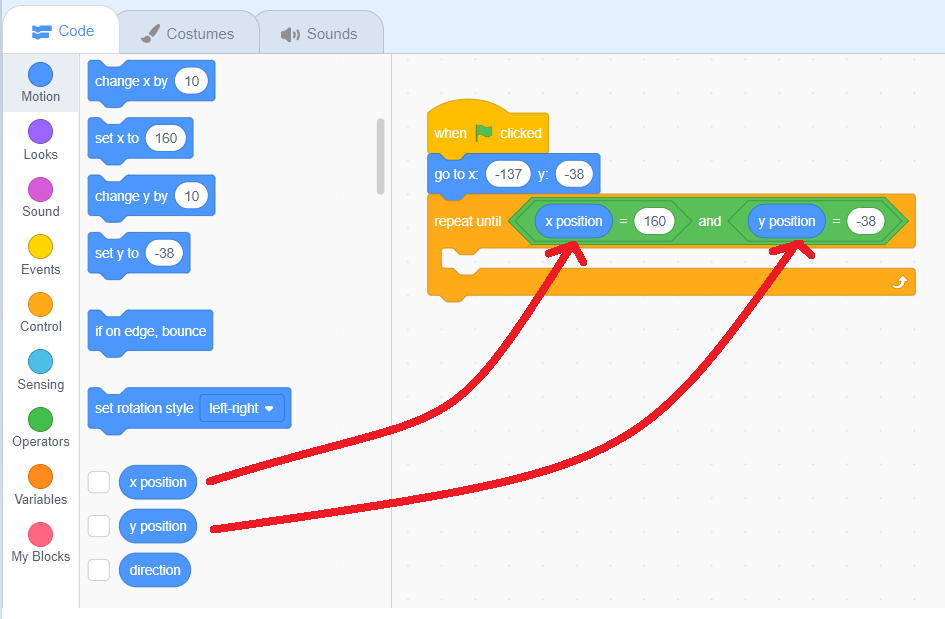
- Step7: Let us repeat until a block from a control inside which we will place and block, and two equals blocks from operators to compare positions.
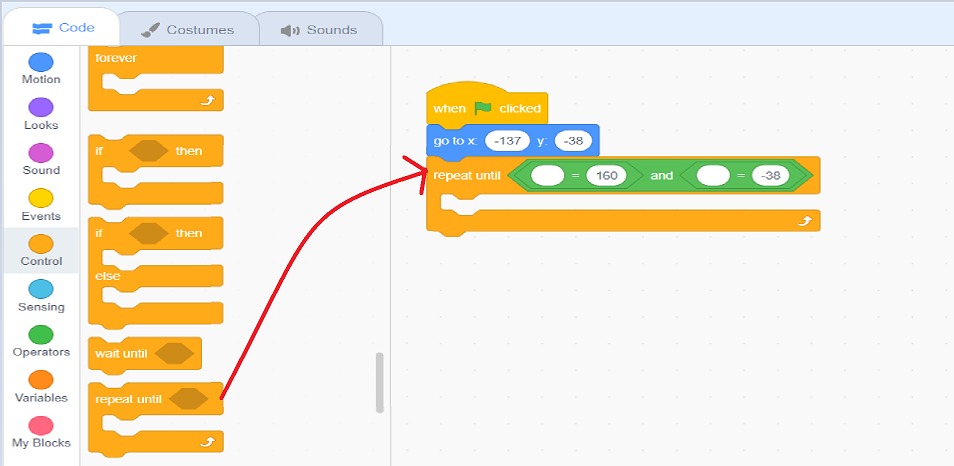

- Step8: To get the x position and y position of our Polar Bear currently, we can make the use of the x position block and y position block available in the motion category of block pallet.
![animation in scratch]()
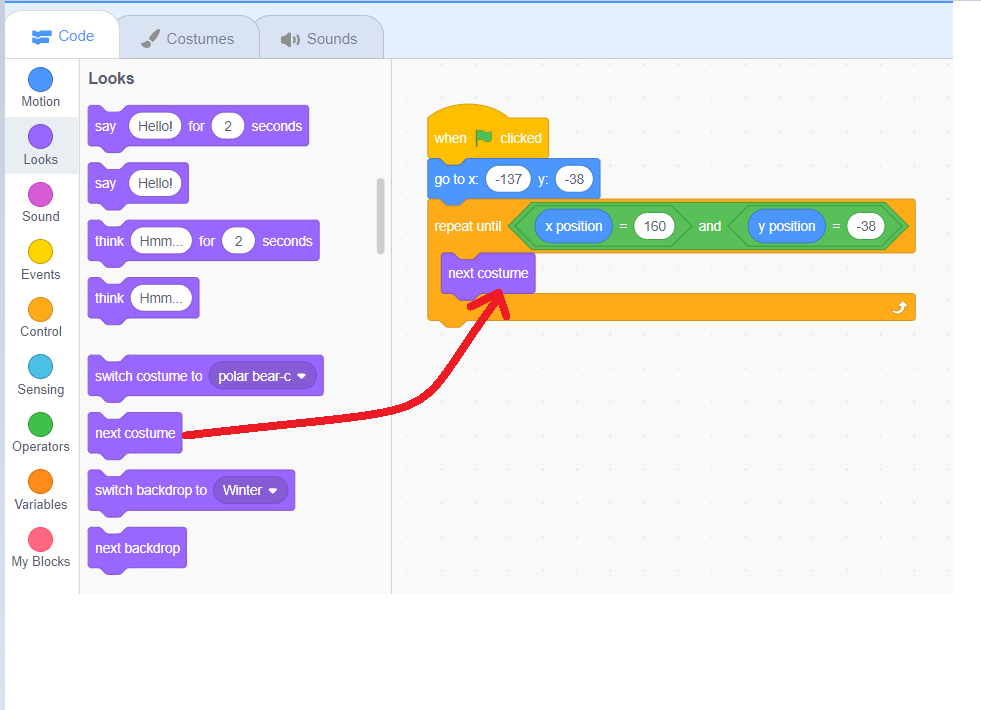
- Step9: Now, in order to keep on changing costumes until the positions are reached, we can navigate to the looks section and make the use of the next costume from there.
![animation in scratch]()
- Step8: If we look at the output now, by clicking on the green flag above the stage, we can observe that the bear is switching its costumes very fast at the same position. To slow down the speed of changing costumes, we can add a wait block inside repeat until. This wait block is available in the control section as shown.
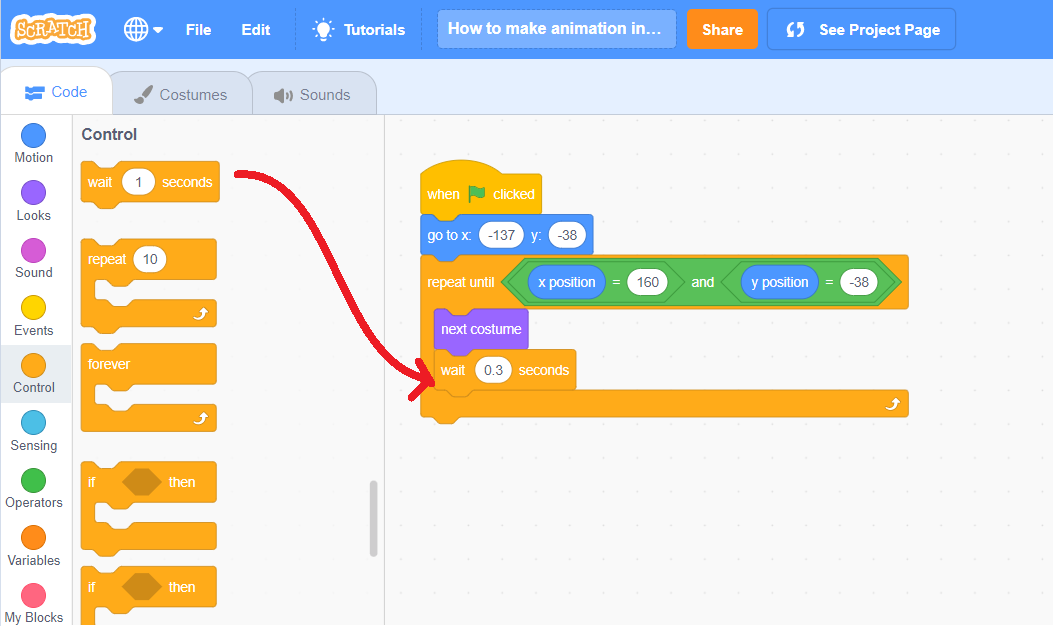
Instead of waiting for one second, we will wait for 0.3 seconds. However, you can change the waiting time as per your convenience and the speed with which you want the bear to change its costume.
- Step9: Finally, now after running we can see the bear is able to switch his costumes nicely but it seems like he is walking in the same position. To make him move to the last position of 160 and -38, we will now make use of a gliding block. Let us take one more when green flag clicked block from events and then add glide block from motions as shown –

Instead of gliding in 1 second, we want the bear to walk slowly that’s why we will change it to 20 secs. The x and y position till which the polar bear will glide that is walk should be 160 and -38 respectively as we checked previously the position of the bear at the other tree corner.
Step10: Now, one final time, we will click on the green flag above the stage and check whether the animated Polar Bear walk is happening correctly. And Tada! We are done with it. Similarly, you can go for creating many amazing creative animations from Scratch.
Conclusion
After reading this blog, we learned about different elements of the scratch platform and learned about the steps that need to follow while creating an animation on Scratch.
Learn to master the art making some best animation in Scratch with our Scratch programming course for kids ages 8-14.
Scratch programming serves as an introduction to coding for kids. It helps kids get a grip on the basics that support all kinds of coding languages.
Our Scratch curriculum prepares students with complete mastery of the Scratch environment and prepares them to advance into high-level programming.
Codingal motivates kids to bring their imagination to life by engaging in Scratch course activities individually and in groups.
Try a free class and get started on the perfect pathway for kids to explore and learn coding with Scratch. Let kids explore their interests and grow; as a result, becoming better prepared for the future and all it holds!