Table of Contents
Introduction What exactly is a platform game? Steps to make the Mario game Code for backdrop Music code block Sun sprite rotation code block Enemy sprite code blocks Mario sprite code blocks ConclusionIntroduction:
Platformer game in Scratch. Type of console games where the player must jump from one platform to another while dodging various opponents and obstacles or gathering various collectibles to proceed.
Scratch programming is among the top online coding environments for users of all ages. The platform is easily accessible from most desktop PCs and Android devices.
It’s also a great place for newbie coders, ages 6 and above, to begin learning the fundamentals of block-based coding. The computer language Scratch is used for various tasks, including creating cartoons and presenting interactive stories.
Scratch is a wonderful programming language for creating engaging games because it allows players to input data and gives them complete control over the code.
It’s also one of the most well-liked solutions for “block-based coding” or “visual programming” and one of the finest programming languages for youngsters to learn.
With Scratch coding, children learn to merge code and art, and they start to understand that with a little effort, whatever they can imagine can become a reality.
Kids frequently ask why it’s the finest platform for coding and how to create a game from scratch.
Platformers are a category of games. In reality, platformers ruled the initial days of video game development.
What exactly is a platform game?
This well-known video game style, sometimes known as a “platformer,” involves a character jumping onto and off platforms or navigating obstacles.
Platformer games from the past often followed the following standards:
1.Jumping: Jumping is a common mechanic in platformer games. The game’s central concept is this.
2.Movement: It feels wonderful merely to walk about in the game since the character the user will be controlling must have accurate controls.
3.Obstacles and enemies: A platformer must face some obstacles and challenges. It may also have enemies with different characteristics.
4.Collectibles: These are optional; however, it makes the game easier if the player receives rewards for advancing through the stages.
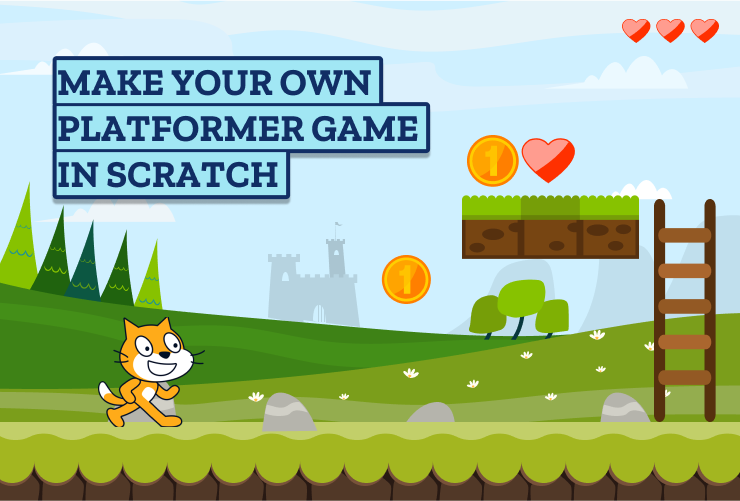
This blog will demonstrate how to create a Mario game in Scratch. One of the most well-known video games ever is undoubtedly Super Mario Bros., which was first launched in 1985.
Steps to make the Mario game
Step I: Create Sprites
Sprites are used in platformers to create the character Mario, the enemy character, and the sun character.
Use the scratch cat or any other any other sprite at your choice. Click the “Choose a Sprite” button in the bottom right corner of your screen to choose a different sprite that is available in the scratch. One can even change costumes to make the experience even more unique.
Create sprites
We will be using Mario’s sprite, the enemy sprite, and the sun sprite in our platformer game.
Mario and enemy sprites are not included in the selection of sprites provided by Scratch; instead, we must acquire the necessary pictures from Google, remove the background, and then upload the images to the Scratch area for sprites.
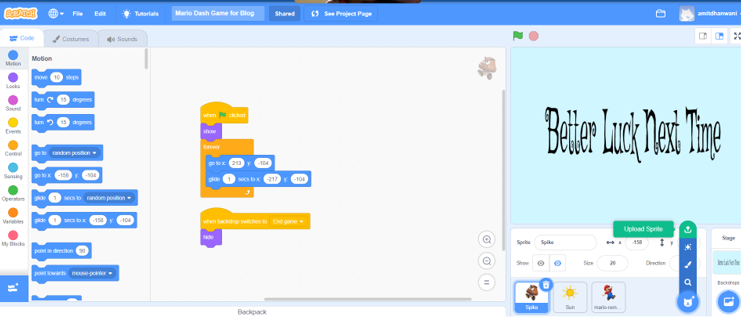
Upload sprites
Step II: Make Backdrop
Choose or create a backdrop for our game to give it a wonderful appearance!
Choosing a fun background makes our game more realistic and entertaining while also helping to express the concept.
To choose a backdrop, click the blue button next to the “New Sprite” button. This will bring up a selection of background options for selecting any backdrop.
The Backdrops Library contains default backdrops. All, Fantasy, Indoors, Music, Outdoors, Patterns, Space, Sports, and Underwater are some of the categories.
Make backdrop

Backdrops gallery
Our backgrounds may also be drawn, or we can use any picture from our computer! To try out these additional choices, click the relevant buttons in the drop-down menu.
Try to match your character to the backdrop, no matter your choice. It will assist the player in comprehending your game’s concept.
We will choose and upload the backdrop from the classic Mario game to provide the user with a nostalgic experience while playing our game.
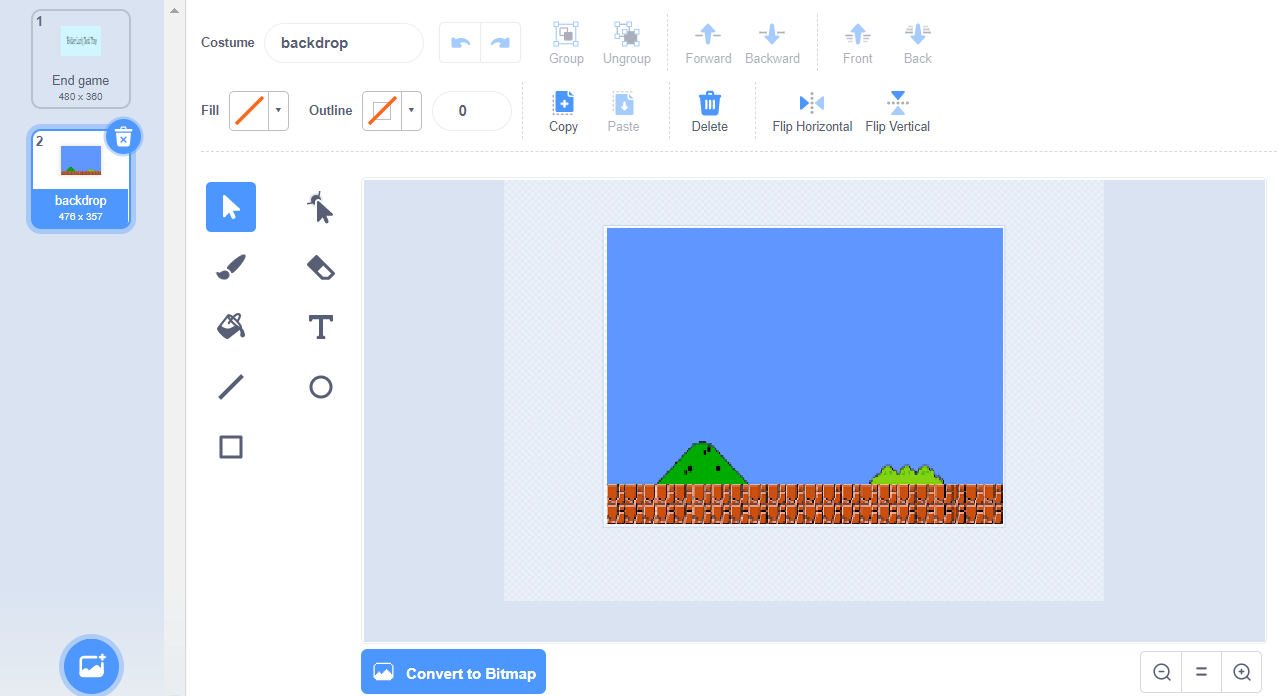
Classic Mario backdrop game
We will also create a background for the game over by selecting the paint option from the drop-down list in the backdrop area in addition to this backdrop for the class Mario game.
Step III: Clarify the goal and code appropriately
Based on the prior strategy we made, we should have a general idea of what we want our aim to be. The goals of various game kinds might vary greatly.
The objectives for the different kinds of games are as follows:
- Collectibles for the Collecting Game
- Dodging Game: Opponents to avoid
- You must respond to questions in the Question Game.
We should select the sprite for our goal since doing so will clarify how to create the game from scratch.
Our objective in the game is to avoid the enemy and score points because once you touch an enemy, the game ends, and we lose.
Step IV: Add score variable
Giving the player points or increasing their score makes them more interested in the game and fosters their competitive nature.
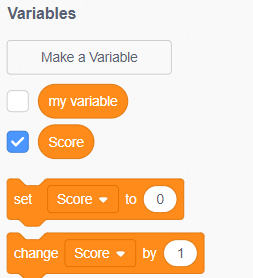
Create variable score
Step V: Adding Sound
Attach a play sound block within the forever block, then select “pop” from the drop-down menu by clicking the arrow.
One other sound choice that you’ll see is to record your own. We can choose the sound from the offered list to be used as “pop” from scratch.
We will first choose an emotional piano sound from the selection.
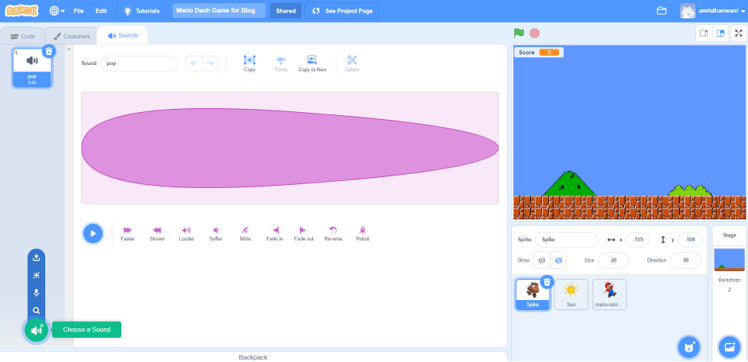
Adding sound
In this activity, the original Mario game sound or music can be added. You will now hear the “emotional piano” while playing the game, and it will play continuously.
Step VI: Test the game
Once we have set up our characters, backdrop, sound, and code blocks, the main part of implementation is to verify that our game is functioning as intended or not.
To test whether Mario is jumping, use the space bar. Additionally, make sure the opponent’s sprites are gliding as they should. And if Mario touches an enemy, check to see if the game ends or not. The sun sprite should spin as intended.
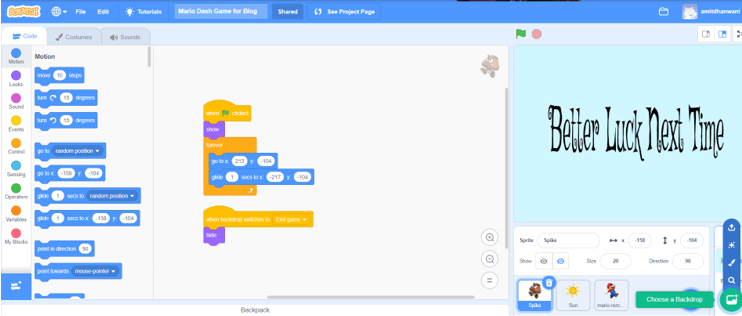
Code for backdrop
Code for backdrop
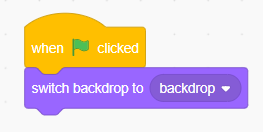
When the green flag is clicked, the traditional Mario backdrop has to be put in the background.
Therefore, we used a switch backdrop to block from looks and a block from events when the green flag is clicked.
The backdrop is called the classic Mario background.
Music code block
Code for music block
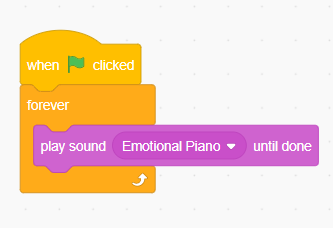
In this activity, the original Mario game sound or music can be added. You will now hear the “emotional piano” while playing the game, and it will play continuously because of the forever loop in the controls block.
Sun sprite rotation code block
Code for sun sprite
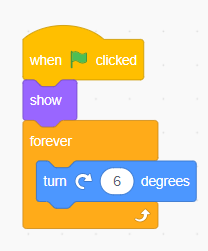
The sun will be seen in this code block and will begin rotating or turning 6 degrees when the green flag is clicked.
This causes the sun to rotate continually because it is inside the forever loop.
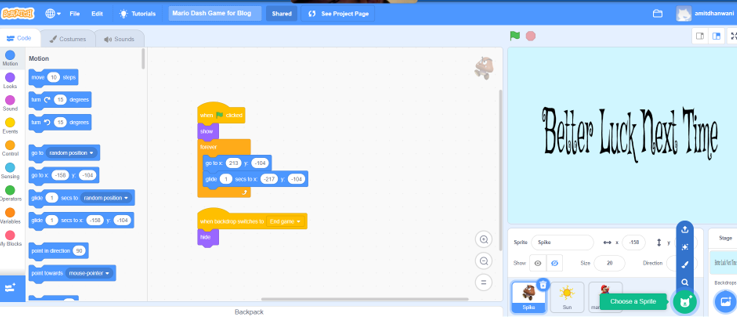
Enemy sprite code blocks
Code for enemy sprite
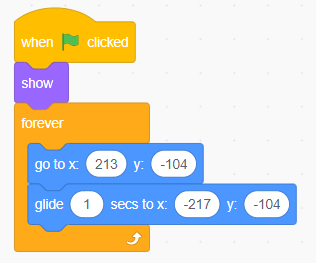
The enemy will emerge and go to the location you specified in the “go to x” and “go to y” blocks when the green flag is pressed in this code block.
Then, using the glide block, we want the enemy to move in the direction of Mario and attempt to touch him. To do this, we must provide the x and y coordinates where you want the enemy to go to reach Mario.
The sprite is linearly moved by the Glide block, which means it goes continuously at the same pace.
Furthermore, we want this action to continue indefinitely, so we have included the glide and go to x and y blocks within the forever block.
The Glide () Secs to () block was added to Scratch 3.0 and is Motion Block. This block moves its sprite precisely, comparable to moving the sprite in a direction and repeating it using Move () Steps to the designated sprite or the mouse cursor from a drop-down.
The first input field is for numbers, while the second field can be set to a sprite, a random location, or the mouse pointer.
This block’s drawback is that it pauses the script while gliding, preventing anything else from happening during that period.
The only way to stop a glide is with the Stop () block, and a sprite will prevent the If on Edge, Bounce block from doing its intended function.
Mario sprite code blocks
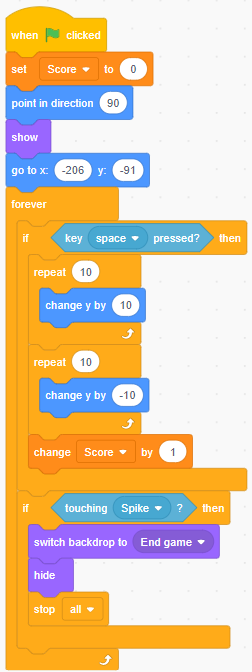
Code for mario sprite
The above code block executes the following actions:
- The score variable is initially set to 0 once we first place the when green flag is clicked from the events blocks.
- Then, using the motion blocks, we must apply the point in direction 90 command to have Mario facing towards the enemy i.e. right side direction.
- In this command, 0 indicates up, 90 indicates right, 180 indicates down, and -90 indicates left.
- Then, in order to start the game, we must show the Mario sprite.
- The go-to x and y block from motion is used to set Mario’s initial position, then enter the Mario sprite’s x and y coordinates in the appropriate areas of go to block.
- To have Mario jump over the enemies, the user must use the space bar on the keyboard.
- We must detect whether the user has pressed the space bar key or not, and to do so, we will use the key space pressed? block from sensing. Because the condition needs to be verified, the if-then block from the control must be used.
- Then Mario must jump, and when jumping, the character must first move up and then fall down on its own; this is where we must use the change y by 10 block from the motion, and for the up direction, the value for the y-axis coordinate will be positive.
- In order to make Mario come down, we duplicate the same code once more, but this time, we’ll use the -10 value for the change y by 10 block instead of 10, as the value for the y-axis coordinate will be negative for the downward direction.
- As we want our Mario sprite to jump continually whenever the user presses the space bar key, we must insert these blocks of moving up and down in the repeat 10 block of control, which is in fact within the forever block of controls.
- Using the change score by 1 from variables block, we are awarding the user 1 point for each successful jump of the Mario sprite.
- Along with this Mario jump, we must also determine whether the Mario sprite has touched the enemy sprite or not. To do this, we must use the Touching Sprite Block from Sensing and the If-Then Block from Controls because it is the condition that has to be checked.
- If Mario touches an enemy, we will switch to the game-over background using the switch backdrop to End Game block from looks, hide the Mario sprite using the hide block from looks, and stop all of the scripts using the stop all block from controls.
- After the game is over, we must also hide the enemy and sun sprites. So, from events, we’ll use the when backdrop switches to game over backdrop block, and from looks, we’ll attach the hide block to it.
- Both the sun and the enemy sprites must employ these code blocks.
Once you’ve understood the fundamentals, you may develop by collecting things and using the scrolling platformer function (or many levels) for a greater challenge. You may even browse through the many platformers on Scratch by just searching for them, obtaining ideas for your own game.
By using parts from our Assets background and creating new costumes in our sprites, we can easily create levels and entire worlds. Each level may have enemies and other interactive sprites.
The duration of time that the player was alive can be entered into the game. We could even include a challenging top score!
The amount of time that is left for the player is measured by a timer. You can only play the game till the timer expires! It becomes much more challenging to score well in your game as a result.
Conclusion
With Scratch, the world is your playground! The above rules offer a small portion of the overall concept when it comes to game creation, allowing for full customization of the theme, visuals, complexity, and outcomes.
We are now capable of creating a simple platform game. Continue learning new tricks and gaming tactics. We can even share our creation with the Scratch community.
Using Scratch to code games, children can learn to think creatively, reason systematically, and work collaboratively — harnessing essential 21st-century skills.
Learn to create some best games in Scratch with our Scratch programming course for kids. Let kids explore their interests and grow; as a result, becoming better prepared for the future and all it holds!
Try a free class and get started on the perfect pathway for kids to explore and learn coding with Scratch.