Learn to customize Sprite costumes in Scratch programming online for beginners. Explore scratch coding for beginners online with a free class.
Table of Contents
Introduction Scratch Programming What are Sprite Costumes in Scratch programming? How to Make a Sprite Costume in Scratch? Create a Costume Edit a Costume Editing in Bitmap Editing in Vector Costume-Related Blocks Conclusion
Introduction
How fun would it be if you could dress up your sprite just like yourself?
In Scratch, that is possible using a sprite costume! In this article, we’ll guide you in adding different accessories to make your sprite look better and fun!
Scratch Programming
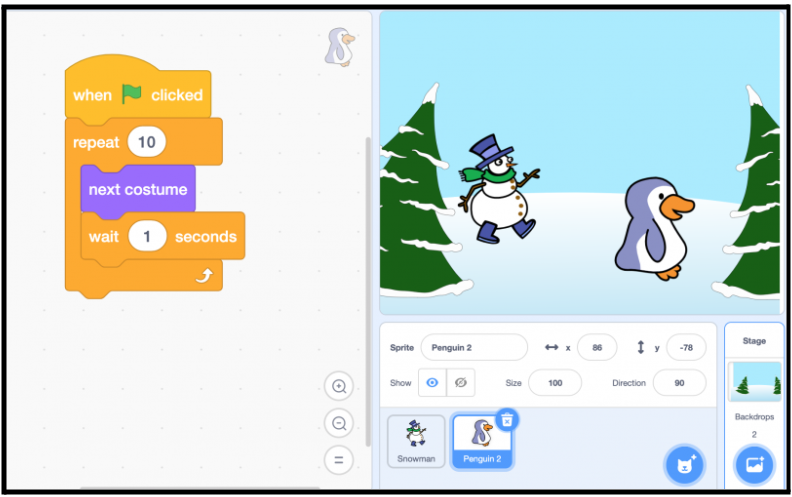
Scratch is a visual programming language and an online community developed by the MIT Media Lab. It is designed to teach coding concepts to beginners, especially kids, in a fun and interactive way.
Scratch provides a graphical interface where users can drag and drop code blocks to create animations, games, stories, and interactive projects. If you are new to scratch programming, then we recommend you read the A to Z Guide on Block Coding.
What are Sprite Costumes in Scratch programming?
As you can guess, a sprite costume refers to your sprite’s appearance or visual features. Each sprite can have multiple costumes, which allow it to change its appearance dynamically during the program’s execution.
Why do you think costumes would be used in Scratch? Well, it is used for creating animations, character movements, and visual effects in Scratch projects.
These costumes can be named, created, edited, deleted, and changed – so many options! The best part is that each and every sprite must have at least one costume. Each sprite has a default costume.
How to Make a Sprite Costume in Scratch?
Here’s how you can customize your Sprite to look pretty and fun:
Create a Costume
There are two ways of getting a costume or background for a sprite or stage. (Yes, you can even customize the background of your Scratch Project!)
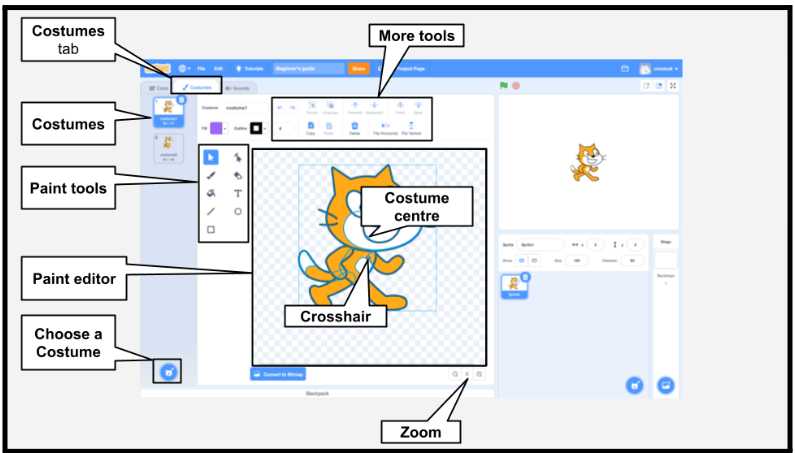
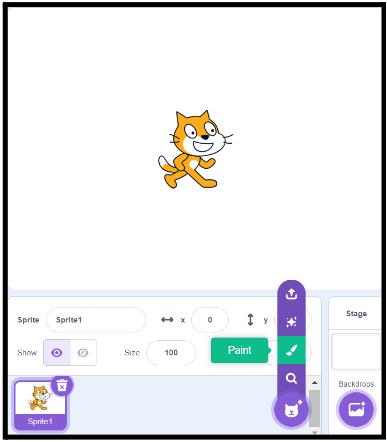
- Drawing one using the inbuilt Scratch built-in editor by selecting your sprite and clicking the “
paint” button.![]()
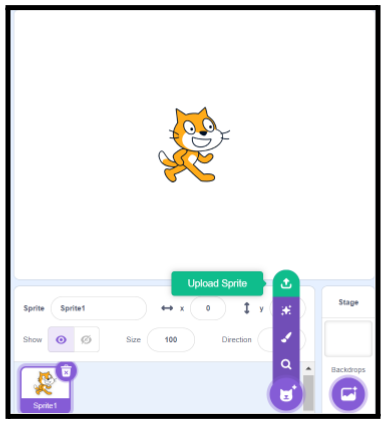
- Getting an image or multiple images from your computer, either by clicking the “
import” button as shown or dragging in an image from an open folder.
![]()
Edit a Costume
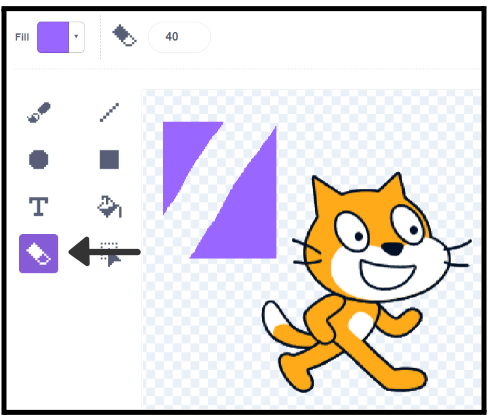
There are two different categories of costumes: Vector and Bitmap. Bitmap costumes are made from small dots called pixels. On the other hand, Vector costumes are made up of straight lines.
Here is an image that highlights the difference:
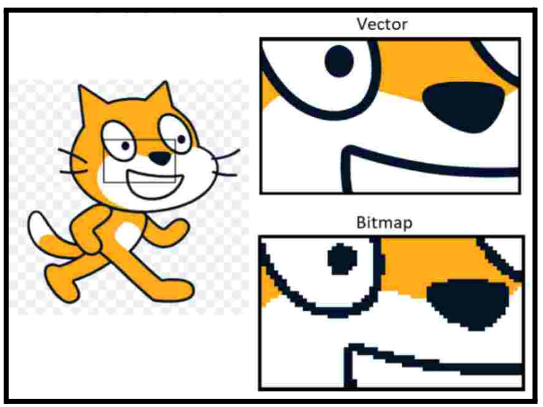
Now, Scratch offers similar editing options for both types of costumes with only minor differences. You’ll find more about it as you read ahead.

If you want to select an editing option, then you would have to click on the buttons shown above. You can find these buttons just below the paint editor.
Editing in Bitmap
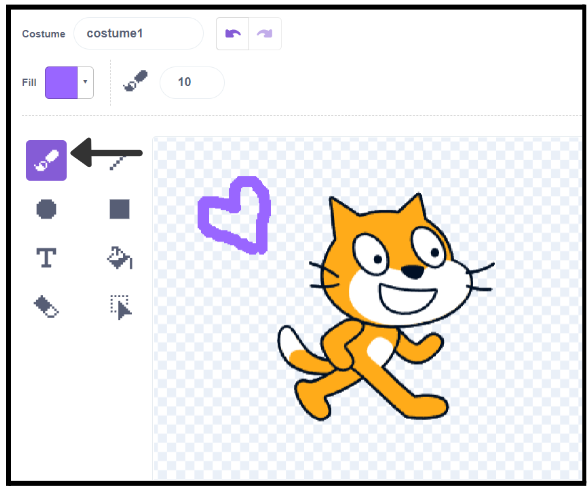
- The
brush. The brush is used to make general shapes, and it is the most common costume-making tool.
![]()
- The
line. The line is for creating straight edges that are hard to create with the brush.![]()
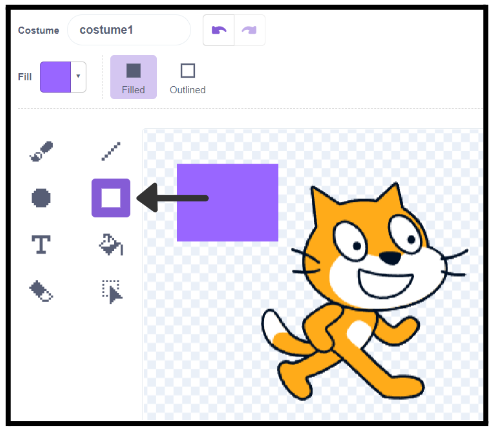
- The
rectangle tool(or press and hold shift to draw a square). With this, you can draw a perfect box without much hassle.
![]()
- The
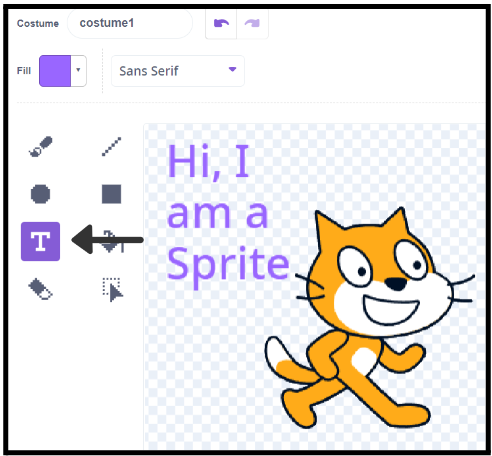
circle tool(Press and hold shift to draw a circle). This tool creates a better circle or oval than the brush tool if you want a good circle. - The text. Click on the place you want to type, and a text box will pop up. This may be used for labelling or custom texts.
![]()
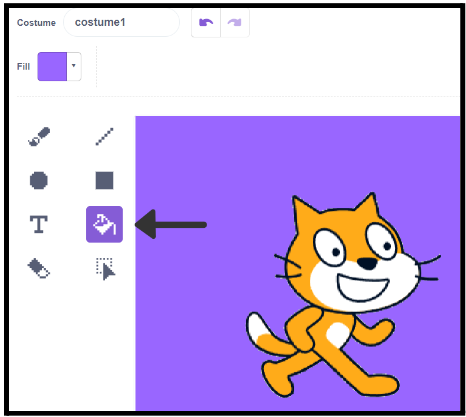
- The ‘fill with colour’ tool. Click anywhere to fill that space with any colour of your choice.
![]()
- The eraser. You know what an eraser does! It eliminates the colour or whatever customization you have applied!
![]()
- The ‘select’ tool. You use it to move the selected space to a new position.

Editing in Vector
There are 9 editing options in the vector category, but only 2 of them are different from the bitmap category mentioned above. Let’s dive into the different functionality:
- The reshape tool. After selecting an item, dots will appear around the shape in different places. You can move the dots around to create custom shapes, like a triangle from a square. How cool is that?
![]()
- The select tool. It has the same function as discussed above. The only difference is when you select an object, two smart tools pop up: “Send back one layer” and the “Send forward one layer” tools.
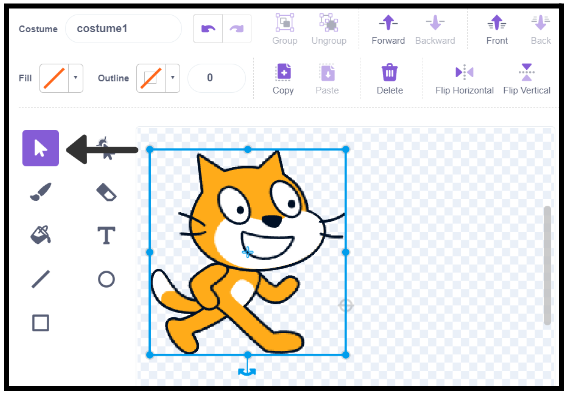
For example, if your sprite is wearing a shirt and a jacket, then the shirt will be behind the jacket, so we can use the “Send back” option on the shirt.
Costume-Related Blocks
Do you want your sprite to change costumes mid-game, or support add-on customization? You can do all that via these code blocks:
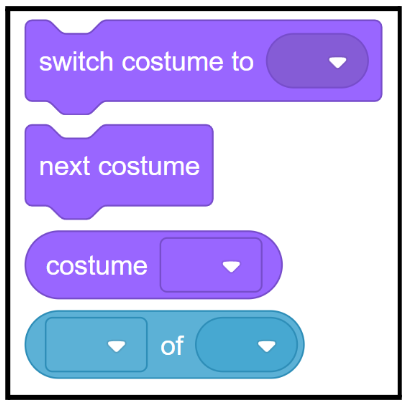
Based on the same colour of the first three blocks, you can tell they belong in the same “Looks” block section. On the other hand, the last block can be found in the “Sensing” block area.
Let’s explain the purpose of each of these blocks:
- The first block is used to switch the costumes of the sprite after some specific action.
- The second block is used to trigger the next costume, if any.
- The third block contains the number of the current costume of a sprite. You can select a particular costume for your sprite based on a specific condition.
- The fourth block allows for any sprite’s dimensions, costume amount, volume, and size to be read.
Conclusion
Kudos to you for completing this journey with us. Now, you know everything about styling your sprites into fun and animated characters through costumes. Anytime you create a project on Scratch, don’t forget to customize your sprites according to your liking.
Scratch is a powerful tool that allows you to unleash your creativity and learn the basics of coding in a fun and engaging way.
Begin your journey in scratch programming with a free Scratch programming trial class or join Codingal’s Scratch Programming course, where you can unlock your full potential and learn something new at every step. So keep learning with us, and who knows what amazing projects you’ll create next?