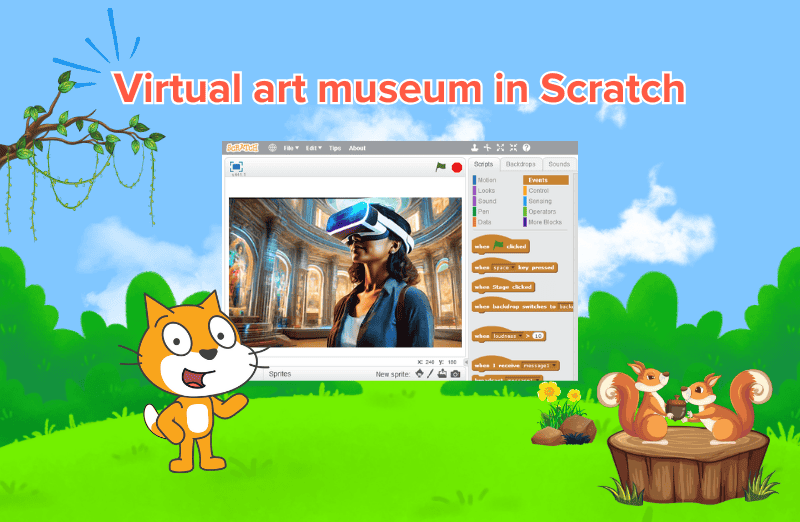
Introduction: Virtual Art Museum on Scratch
We all are huge fans of museums. Whether it’s related to paintings or science, museums have a beauty that is beyond words. Imagine this same beauty being changed in front of you with the tip of your fingers where the paintings and art come to life and you do not even have to get up from your chair! Yes, you’re absolutely right, we are talking about a full scale virtual museum! Where people from any corner of the world can come and visit your museum. Let the world indulge into the world of art through your own designs and illustrations where you’re the creator as well as the explorer.
Now are you a beginner aspiring to be the next Van Gogh with a virtual museum created by you? Well, worry not! That’s exactly where Scratch programming comes in. Through Scratch, you can easily create your own virtual museum on Scratch using simple tools and showcase your creations to the entire world!
Step-by-Step Guide to make virtual Art Museum on Scratch
Here is the step by step guide to make the virtual art museum on Scratch.
Step 1: Visualising your Museum
The first step in building your very own virtual art museum would be to plan your museum according to your preferences. One must visualise about the basic themes of the museum, the artworks to be displayed, the number of rooms or pages that will be displayed and other various features to be added like interactions with the players and controls. It is the crucial step to understand everything about what you create.
Step 2: Set up the layout
Now that you’ve visualised everything about your museum, the next step is to set up the layout in Scratch.
- Build the main room of the museum:
- Open Scratch on your device and click on ‘new project’.
- Choose your own very preferred background for the main room of your museum. You can either use the backgrounds from the Scratch library or draw your own using the paint icon.
- Add doorways:
- In your main room you must next draw doorways which are arrows that will take visitors to different rooms or pages.
- Use the “when this sprite clicked” block to change the backdrop when a visitor clicks on a door or an arrow. For example, clicking on a door could take the visitor to a different page or room of the museum by switching to a very new backdrop.
Step 3: Display your creations
With your museum’s layout kept ready, it’s time to showcase your very own artwork.
- Add your creations with sprites
- You can use Scratch’s existing sprites to create creations or either upload your very own artwork.
- Place the artwork sprites around the room using the “go to” block to position them according to your preferences.
- Title each of the sprites or artworks
- To give your visitors a clear understanding about each piece of art, label each one of them. These can pop up when a visitor clicks on any paintings.
- Use “show” and “hide” blocks to make the titles appear when the artworks are clicked and to disappear when not in use.
Step 4: Create descriptions
One of the most crucial parts of building a virtual museum is adding interesting elements like descriptions or animations. Here’s how you do that:
- Text Descriptions:
- When a visitor clicks on a piece of art, you can either describe a short summary or a description of the artwork. Use the option “say” blocks to show a text bubble with information about the painting..
- Audio Descriptions:
- Sometimes text descriptions can be tiresome. That’s where you can also record audio clips where you explain each of your artwork according to necessary details like you’re giving a real museum tour!
- To record your audio, click on the “Sounds” tab and click on “Record,” and then save the clip. Add the recorded sound to your sprite using the “play sound” block.
- Animations:
- Add animations if you’d like to make your museum more engaging. For example, the paintings could come to life and move or zoom in like a 3D motion when clicked. Use the blocks “next costume” and “wait” to create simple animations for each artwork.

Step 5: Add a Museum Guide
Every museum has a tour guide who comes along with you to explain each of the creations. To make your virtual museum more realistic, add a museum guide.
- Create a Guide Sprite:
- Select a character from the Scratch library of sprite or draw your very own guide. The guide can introduce the museum, explain how to navigate it and also provide fun facts about the art.
- Use Broadcasting for the Tour:
- Create a guided tour by using the very option of “broadcast” messages. When the visitor clicks on the guide, the guide can directly “broadcast” a message that causes other sprites (like the other artworks) to show their descriptions or animations. This in turn makes it a realistic experience for the players.
Step 6: Add Transitions or Effects
Add smooth transitions and effects to the part where the pages or room navigate from one room to another.
- Fading Transition:
- When a visitor clicks to go to another room, you can use the block “change ghost effect” to create a different fading effect transition. This makes the screen slowly fade in and out as you move between rooms.
- Sound Effects:
- Add subtle sound effects to make the museum more appealing. For example, when you enter a new room you could play a soft “whoosh” sound to let the user feel a tangible experience.
Step 7: Add Navigation Controls
Make sure your visitors can easily move from one room to another or even the main homepage without any trouble.
- Arrow Sprites:
- Create arrows and signs that allow visitors to move to different rooms. Use the blocks “when this sprite clicked” to change such backdrops.
- Home Button:
- Add a “return to home” button in each of the rooms that allows visitors to return to the main lobby.
Step 8: Preview and Share Your Museum
Once you’ve completed the above steps and are finished with your virtual art museum, it’s time to have a preview of it by yourself! Walk through your own museum as if you’re a visitor and check if there are any issues to attend to or any changes to be made. Make sure the navigation buttons and effects works smoothly and all the necessary interactions happen as you imagined.
When you’re satisfied with the final result, you can now share your project with others. Click on “Share” in Scratch to publish your first very own virtual art museum and let your friends and family explore the gallery of your creativity!
Conclusion:
The whole concept of a virtual museum can be a door to opportunities open for everyone as we can explore the world’s history and creations. Coding in this way opens chances to a wide range of possibilities just through the tip of our fingers! Are you new into the world of coding and a fan of it or want to enrol your young teen into the world of coding?
Jump right on to Codingal’s coding courses for kids, where kids and teens learn to adapt to the digital world of coding through simple and fun learning experiences!
Encourage learning everywhere you go and have fun with your coding journey! At Codingal, we’re here to support you every step of the way. Happy coding!