Introduction
Minecraft is more than just a game—it’s a world of endless possibilities where you can build, explore, and connect with friends. While joining public servers is fun, there’s something special about creating your own Minecraft server. It gives you full control: you decide the rules, mods, plugins, and who gets to join.
If you’ve ever wondered how to make a Minecraft server, this guide is for you. We’ll cover everything you need to know, from system requirements and installation to advanced customization. Whether you’re setting it up for friends, a classroom, or a large gaming community, this guide will walk you through step by step.
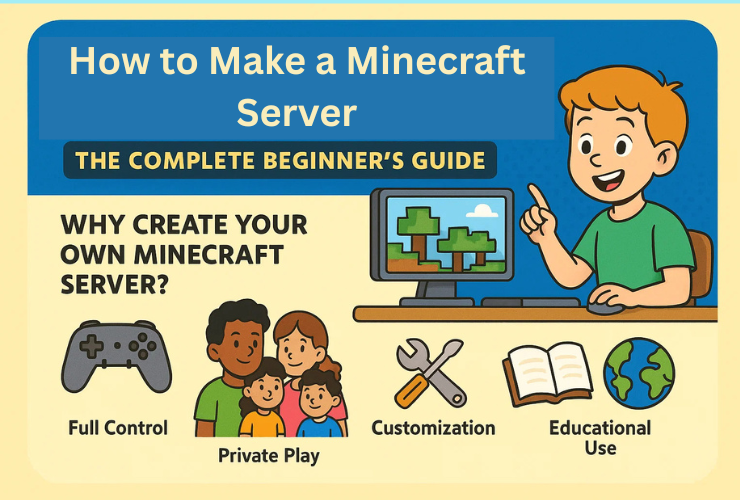
Why Create Your Own Minecraft Server?
Before diving into the technical setup, let’s look at the benefits of running your own server:
Full Control: You decide the gameplay, rules, and settings.
- 👨👩👧👦 Private Play: Invite only your friends or family for a safe environment.
- 🛠️ Customization: Add mods, plugins, and unique maps to personalize the world.
- 📚 Educational Use: Perfect for teachers to use Minecraft as a learning tool.
- 🌍 Community Building: Build your own public or semi-private gaming community.
What You’ll Need to Set Up a Minecraft Server
1. System Requirements
Your computer (or hosting machine) must meet certain requirements.
| Player Slots | Minimum RAM | Recommended RAM | CPU Requirement |
|---|---|---|---|
| 1–4 players | 2 GB | 4 GB | Dual-core CPU |
| 5–10 players | 4 GB | 6 GB | Quad-core CPU |
| 10–20 players | 6 GB | 8 GB+ | High-speed CPU |
💡 Tip: The more players and mods you add, the more powerful your server needs to be.
2. Stable Internet Connection
- Upload speed of at least 5 Mbps for small servers.
- A wired connection (Ethernet) is better than Wi-Fi.
3. Minecraft Java Edition
Most tutorials (including this one) are based on the Java Edition of Minecraft.
Step-by-Step Guide: How to Make a Minecraft Server
Step 1: Install Java
Minecraft servers run on Java, so you’ll need the latest version installed.
- Go to the Java download page.
- Install the latest Java Development Kit (JDK).
- Verify installation by typing in your terminal or command prompt:
java -versionStep 2: Download the Minecraft Server File
- Visit the official Minecraft server download page.
- Download the server.jar file (latest version).
- Place it in a dedicated folder (e.g.,
Minecraft_Server).

Step 3: Run the Server for the First Time
- Open your terminal/command prompt in the server folder.
- Run the following command:
java -Xmx1024M -Xms1024M -jar server.jar noguiXmx= maximum memory allocation.Xms= minimum memory allocation.
The server will create some files and show an error about the EULA.
Step 4: Accept the EULA Agreement
- Open the newly generated file
eula.txt. - Change
eula=falsetoeula=true. - Save and close the file.
This means you agree to Minecraft’s End User License Agreement.
Step 5: Configure Server Properties
The file server.properties controls your server settings.
| Setting | Description | Example |
|---|---|---|
| level-name | Name of your world | world1 |
| motd | Message of the day (shows in server list) | Welcome to My Server! |
| max-players | Maximum number of players allowed | 20 |
| online-mode | Verifies players with Mojang accounts | true |
💡 Tip: Change motd to something fun and creative to attract players.
Step 6: Port Forwarding (for External Players)
To let others join your server, you need to open your router’s ports:
- Log in to your router’s admin page.
- Find Port Forwarding settings.
- Forward port
25565(default Minecraft port) to your computer’s local IP.
⚠️ Note: Be careful when port forwarding—this opens access to your computer. Alternatively, use a hosting service for safety.
Step 7: Connect to Your Server
- Open Minecraft → Multiplayer → Add Server.
- Enter:
- Local (on same computer):
localhost - Friends (same network): Your local IP (e.g.,
192.168.x.x) - Global (outside network): Your public IP address.
- Local (on same computer):
Now, your Minecraft server is live! 🎉
Customizing Your Minecraft Server
One of the best parts of running your own server is customization.
1. Install Plugins
Plugins add features like:
- Player ranks
- Economy systems
- Minigames
👉 Use Spigot or PaperMC for plugin support.
2. Add Mods
Mods can completely change gameplay. Popular mod managers:
- Forge
- Fabric
💡 Always ensure mods are compatible with your Minecraft version.
3. World Management
- Use tools like Multiverse to create multiple worlds.
- Add custom maps from Minecraft community sites.
Hosting Options: Local vs Professional Hosting
| Option | Pros | Cons |
|---|---|---|
| Local Hosting | Free, full control, good for friends | Needs strong PC & internet, manual setup |
| Professional Hosting | Easy setup, stable uptime, 24/7 access | Monthly cost, limited control depending on provider |
Popular hosting services:
- Apex Hosting
- Shockbyte
- Hostinger Minecraft Hosting
Safety Tips for Kids’ Minecraft Servers
If kids are running or joining a server, safety is key:
- Use whitelists to limit who can join.
- Install chat moderation plugins.
- Encourage private servers for family and friends.
- Set clear rules for behavior and screen time.
Troubleshooting Common Issues
| Problem | Solution |
|---|---|
| Server won’t start | Check Java version & EULA file. |
| Friends can’t join | Ensure port forwarding is correct. |
| Lag issues | Allocate more RAM or upgrade hosting. |
| Mods not working | Check version compatibility. |
Fun Project Ideas for Your Minecraft Server
- 🏰 Survival World – Classic play with friends.
- ⚔️ Mini-Game Hub – Add plugins for parkour, PvP, or capture-the-flag.
- 🏫 Educational Server – Teachers can use Minecraft for math, science, or history lessons.
- 🎨 Creative World – Build cities, castles, or pixel art together.
Conclusion
Making a Minecraft server may seem challenging at first, but with the right setup, it’s a rewarding experience. From configuring server files to customizing worlds with mods and plugins, you’ll gain valuable technical skills while creating a fun space for friends or students.
Whether you choose to host locally or with a professional service, remember that a Minecraft server is more than just a game server—it’s a community, a classroom, and a creative outlet.
👉 Ready to take your Minecraft skills further? At Codingal, kids learn coding, problem-solving, and creativity through Minecraft Education Edition and fun projects.
✨ Book a Free Trial Class today and let your child explore coding inside Minecraft!