Introduction
We all love graphs, as they are a great way to display information visually. They help people understand data quickly by showing numbers, patterns, and relationships. Creating graphs might sound complicated, but with Scratch, it’s fun and easy! Scratch is a programming language that lets you use blocks to make games, animations, and even graphs.
By the end of this article, you will quickly understand how to create a graph from Scratch successfully.
What is Scratch?
Scratch is a free, block-based coding platform designed for kids and beginners. Instead of typing complicated code, you use colorful blocks to build programs. It’s like solving a puzzle, where each piece fits together to create something unique. You can make your character (called a sprite) move, interact with others, or even display graphs!
Why Create Graphs in Scratch?
Graphs are used in many areas like math, science, and even video games. They help people see things like:
- How much something has increased or decreased over time.
- How do two things compare to each other?
- Patterns or trends in data.
Hence, you can learn how to display data visually and interactively as well as improve your coding skills!
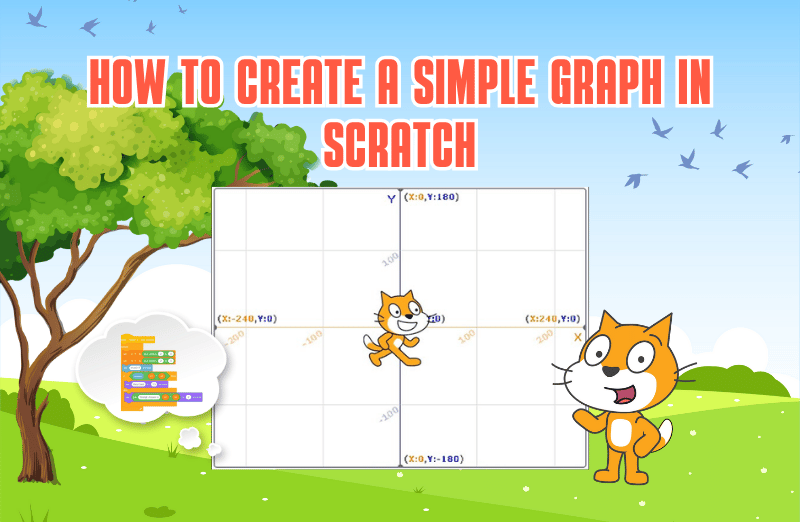
How to Create a Graph in Scratch?
Here is the step by step guide to create a graph using Scratch Programming:
Step 1: Plan Your Graph
Before jumping into Scratch, think about what data you want to display in your graph. For example:
- The number of books you’ve read every month.
- The scores of players in a game.
- The number of apples or points collected in different levels of a game.
Step 2: Build a New Project
Start by going to the website of Scratch and then create a new project. A blank canvas will appear along with a cat sprite emoticon. Click on that and start a new project.
Step 3: Add Your Sprites for the Bars
Now, you’ll have to add the bars that will make up your graph. For each bar, you’ll need a sprite. Follow these steps:
- Click on the icon or button that says “Choose a Sprite” at the bottom of the screen.
- Then, select the paintbrush icon to create your custom sprite.
- Use the rectangular tool to draw a bar.
You can adjust the size and color of the bar according to your preference to make it look how you want. Create as many bar sprites as you need, one for each value in your data.
Step 4: Set Up Variables for the Data
In Scratch, you use variables to store numbers. For each piece of data (like the number of books you read in a month), create a variable:
- Click on the “Variables” section in the left menu.
- Click on “Make a Variable” and name it (for example, “Books in January”).
- Do this for each piece of data you want to display in your graph.
Now, your data is stored in the proper set of variables!
Step 5: Code the Bars to Show the Data
Now that you have your bars and variables, it’s time to make the bars represent your data. For each bar sprite:
- Go to the “Events” section and drag the block “When green flag clicked” to start the graph when you press the green flag.
- Next, go to the section of “Motion” and drag the block saying “go to x: y:” to position the bar on the stage.
- In the section “Looks,” grab the block that says “set size to 100%”. Replace the option “100%” with your variable. This will make the bar taller or shorter based on whatever your data is.
- Do this for each bar, using different variables to represent different data points.
Step 6: Label the Bars
To make your graph more straightforward and comprehensive to understand, label each bar. Here’s how:
- Create a new sprite for each of the labels.
- Then, use the paint editor to write the name or title (as per your preference) of the data.
- Use the block “go to x: y:” to position each of the labels underneath the corresponding bar.
Step 7: Run Your Program
Now it’s time to test your graph! Once you are done with the graph, to run it and see if it works well, click on the ‘green flag,’ and it will automatically start playing. Then, you can see whether it’s displayed according to your preference or not.
Conclusion
Wasn’t that fun creating your own set of graphs? In this way, Scratch is a fun way to learn about both coding and data visualization. As you get better at coding, you’ll discover new ways to present data and tell stories with your graphs.
Jump right on to code camps for kids, where your kids learn to adapt to the digital world of coding through simple and fun learning experiences! Let them join their first trial class today!
Encourage learning everywhere you go, and have fun with your coding journey! Happy Coding!