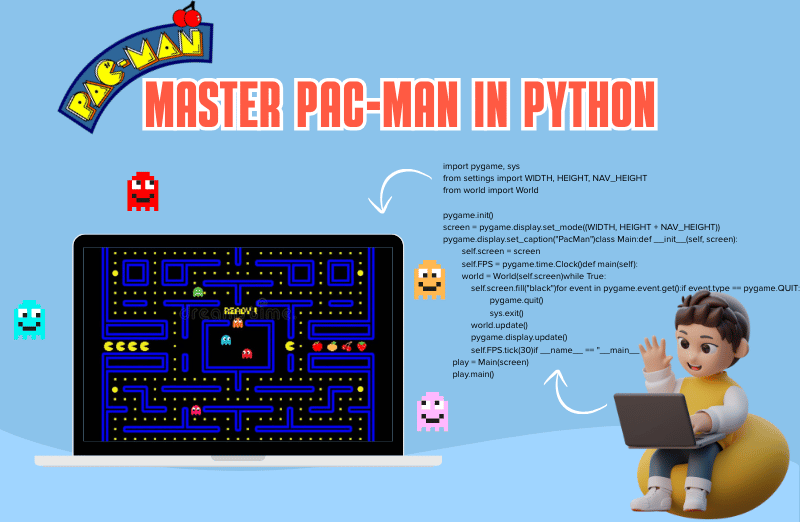
1. Introduction: The Enduring Appeal of Pac-Man and Python’s Power
In the vast and ever-evolving landscape of video games, few titles hold the iconic status and enduring appeal of Pac-Man. Since its debut in 1980, this yellow, pellet-munching hero navigating a maze filled with colorful ghosts has captivated generations of players. Its simple yet addictive gameplay, combined with its charming characters, cemented Pac-Man’s place in pop culture history. But beyond the nostalgia, Pac-Man offers a fantastic learning opportunity for aspiring game developers, especially when paired with the versatility and accessibility of Python.
Python, a programming language renowned for its readability and extensive libraries, has become a go-to choice for everything from web development to data science, and increasingly, game development. Its straightforward syntax allows developers to focus on the logic and creativity of their games rather than getting bogged down in complex coding structures. When combined with Pygame, a set of Python modules designed for writing video games, the possibilities are endless. Pygame provides the necessary tools for graphics, sound, and user input, making it an ideal framework for bringing classic arcade experiences like Pac-Man to life.
This comprehensive guide will take you on a journey through the process of building your very own Pac-Man game using Python and Pygame. Whether you’re a seasoned programmer looking to delve into game development or a curious beginner eager to create your first interactive experience, this tutorial is designed to equip you with the knowledge and skills needed to master the fundamentals of game creation. We’ll cover everything from setting up your development environment and implementing core game mechanics to designing intelligent AI for the ghosts and adding immersive sound and visuals. By the end of this guide, you’ll not only have a functional Pac-Man game but also a deeper understanding of game development principles that you can apply to your future projects. Get ready to embark on an exciting adventure into the world of Python game development, where the only limit is your imagination!
2. Setting Up Your Development Environment: Python and Pygame
Before we dive into the exciting world of game development, the first crucial step is to set up your development environment. This involves installing Python and the Pygame library, which will provide all the necessary tools and functionalities to build our Pac-Man game. Don’t worry if you’re new to this; the process is straightforward and we’ll guide you through each step.
Installing Python
If you don’t already have Python installed on your system, head over to the official Python website (python.org) and download the latest stable version. It’s recommended to download Python 3.x, as Python 2.x is no longer supported. The installation process is generally simple: run the installer and follow the on-screen instructions. Make sure to check the box that says “Add Python to PATH” during installation, as this will make it easier to run Python commands from your terminal or command prompt.
Once Python is installed, you can verify the installation by opening your terminal (or Command Prompt on Windows, or Terminal on macOS/Linux) and typing:
python --versionOr, depending on your installation:
python3 --versionYou should see the installed Python version printed in the console. If you encounter any issues, double-check your installation steps or refer to Python’s official documentation for troubleshooting.

Installing Pygame
With Python successfully installed, the next step is to install Pygame. Pygame is a cross-platform set of Python modules designed for writing video games. It includes computer graphics and sound libraries designed to be used with the Python programming language. Pygame is free and open-source, making it an excellent choice for our project.
To install Pygame, open your terminal or command prompt again and use pip, Python’s package installer, by typing the following command:
pip install pygameOr, if you have multiple Python versions installed:
pip3 install pygamePip will download and install Pygame and its dependencies. Once the installation is complete, you can verify it by opening a Python interpreter (type python or python3 in your terminal) and trying to import pygame:
import pygame

print(pygame.ver)
If no errors occur and you see a version number printed, then Pygame has been successfully installed. Congratulations! You’ve now set up your development environment and are ready to start coding your Pac-Man game. In the next section, we’ll delve into the core mechanics of the game, starting with how Pac-Man moves and interacts with the game world.
3. Core Game Mechanics: Movement, Collisions, and Pellets
Now that your development environment is ready, it’s time to dive into the heart of our Pac-Man game: the core mechanics. This section will cover how to implement Pac-Man’s movement, detect collisions with walls and pellets, and manage the consumption of those delicious dots that are central to the game’s objective.
Pac-Man’s Movement
Pac-Man’s movement is deceptively simple yet crucial to the gameplay. He moves in four cardinal directions (up, down, left, right) and can only change direction when he’s aligned with the grid of the maze. This ‘grid-based’ movement is a hallmark of classic arcade games and requires careful handling.
To implement this, we’ll need to track Pac-Man’s current position (x, y coordinates) and his desired direction. When a directional key is pressed (e.g., arrow keys), we’ll update the desired direction. However, Pac-Man won’t immediately change direction. Instead, he’ll continue moving in his current direction until he reaches a point in the maze where a turn is permissible (typically at an intersection or a clear path in the new direction). This ensures smooth, grid-aligned movement.
Consider a Player class for Pac-Man. This class would hold properties like x, y, current_direction, and desired_direction. A move() method within this class would update x and y based on current_direction and check for valid turns based on desired_direction and the maze layout.
# Conceptual Python code for Pac-Man movement

class PacMan:
def __init__(self, x, y, speed):
self.x = x
self.y = y
self.speed = speed
self.current_direction = 'RIGHT'
self.desired_direction = 'RIGHT'

def update(self, maze):
if self.is_at_intersection() and self.can_turn(self.desired_direction, maze):
self.current_direction = self.desired_direction
if self.current_direction == 'RIGHT':
self.x += self.speed
elif self.current_direction == 'LEFT':
self.x -= self.speed

def is_at_intersection(self):
pass

def can_turn(self, direction, maze):
pass
Collision Detection with Walls
Collision detection is vital to prevent Pac-Man from moving through maze walls. As Pac-Man moves, we’ll constantly check if his next intended position would overlap with a wall segment. If it does, we prevent the movement in that direction. This can be done by checking the tiles in the maze array that correspond to Pac-Man’s bounding box or a single point representing his center.
Pygame provides useful functions for collision detection, such as pygame.Rect.colliderect() for checking overlaps between rectangular objects. Each wall segment in your maze can be represented as a pygame.Rect object, and Pac-Man himself would also have a pygame.Rect.
# Conceptual Python code for wall collision

# proposed_rect = pygame.Rect(pacman.x + dx, pacman.y + dy, pacman_width, pacman_height)
# for wall in maze_walls:
# if proposed_rect.colliderect(wall.rect):
# dx, dy = 0, 0
Pellet Consumption
The primary objective of Pac-Man is to eat all the pellets scattered throughout the maze. This involves detecting when Pac-Man collides with a pellet and then removing that pellet from the game. Each pellet can also be represented as a small pygame.Rect or simply a point on the grid.
When Pac-Man’s position overlaps with a pellet’s position, we’ll increment the player’s score and remove the pellet from our list of active pellets. This process continues until all pellets are consumed, at which point the level is complete.
# Conceptual Python code for pellet consumption

# for pellet in pellets_list:
# if pacman_rect.colliderect(pellet.rect):
# score += pellet.value
# pellets_list.remove(pellet)
These core mechanics form the backbone of our Pac-Man game. Mastering them is essential before moving on to more complex elements like ghost AI and maze rendering.
4. Bringing Ghosts to Life: Basic AI and Pathfinding
The ghosts—Blinky, Pinky, Inky, and Clyde—are what make Pac-Man truly challenging and engaging. Their distinct personalities and pursuit patterns are key to the game’s enduring appeal. While their behavior can be quite complex in the original game, we’ll start with basic AI and pathfinding to make them formidable opponents.
Ghost Movement and Personalities
Unlike Pac-Man, who follows player input, ghosts need their own logic to navigate the maze and chase Pac-Man. Each ghost typically has a ‘target tile’ that dictates its movement. The challenge lies in defining these target tiles to create varied and interesting behaviors:
- Blinky (Red): The Shadow – Blinky is the most aggressive ghost. His target tile is usually Pac-Man’s current location. He’s always in direct pursuit, making him a constant threat.
- Pinky (Pink): The Ambusher – Pinky tries to ambush Pac-Man. Her target tile is typically a few tiles in front of Pac-Man’s current position, attempting to cut him off.
- Inky (Cyan): The Fickle – Inky’s behavior is more complex, often influenced by both Pac-Man’s position and Blinky’s position. His target tile might be a reflection of Pac-Man’s position relative to Blinky, making him unpredictable.
- Clyde (Orange): The Pokey – Clyde is the least predictable. He chases Pac-Man when close but retreats to his corner of the maze when Pac-Man gets too close.
During ‘frightened’ mode (when Pac-Man eats a power pellet), ghosts typically reverse direction and move randomly, avoiding Pac-Man.
Pathfinding: Navigating the Maze
For ghosts to effectively chase or evade Pac-Man, they need a way to navigate the maze. The most common approach for grid-based games like Pac-Man is to use pathfinding algorithms. A simple yet effective algorithm for this purpose is Breadth-First Search (BFS) or A* search.
# Conceptual Python code for A* pathfinding (simplified)

import heapq

def heuristic(a, b):
return abs(a[0] - b[0]) + abs(a[1] - b[1])

def a_star_search(maze, start, goal):
frontier = []
heapq.heappush(frontier, (0, start))
came_from = {}
cost_so_far = {}
came_from[start] = None
cost_so_far[start] = 0
while frontier:
current_f_score, current = heapq.heappop(frontier)
if current == goal:
break
for next_node in maze.get_neighbors(current):
new_cost = cost_so_far[current] + maze.get_cost(current, next_node)
if new_cost < cost_so_far.get(next_node, float('inf')):
cost_so_far[next_node] = new_cost
priority = new_cost + heuristic(goal, next_node)
heapq.heappush(frontier, (priority, next_node))
came_from[next_node] = current
path = []
current = goal
while current != start:
path.append(current)
current = came_from[current]
path.reverse()
return path
5. Designing the Maze: Data Structures and Rendering
The maze is the stage for all the action in Pac-Man. Its design is crucial for gameplay, influencing strategy, ghost behavior, and overall player experience. In this section, we’ll explore how to represent the maze using appropriate data structures and how to render it visually using Pygame.
Representing the Maze: Data Structures
The most common and efficient way to represent a grid-based maze in programming is using a 2D array or a list of lists. Each element in the array corresponds to a tile in the maze, and its value can indicate the type of tile: a wall, an empty path, a pellet, a power pellet, or a ghost/Pac-Man starting position.
For example, you could use integer values or specific characters:
- 0 or ‘ ‘: Empty path
- 1 or ‘#’: Wall
- 2 or ‘.’: Pellet
- 3 or ‘o’: Power Pellet
# Example of a simple maze representation
maze_layout = [
    [1, 1, 1, 1, 1, 1, 1],
    [1, 0, 0, 0, 0, 0, 1],
    [1, 0, 1, 1, 1, 0, 1],
    [1, 0, 0, 0, 0, 0, 1],
    [1, 1, 1, 1, 1, 1, 1]
]
This 2D array allows for easy lookup of tile types based on coordinates, which is essential for collision detection, pathfinding, and rendering. You might also consider creating a Tile class for more complex tile properties, but for a basic Pac-Man, a simple integer or character representation is often sufficient.
Rendering the Maze with Pygame
Once you have your maze data structure, the next step is to draw it onto the screen using Pygame. This involves iterating through your 2D array and drawing the appropriate graphical element for each tile type. Pygame’s drawing functions, such as pygame.draw.rect() for walls and pellets, or pygame.image.load() and blit() for more complex sprites, will be your primary tools.
import pygame
pygame.init()
SCREEN_WIDTH = 7 * 20
SCREEN_HEIGHT = 5 * 20
SCREEN = pygame.display.set_mode((SCREEN_WIDTH, SCREEN_HEIGHT))
WALL_COLOR = (0, 0, 255)
PELLET_COLOR = (255, 255, 255)
TILE_SIZE = 20

def draw_maze(screen, maze_layout):
    for row_index, row in enumerate(maze_layout):
        for col_index, tile_type in enumerate(row):
            x = col_index * TILE_SIZE
            y = row_index * TILE_SIZE
            if tile_type == 1:
                pygame.draw.rect(screen, WALL_COLOR, (x, y, TILE_SIZE, TILE_SIZE))
            elif tile_type == 2:
                pygame.draw.circle(screen, PELLET_COLOR, (x + TILE_SIZE // 2, y + TILE_SIZE // 2), TILE_SIZE // 4)
For a more visually appealing maze, you might consider using image sprites for walls, corners, and intersections instead of simple rectangles. However, for a functional game, basic drawing shapes are a great starting point. Designing and rendering the maze is a foundational step in building your Pac-Man game. A well-structured maze not only looks good but also facilitates the implementation of game logic for movement, collisions, and AI.
6. Adding Sound and Visuals: Enhancing the Player Experience
While core mechanics and a functional maze are essential, it’s the sound and visual elements that truly bring a game to life and immerse the player. In this section, we’ll explore how to incorporate sounds for actions like eating pellets and power-ups, and how to enhance the visual appeal of your Pac-Man game beyond basic shapes.
Incorporating Sound Effects
Sound is a critical component of the Pac-Man experience. The iconic ‘waka-waka’ sound as Pac-Man eats pellets, the distinct ghost sounds, and the power-up jingle all contribute to the game’s charm and provide immediate feedback to the player. Pygame makes it relatively easy to load and play sound files.
import pygame
pygame.mixer.init()
pellet_sound = pygame.mixer.Sound('sounds/pellet.wav')
powerup_sound = pygame.mixer.Sound('sounds/powerup.wav')
game_over_sound = pygame.mixer.Sound('sounds/game_over.wav')
You would then trigger these sounds at appropriate moments in your game logic. For instance, pellet_sound.play() would be called every time Pac-Man eats a pellet, and powerup_sound.play() when he consumes a power pellet.
Enhancing Visuals with Sprites and Animations
Moving beyond simple colored rectangles, using sprites and animations can dramatically improve the visual quality of your game. Sprites are 2D images or animations that represent characters, objects, or elements in your game. For Pac-Man, this means having distinct images for Pac-Man himself (perhaps with different mouth positions for animation), the ghosts, pellets, and power pellets.
Loading and Displaying Sprites
First, you’ll need image files (e.g., .png) for your sprites. Pygame’s pygame.image.load() function is used to load images, and blit() is used to draw them onto the screen.
pacman_image = pygame.image.load('images/pacman_open.png').convert_alpha()
# screen.blit(pacman_image, (pacman.x, pacman.y))
Animations
class AnimatedSprite:
    def __init__(self, images, x, y):
        self.images = images
        self.index = 0
        self.image = self.images[self.index]
        self.rect = self.image.get_rect(topleft=(x, y))
        self.animation_speed = 0.1
        self.last_update = pygame.time.get_ticks()

    def update(self):
        now = pygame.time.get_ticks()
        if now - self.last_update > self.animation_speed * 1000:
            self.last_update = now
            self.index = (self.index + 1) % len(self.images)
            self.image = self.images[self.index]

    def draw(self, screen):
        screen.blit(self.image, self.rect)
7. Advanced Concepts: Power-ups, Levels, and Scoring
With the core mechanics, AI, maze rendering, and basic sound/visuals in place, your Pac-Man game is already taking shape. To elevate it from a simple clone to a more robust and engaging experience, we can introduce advanced concepts like power-ups, multiple levels, and a comprehensive scoring system. These elements add depth, challenge, and replayability.
Power-ups: The Game Changers
The power pellet is the most iconic power-up in Pac-Man, temporarily turning the tables on the ghosts. When Pac-Man consumes a power pellet, the ghosts become vulnerable, change color, and reverse direction. This introduces a crucial strategic element, allowing the player to hunt the hunters.
- State Management: Introduce a frightened state for ghosts with a timer.
- Ghost Vulnerability: When frightened, collisions with Pac-Man reset the ghost.
- Visual and Audio Cues: Change ghost sprites and sounds during power-up mode.
Beyond the power pellet, you could introduce other power-ups like speed boosts, shields, and bonus fruits.
Multiple Levels and Progression
- New Maze Layouts: Different maze configurations for variety.
- Increased Difficulty: Faster enemies and shorter power-up durations.
- Bonus Elements: New bonus items or environmental hazards per level.
Comprehensive Scoring System
- Pellets: 10 points each.
- Power Pellets: 50 points each.
- Ghosts: Increasing points per ghost eaten (200, 400, 800, 1600).
- Bonus Fruit: Extra points for timed items.
Add a high score table and a lives system for a complete arcade experience.
8. Conclusion: Your Journey into Game Development
Congratulations! You’ve embarked on an incredible journey, transforming a classic arcade concept into a functional and engaging game using the power of Python and Pygame. From setting up your development environment and mastering core mechanics to bringing intelligent ghosts to life and enhancing the player experience with sound and visuals, you’ve covered a vast landscape of game development principles.
Building a game like Pac-Man from scratch is more than just a coding exercise; it’s a deep dive into problem-solving, logical thinking, and creative expression. You’ve grappled with collision detection, implemented pathfinding algorithms, managed game states, and designed user interfaces—all fundamental skills that are highly transferable across various programming domains.
This guide has provided you with a solid foundation, but the world of game development is vast and full of possibilities. Consider this Pac-Man project as a springboard for your future endeavors. Here are some ideas to continue your learning and expand your game:
- Refine Ghost AI: Implement more advanced or adaptive behavior.
- Level Editor: Build your own maze creator.
- Multiplayer Mode: Add competitive or cooperative play.
- Power-up Variety: Invent creative new mechanics.
- Visual Enhancements: Experiment with particle effects or 3D.
The skills you’ve gained through this project are invaluable. You’ve learned to break down complex problems, debug code, and iterate on your designs. Keep experimenting, keep building, and most importantly, keep having fun. The next iconic game could be waiting in your imagination, ready to be brought to life with Python. Happy coding, and may your Pac-Man always munch to victory!