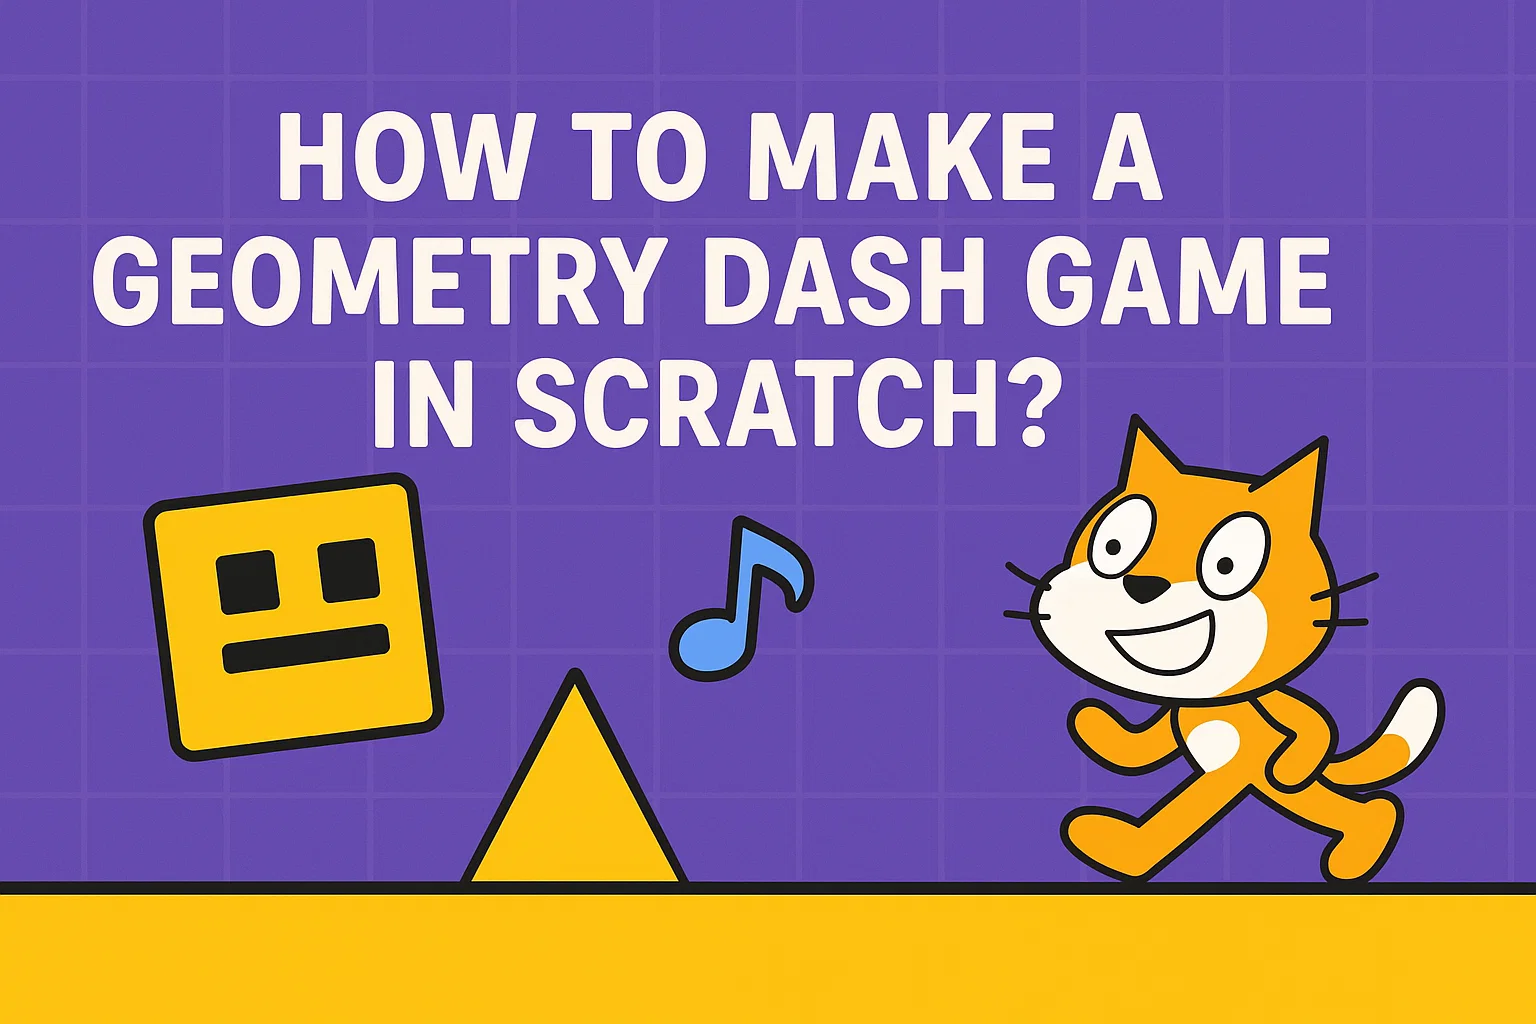
Create your own Geometry Dash in Scratch with this step-by-step guide. Book a free class and learn Scratch programming online today.
Table of Contents
Introduction What Is Geometry Dash Scratch Game? How Do You Create a Geometry Dash Scratch Game? ConclusionIntroduction
Geometry Dash in Scratch is a fun and exciting game project for beginners who want to learn coding by building something interactive and enjoyable. If you enjoy fast-paced obstacle games and want to create one on your own, Geometry Dash in Scratch is a great place to start.
In this game, a character or square-shaped object moves along a path while avoiding obstacles like spikes. The challenge is to jump at the right time and survive for as long as possible. If the character touches an obstacle, the game ends.
The best part is that building Geometry Dash in Scratch is easier than it may seem. With the right steps, you can create your own version of this game while learning important Scratch programming concepts. In this guide, we will show you how to make Geometry Dash in Scratch step by step.
What Is Geometry Dash in Scratch?
Geometry Dash in Scratch is inspired by the popular obstacle-based arcade game where players control a character and guide it through a path filled with hazards. In this Scratch version, the player controls a square or another geometric sprite and must jump over obstacles such as spikes to survive.
The goal of Geometry Dash in Scratch is simple: avoid crashing into obstacles and keep progressing through the level. If the player touches any spike or hazard, it is game over, and the level must be restarted.
One reason Geometry Dash in Scratch is such a popular beginner project is that it combines fun gameplay with essential coding concepts like movement, collision detection, variables, and cloning. It can be played using a keyboard and can be customized in many creative ways.
Why Build Geometry Dash in Scratch?
Creating Geometry Dash in Scratch is a great way to learn coding through game development. Instead of only reading about coding concepts, students can apply them in a fun and practical project.
When you learn how to make Geometry Dash in Scratch, you get hands-on practice with game logic, sprite creation, motion blocks, variables, loops, conditions, and collision detection. This makes the project both educational and entertaining.
Step-by-Step Process to Build Geometry Dash in Scratch
Making Geometry Dash in Scratch is not as difficult as it may look. With a little patience and creativity, you can quickly build the first level and then improve it with more designs and challenges. Here is the step-by-step process to create Geometry Dash in Scratch.
1. Start with the Backdrop
The first step in building Geometry Dash in Scratch is creating the backdrop. When you begin in Scratch, the backdrop is usually blank by default. Designing a custom background will make your game look more engaging and visually appealing.
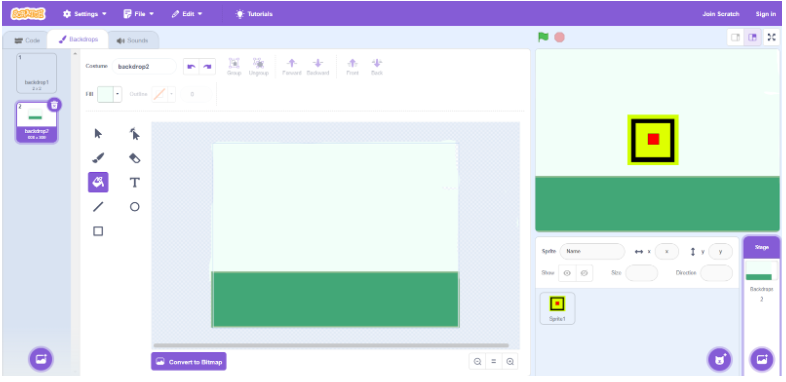
To create the backdrop, click on the round mountain icon on the right side of the Scratch editor. From there, you can either select an existing backdrop or design your own.

2. Create the Sprite
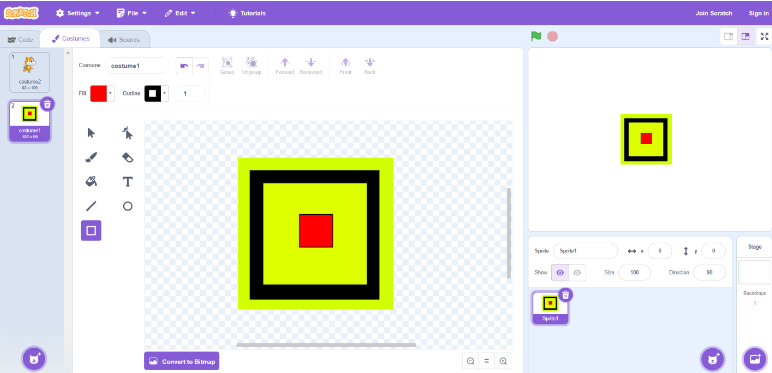
The next step in making Geometry Dash in Scratch is creating the player sprite. While Scratch offers default sprites, the game becomes more fun and unique when you design your own character.
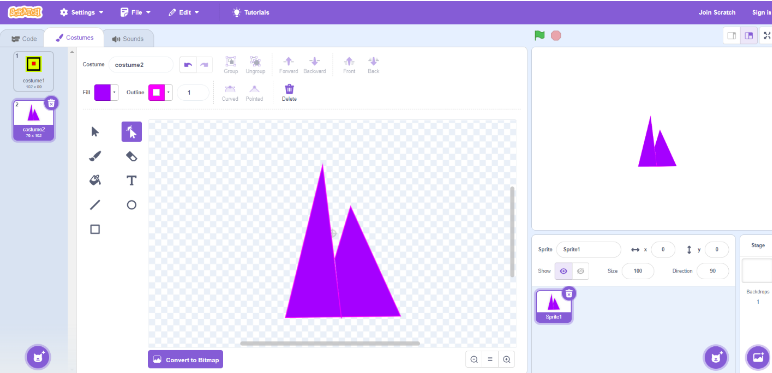
Click on the round blue cat icon and choose the paintbrush option to create your sprite. You can design a square-shaped character or another geometric object to match the style of Geometry Dash in Scratch.
After that, create a few more costumes for the spikes or other obstacles you want in your game. If you want to keep the project simple, three to four obstacle costumes are enough.
3. Add a Score Variable
To track progress in Geometry Dash in Scratch, create a variable from the Variables blocks and name it Score. This variable will store the player’s score as they continue moving through the game.
Using a score variable makes Geometry Dash in Scratch more interactive and gives players a goal to aim for while playing.
4. Make Your Player Jump
Now it is time to start coding. This is one of the most important parts of learning how to make Geometry Dash in Scratch.
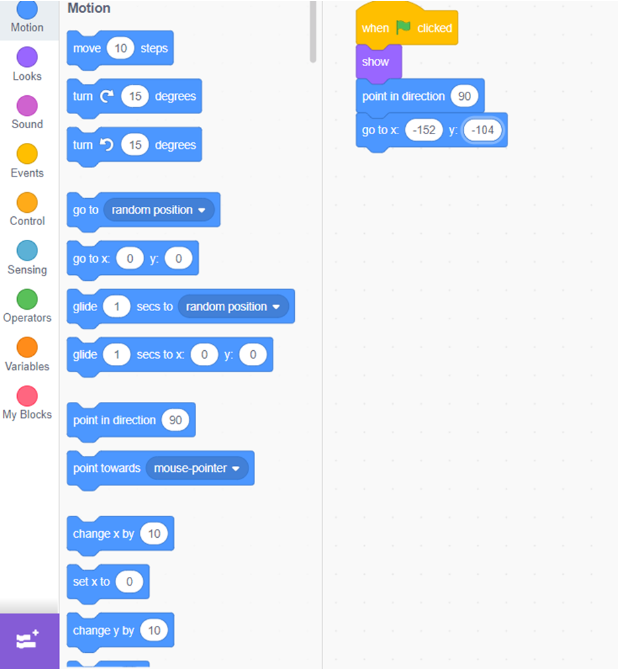
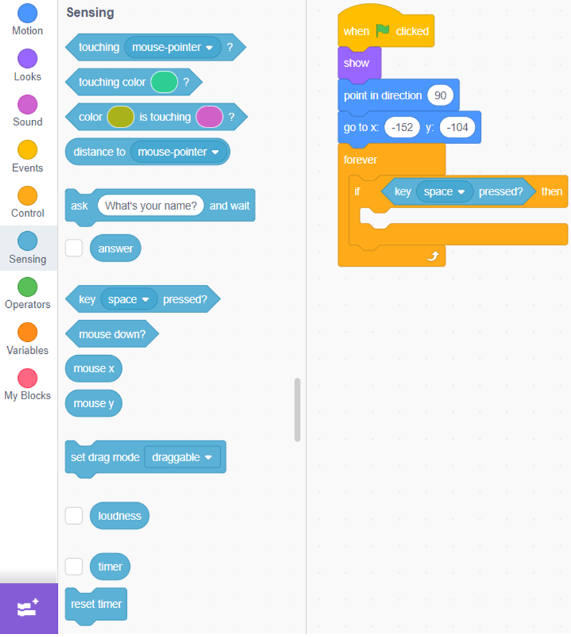
From the Events blocks, place the When flag clicked block at the top. Then, from the Looks blocks, add the Show block. Under that, from the Motion blocks, add the point in direction 90 block and the go to x: -152 y: -104 block.
Next, add a Forever block so the game keeps checking for player input. Inside it, add an If block. Then place the key space pressed block inside the If condition.
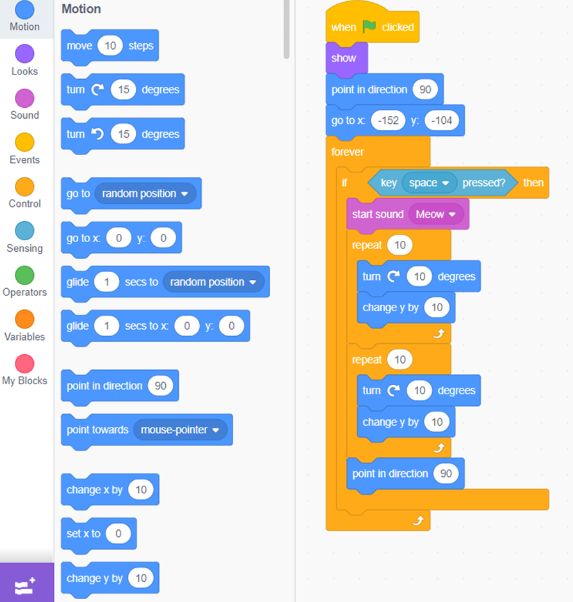
Now add two Repeat 10 blocks, one after the other, inside the If block. In the first Repeat block, add change y by 10 and turn clockwise 10 degrees. In the second Repeat block, add change y by -10 and turn clockwise 10 degrees again.
Finally, insert a point in direction 90 block right after the Repeat blocks. This creates the jumping effect in Geometry Dash in Scratch.
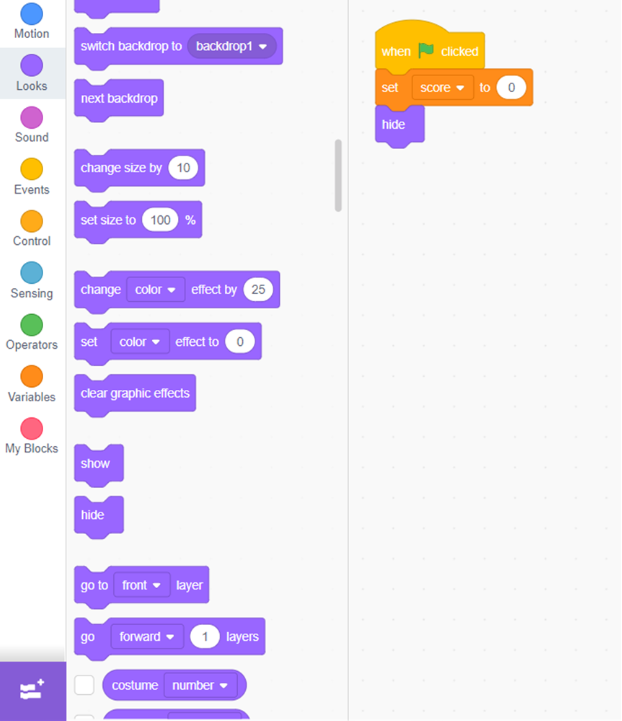
5. Reset the Score
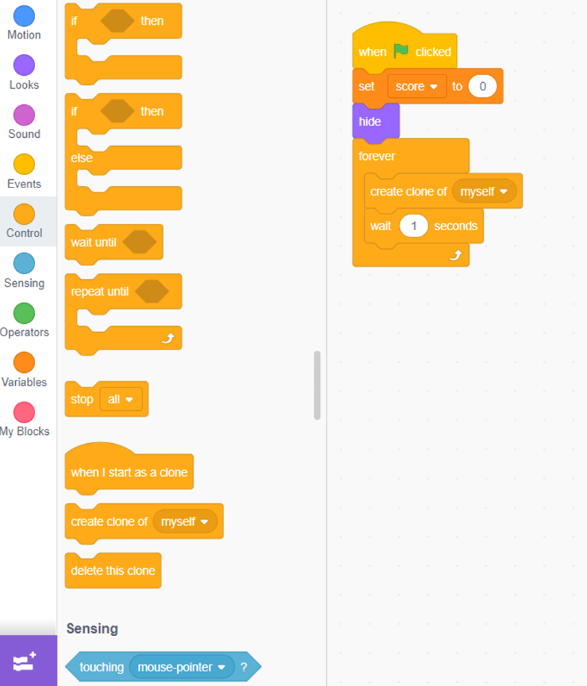
Go to the spike sprite and choose the When flag clicked block. Under it, add the set Score to 0 block, followed by a hide block.
Next, add a Forever block. Inside it, place a wait 1 second block and a create clone of myself block. This will make the spikes appear continuously during the game.
6. Score Points
To score points, choose the When flag clicked block and then add Repeat until and Forever blocks underneath.
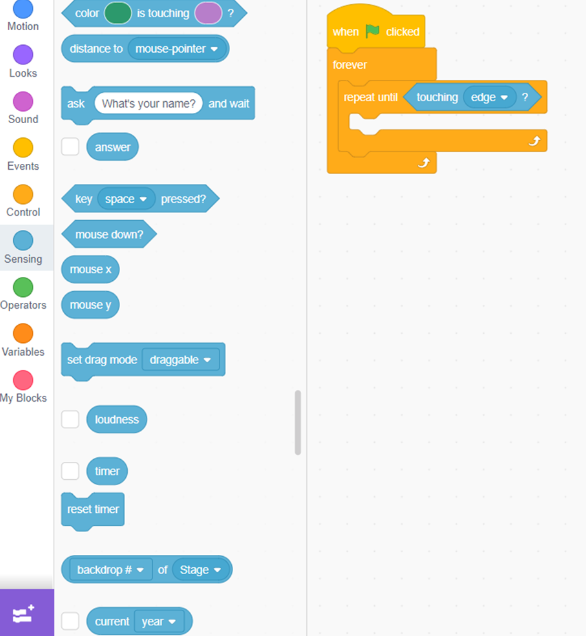
Make sure to place a touching player block in the Repeat Until condition. Next, add a change Score by 1 block inside the Repeat Until block. This scoring system makes the game more rewarding and is another useful step in understanding how to make Geometry Dash in Scratch.

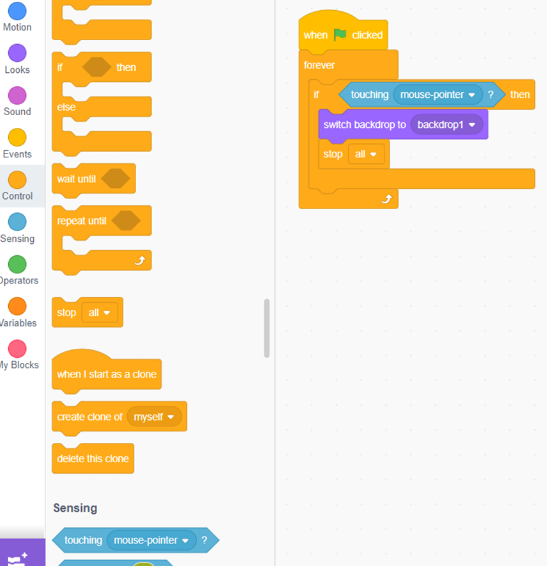
7. End the Game When the Player Touches the Spikes
Select the player sprite and choose the When flag clicked block. Then add a Forever block and an If block. Inside the If condition, place the touching spikes block.
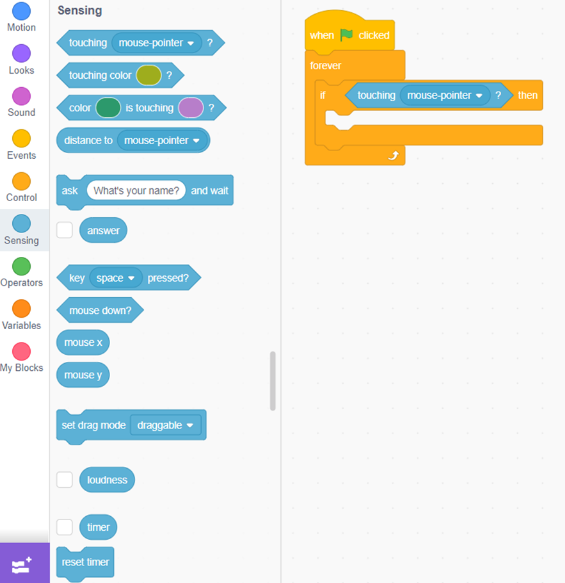
Next, insert a switch backdrop to game over block and then a stop all block. This ensures that the game ends as soon as the player hits a spike. This game-over feature is essential in Geometry Dash in Scratch because it creates the challenge that makes the game exciting.
Tips to Improve Geometry Dash in Scratch
Once you understand how to make Geometry Dash in Scratch, you can start improving your game with extra features. Here are a few ideas:
Add sound effects for jumping and crashing.
Create multiple levels with different obstacle patterns.
Increase obstacle speed over time.
Add a start screen and a game-over screen.
Design a more creative player sprite.
Use different backdrops for each level.
These updates can make Geometry Dash in Scratch more fun, polished, and visually appealing.
What Will You Learn from Geometry Dash in Scratch?
By building Geometry Dash in Scratch, beginners learn much more than just how to make one game. This project helps them understand how coding logic works in a practical and engaging way.
Students who explore how to make Geometry Dash in Scratch improve their understanding of sequencing, repetition, conditions, sprite interaction, game design logic, and problem-solving. That is why Geometry Dash in Scratch is such a strong beginner-friendly coding project.
Conclusion
Building Geometry Dash in Scratch is a great way to learn game design and coding at the same time. It helps beginners understand important Scratch concepts such as sprite creation, movement, scoring, cloning, and collision detection in a fun and practical way.
Once you complete your first Geometry Dash in Scratch project, you can make it even more exciting by adding new levels, advanced obstacles, sound effects, and custom themes inspired by games like Geometry Dash Subzero.
After reading this guide, you should be ready to create your own Geometry Dash in Scratch game and start experimenting with your ideas. To begin building interactive games with expert guidance, book a free Scratch programming class today.